
As some of you are aware, I’ve been trying to create a fairy garden and over the past few months have made quite a few of the little items myself. I did go to various flea markets as well as garage sales and picked up some stuff here and there. Garden kitch is expensive so getting it through a garage sale or flea market is a great way to go. Pinterest has been a great resource for ideas and tutorials and I’ve created quite a few things using bits from our wooded area. We are trying to keep the wooded section as wild and natural as possible so that bees, butterflies and other beneficial insects have a place to live. With that in mind I used a couple of teapots for my fairy houses, knowing that mason bees will eventually populate the insides. I managed to make the lids stay open just enough to let them come and go easily and of course the spout is another entrance too.

Last year my hubby purchased a cheap paddling pool that he thought the dog would enjoy even though I told him she wouldn’t use it. I was right and she refused to even look at it which was quite funny. Anyway it sat behind the garden shed until I had the bright idea of using it as the container for my garden. As this is still a work in progress one can clearly see the pool, but when I add more plants and some moss around the outside it will look natural and the blue should disappear. We made a couple of slits in the bottom to ensure drainage during the winter and then added a layer of gravel, some sand and then the soil. Obviously we placed it in the desired location before adding the layers because it would be impossible to move otherwise. I found a couple of small fairy doors in a local store, but I also figured out how to make my own as well. Hubby cut me some wood cookies which I used as a base for some items and for steps to the houses. At the back you can see a thatched roof and this is actually sitting on a shaped rock to which I added a door and a window. The little fairy sitting underneath is somewhat protected by the roof as she isn’t really an outdoor item and I’m hoping she will stay intact at least for a while.

In front of the stone house is a table – made from a jar lid and a wine cork base with twig chairs around it. I also made some button and wire tiny bicycles that you can just about see. For the twig chairs I followed a Pinterest tutorial and did the same thing when I made the wishing well and the waterfall piece.

The wishing well was done with various pebbles, a hot glue gun and mortar. Our tiler was doing the bathroom and he kindly did the grouting mortar for me as he had it mixed for the bathroom. I added the roof using twigs, a torn apart pinecone and a bit of moss. With some wire I fashioned a handle and a long piece that would hold the shell bucket. I have quite a few shells from Australia and the one I chose already had a small hole in the right place to hold the wire so it was easy to attach. The toadstools are store bought. Well actually the one in the foreground is from a local market and made by people who like playing with stone. You can see a gazing ball in the back which is basically just an old ball (2nd try) that I covered in gems and then added a resin layer so that it will hold up to the elements hopefully. The sign is made by me using a die from Elizabeth craft, hand printed and then covered in plastic from packaging.
This past weekend we did a day trip up island to visit a specific market and go to a recommended restaurant. The second hand store there had some small fairies/angels that were under $5 each so I bought them to add to my garden.
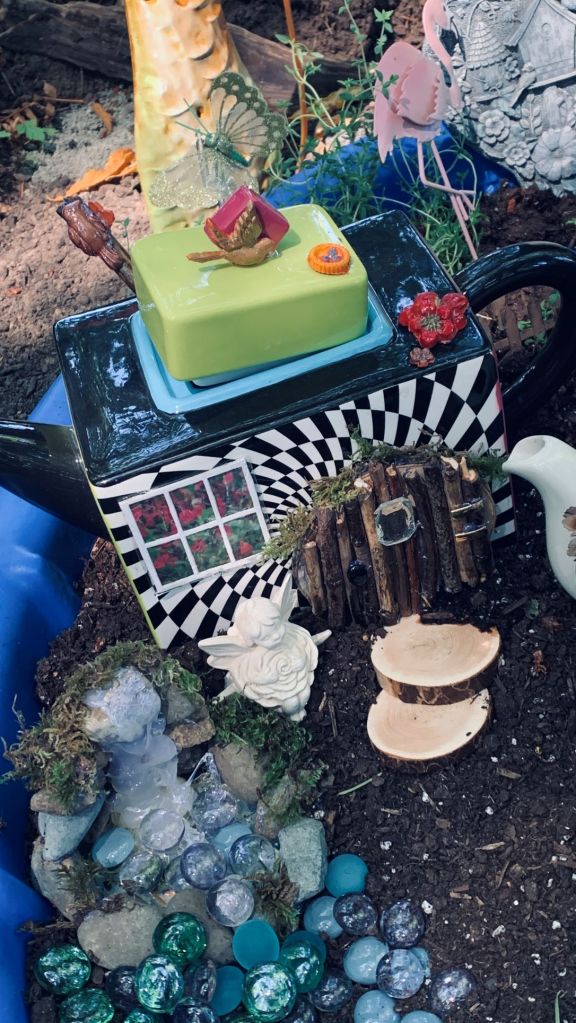
When I found this particular teapot at a garage sale I immediately thought it would make a great fairy house as it is so brightly coloured. I made the window and sealed it in plastic. The door was done by using a wood cookie and gluing twigs on top. I used some old button centers for the hinges and door handle and a square clear gem for the window in the door. Added a bit of moss and it was glued to the pot. the wood cookie steps make it easy for a fairy or gnome to get inside. I used some silicone molds and some clay to make the flowers on the roof as well as the bird nest and bird. At the beginning of the water feature, made from flat glass marbles, I added a kind of pool using an old CD as the base and adding pebbles around it. I then used hot glue to create the look of water and the waterfall. After adding some moss here and there it looked quite realistic although as with everything, I have since figured out a better way to make it. The local dollar stores have come in handy for a few inexpensive bits and pieces so there is a metal flamingo, and between the rock house and teapot is a metal fence with crows on it and a free standing larger toadstool behind the garden as well as a resin decor piece that I’ve had for ages and hadn’t decided where to hang it at this house. Now it is part of the fairy garden that dilemma is solved.

This particular teapot was a freebie found at the side of the road and I also picked up some large pots the same way. Photo is below as it is another much smaller fairy section. The little door is store bought as were the tiny toadstools and I glued them to the wood cookie and then to the teapot. The window is similar to the one on the other pot, but I added more pinecone bits at the top for dimension and to look like the eave of the window.
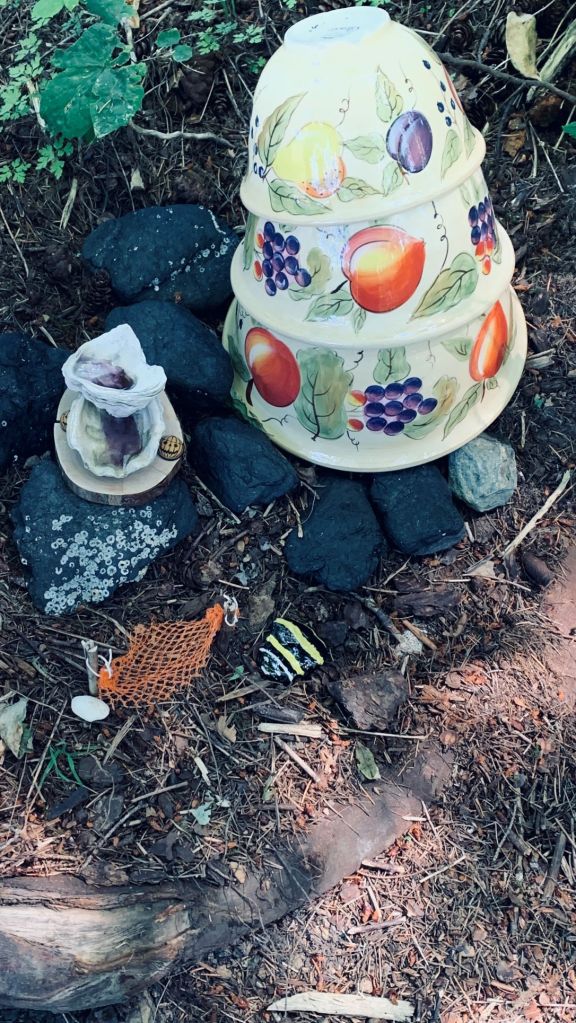
Having a few items around and a large area to fill I created a few other small places for garden kitch and fairy items. The pots in this photo were freebies and I turned them upside down and stacked them crookedly for adding to this section. I have another item to go on top but it isn’t quite ready yet. The rocks are from a local beach as are the shells and I added the shells onto a wood cookie and then some resin to look like a small tiered pond. I made the hammock and since the photo have found a tiny drunken gnome lying on his side so he has been added to the hammock. The painted rock is my first try and I found a natural black stone so I added the stripes and face to make a bee. Have more rocks to play with when I have time.

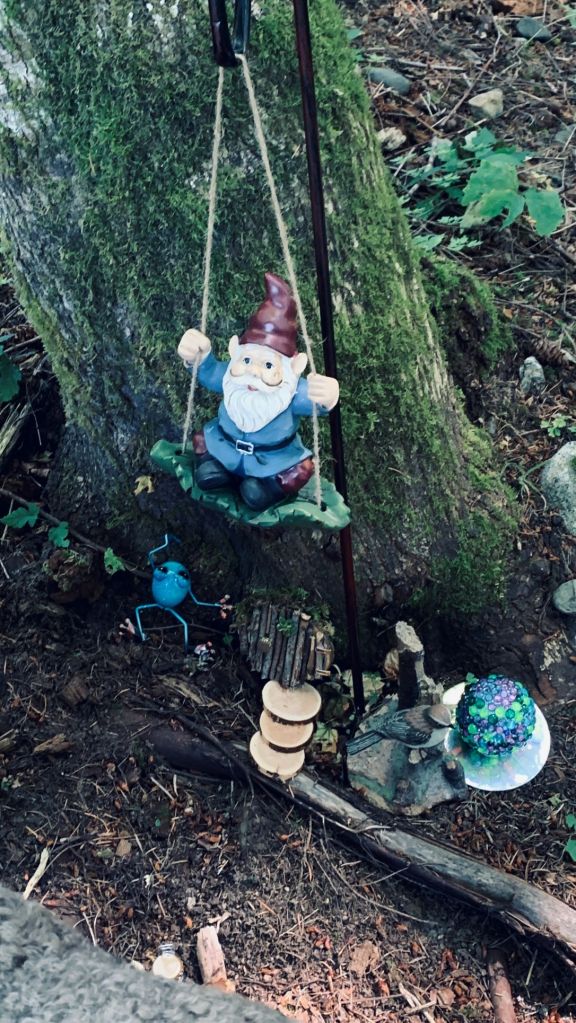
The rooster sits beside the pots and on the other side is a gnome on a swing, a fairy door with steps, another gazing ball, a dollar store frog and an old bookend with a bird. I had two but one broke so it was tossed and using the existing one in the garden made sense to me. Our dog found an old baseball in amongst the trees and brought it to us to play with. Baseballs aren’t a good option for a dog so we confiscated it and gave her the usual safer balls to play with. I was going to throw the baseball away and then had the bright idea of covering it with gems. I attached this one to an old CD but the other one (2nd one I made) was a dollar store ball on a stick.
Although they don’t show in the above photo, I also made a bark table and 2 bottle cap chairs from ideas found on Pinterest.

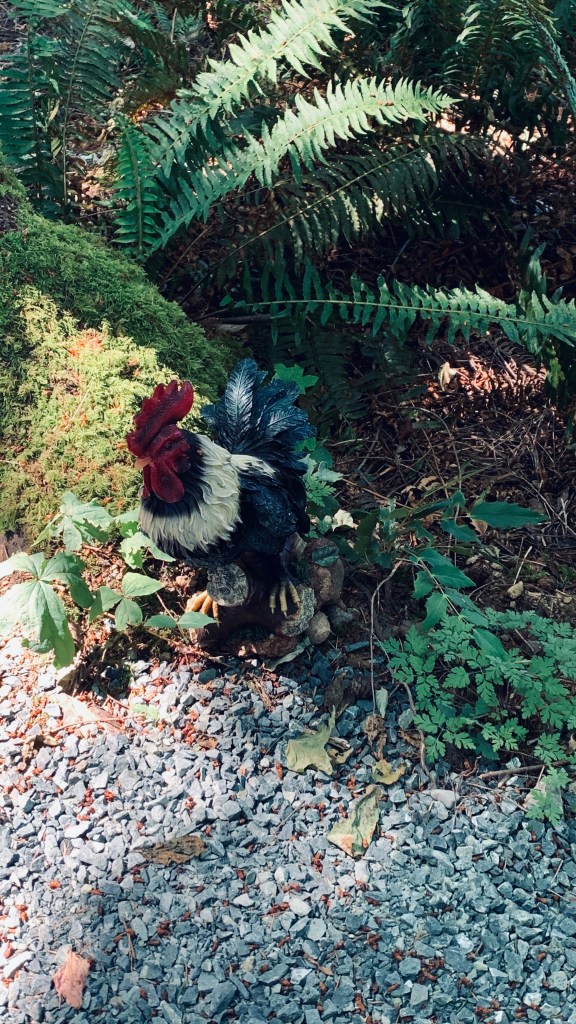
In another space I added this very old 2nd hand gnome along with the frog and in other places there are more roosters all bought at flea markets or garage sales.

The plaster gnome came from Michaels and he was a bit damaged so I repaired him as I was painting. I covered him with resin so hopefully he won’t fall apart when it rains.
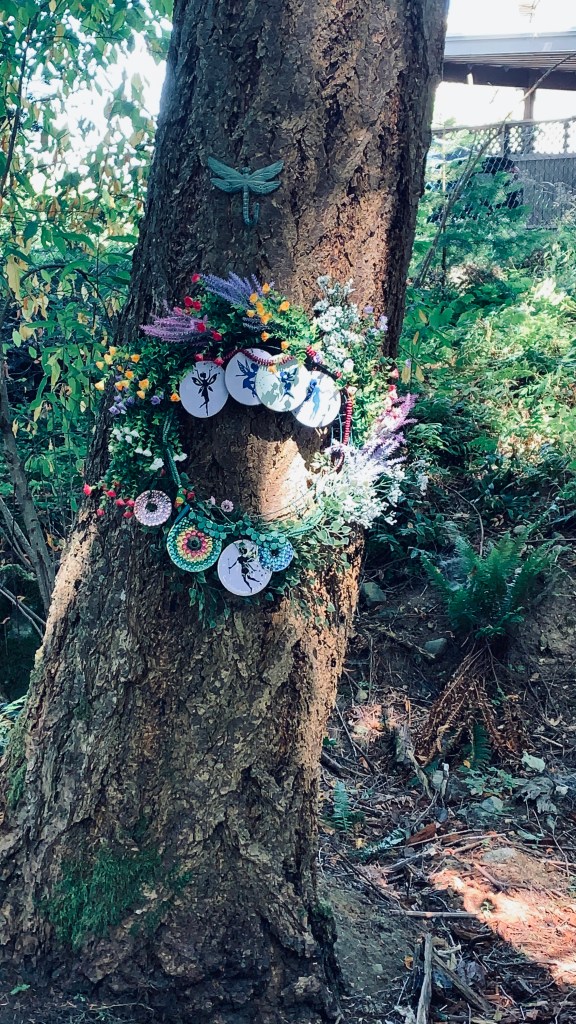
Finally finished the wreath and got it hung on a tree close to the larger fairy garden. Mainly plastic flowers so hopefully not a problem if it rains. May bring it inside during the winter months. The dragonfly hanger was found in an antique store. The fairy hangings are old repurposed CS’s. I used a freebie set of fairy graphics and printed them onto paper. I then glued them to the CD fronts. To help keep them from damage I painted resin over the top of each one. Hubby added holes so I could hang them as you see in the image. Added a few gem covered CD’s as well so it sparkles when the light catches it. I’ve found a tutorial on using CD’s for other decor items so may get to those one of these days.
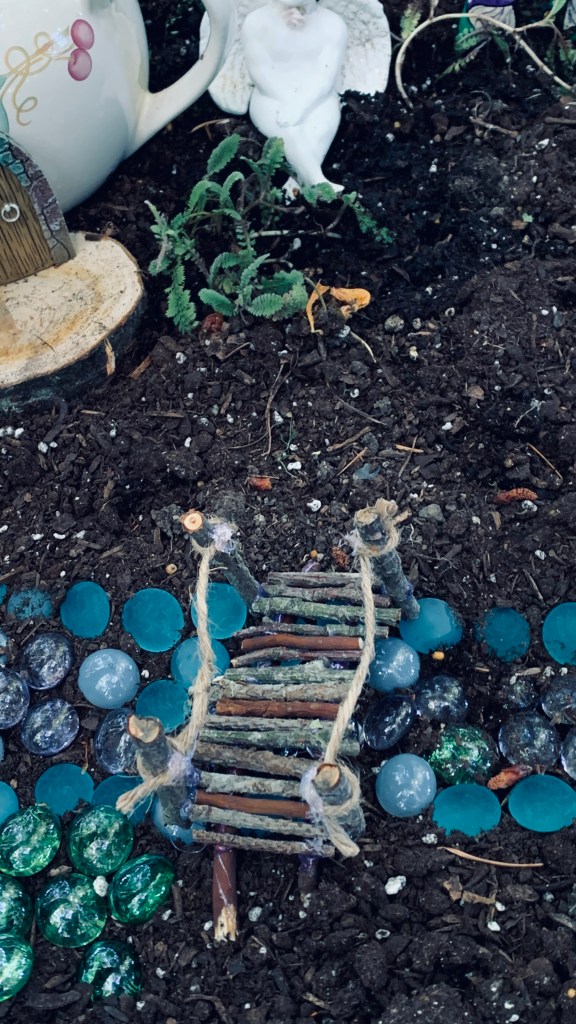
This little bridge was made using twigs cut to size and some string for the ropes. It crosses the narrow part of the water feature. I’m still looking for plants that will work, but as the wooded area is quite shady I have to be careful what I put in. There are lots of places online that now specialize in miniature plants that I’ve seen but I haven’t done a lot of research as yet.
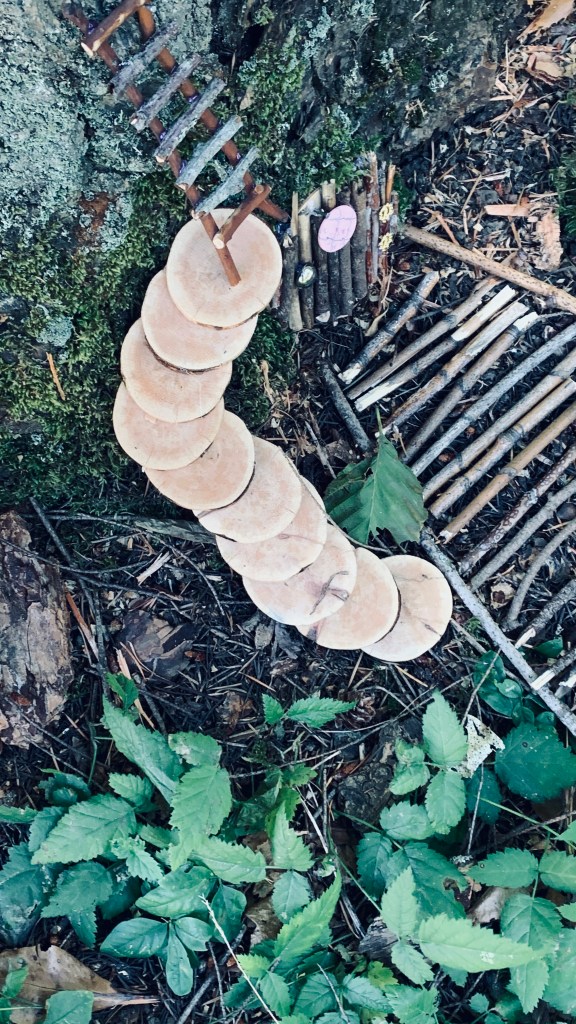
As we come down our driveway there are a couple of stumps which we’ve left and I added a small fairy garden here as well. The stairs show the fairies how to get to the top of the stump. The little door is made the same way as described earlier and I nailed it to the stump so hopefully it will stay.
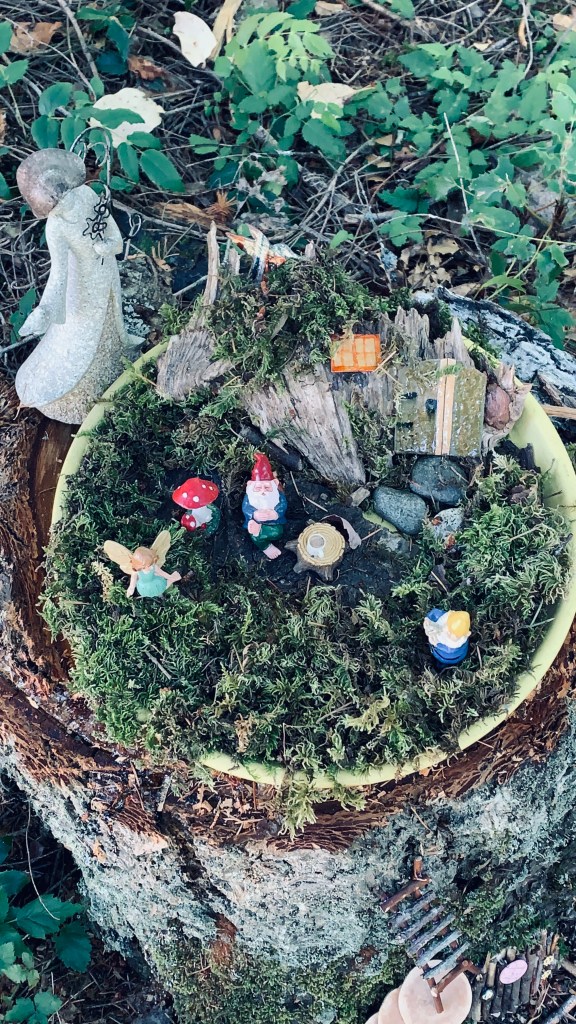
This piece was the first attempt at doing a garden but then I realized that small doesn’t work well in the large spaces we have, so the pool garden came about because of this. The tray is actually a pot tray that wasn’t in use so I added a lot of moss to the tray and then set the decor into the moss. The house is made from a piece of wood and bark to which I added a cork door and a window. the fairy and gnomes are all store bought and the stone angel at the back is a garage sale piece. I love the little gnome sitting with his beer on the table. Wherever I could I have used resin on top of items to hopefully weather proof them a little. The larger garden may get a cover in the winter months as storms will bring down a lot of debris I’m sure.
I’m still working on other items to add here and there so I may continue to add more to this post as time goes on. I’ve found quite a few rocks and shall probably paint them eventually and I’m drying a series of wood cookies so I can make some hanging decor from them. The challenge is finding time to do all this and still create cards as well. When we go for a walk I take along a pail or a bag so I can bring back anything that interests me. We’ll see where I go from here. Its a lot of fun seeing what I come up with however hokey it is. That said I’m pretty pleased with some of the items I’ve made and hope the fairies think the same.
This whole project is still a work in progress and once I have something completed I will take more photos and upload them. Thanks for spending time with me today.
