Back Fold summer card

showing the card open

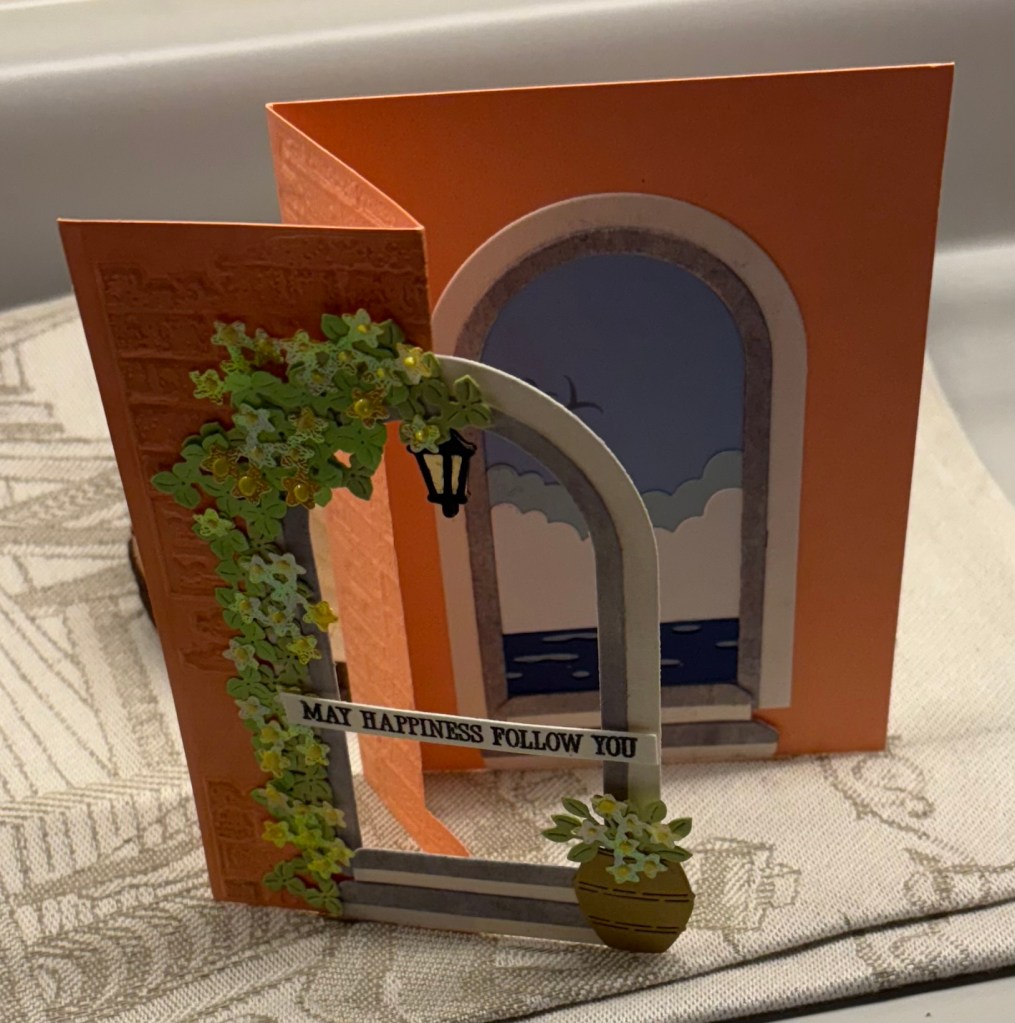
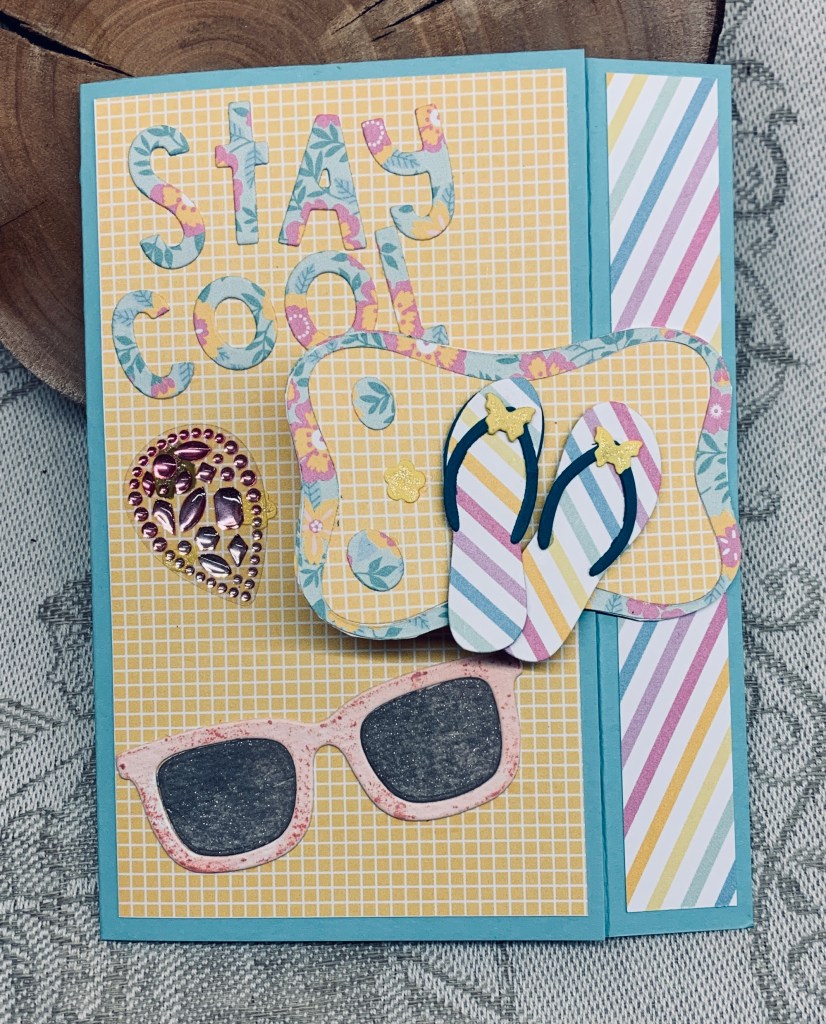
Pamela has chosen a Welcome to Summer theme for our latest challenge (#253) here at Cardz4galz and I decided on a back folded card for my example. My card was inspired by an earlier one done by a stamp buddy in late March and she provided a link tutorial found here to create it. Probably one of the easiest fun folds for anyone to make.

My paper is from a Simple Stories pad, the sentiment and shades are from MFT, the wavy frame die is from Penny Black, with the flip flops coming from an unbranded die set. The jeweled embellishment is from my stash.

I used a Spectrum Moir sparkle pen for the shade lenses and a mop up ink piece for the frame along with a touch of gold glitter on the flip flop butterflies.

Thanks for stopping by, your time is appreciated and I hope you have fun with your own creations and enter them into our gallery.

hello sunshine

We’ve had a hectic few days with some friends coming over from the mainland. They are house hunting so we may find they become neighbors once again. Anyway I am now exhausted and probably shouldn’t have begun crafting but I did and this is what I came up with. I’ve made it with Double D in mind as their current challenge is Let’s Go to the Beach.

My card uses one of the sets received through the recent virtual retreat I did by Spellbinders, called under the sun. The sentiment is from the same company. The waves are from Kokorosa and the foot prints are an old Hero Arts wooden block stamp someone recently gave to me. She had a box of old stamps and I pulled out a few I thought I might use, but most of them went to the thrift shop. I’m too lazy to pull out a stamp positioner for this type of stamp, but getting a good impression in the right place is challenging with the block. For me, clear stamps made so much difference to what I could do and imagine.

My fatigue made me forget to plan my scene properly so the sand and sky portion were added after the fact using watercolour pencils. It isn’t one of my best scenes, although the concept is not bad. The end result is okay, but definitely could be improved upon if I had been thinking straight.

Thanks for stopping by to look, I appreciate you and your time.

musical note Christmas

The Christmas challenge at Peace on Earth Challenge #90 had some lovely colours in the inspiration photos with the bottom right corner one appealing to me the most. I’ve used a few here but slightly muted.

The other day I was playing with a napkin image of musical notes and I attached a larger portion of it to some card stock for a future background. With the piece leftover I was about to set it aside when I wondered what it would look like behind an opening? On my desk was a scrap piece of CS that I had already die cut some banners from and I placed this over the top. It looked good so I cut two more banner openings from the opposite direction then attached it to the napkin piece. After trimming the edges I decided to ink around them and slightly on top to age the CS a little. I remembered that I had this MFT set of bird and die stamps so on another scrap piece I stamped two birds and some foliage. Coloured it all with pencils and water, die cut them and attached as you see here. I used the Just a Note sentiment, from the set, at the top, but as I’d decided I wanted it to be a Christmas card the wishing you and Merry sentiments came from a Divinity Designs set. I had the embossed piece leftover from a project and I added the bird piece to this. Taking some copper thread I added a few turns and tied into a bow before adding the small gem to the middle. Then I added the layers to the main card front. Not a good day for tying bows as it took me more than 10 minutes to do with a bit of swearing thrown in.

Its a Dragon Boat paddling evening, so I have to leave in a few minutes, but thanks for stopping by and for any comments you may leave.

deepest sympathy

Another request for a sympathy card and as I’ve used some PP, I decided it would work in the challenge at Love Those Pretty Papers June Challenge. Although the theme is weddings it is mainly an anything goes challenge and I don’t need any wedding cards at the moment.

My card uses an older set from GKD, PP from my stash, and enamel dots from AlteNew. Die cuts are using infinity dies from Hero Arts.

Once I had the daisies stamped I heat set them clear and then used water colour pencils to add some colour. The sentiment was also heat embossed clear and then die cut using a StampinUP banner die. I used foam tape on the focal circle and on the sentiment banner.

A simple and fairly quick card, and all I had time for today.

Our new upright freezer was delivered earlier and it took me ages to clean up the garage in the area we needed it to go. The dog was also professionally groomed by the mobile groomer so it was a busy morning. I have to say I’m pretty tired now and my hands are getting sore, so it is time to stop.

Thanks for stopping, I appreciate it.

lemons galore

Another card from the La Dolce Vita collection, this one using another piece of patterned vellum along with the Citrus Spritz die set and the small banners. The Alphabet challenge is E is for Embossing Wet or Dry so I am entering it there.

After cutting all the bits and pieces I used a Q-tip to add ink to flower centers and a brush to add some ink to the lemons. I had the dry embossed white piece leftover from another project by Darice I believe. I decided to use it for behind the lemons. I fooled around with placement before attaching everything using a combination of foam tape and glue. I keep meaning to try foiling but as yet haven’t so instead I used scrap piece of gold CS to create the banner sentiment. To attach the vellum background I ran it through a Xyron machine as I’ve found the adhesive doesn’t show through this way. The blue card front makes the blue in the pattern more intense, although the photo doesn’t do it justice. Its much prettier in reality.

All in all I’m pleased with the end result. Thanks for stopping by, I appreciate you, your time and any comments you may leave for me.

vellum tile triptych

As You See It – Challenge #350 – Triptych. Another card using some product from my Weekender kit, this one using printed vellum. It couldn’t be more perfect for this particular challenge. After I cut a piece off the larger pattern piece I attached it to some white CS and then attached to the card base. I stamped the sentiment and using the matching die cut it in the shape. Before cutting I had heat embossed while the ink was wet. The gold thread is from my stash and I attached as you see with an additional smaller bow on top. Using some of the tiny clear gems, again from the kit, I added them to the centers of each tile, but they are so small the camera didn’t pick them up. They twinkle in my craft room light. The 3 blue ones were added and I called the card complete.

Probably the easiest card I’ve made in a while and I quite like the look. Thanks for spending time with me today, I appreciate you and your comments a lot.

Summer vista

This has been created using the Spellbinders Weekend Retreat kit. I did follow along with a tutorial by Jen McGuire so it is similar although not the same. Sometimes I find following along is helpful in learning the dies. This particular set has a lot of elements in it and I’ve seen some stunning creations from others using it. Everything used here is from the kit except for the EF which is from Sizzix – Tim Holtz, the sparkly paper and CS for the leaves which are scraps from my stash.

The card open and standing.

Seize the Birthday #307-Fancy Fold is all about folds and although this style of fold is fairly simple adding all the elements is anything but. Die cutting so many pieces is time consuming. I’m quite pleased with the end result but I have to say it took me most of yesterday afternoon to complete. I added a little sparkle to the water by using a Sakura pen and I heat embossed the sentiment. The new Card Stock from Spellbinders is lovely so I shall look at getting more of it at some point. Its a great weight, totally smooth and the colours are gorgeous.

Thanks for stopping by, I appreciate your time and any comments you may leave for me.

butterfly easel card

Challenge #252, as chosen by Debbie, here at cardz4galz, is for you to make an easel card. In my case I decided to use my latest StampinUP bundle die set and created a butterfly easel. It isn’t a large card but it certainly has impact and it was fun to make. It isn’t too bulky when flat, so can be mailed without additional costs.

I cut the card stock using the largest die which is designed to create a fold line, but if you don’t have the same die, you can still do the fold yourself by placing your die a little above where you want the fold to be. Once I had my basic card front I added a score line around the middle of one side and folded up the wings to give me the easel shape. Another large butterfly was added to this piece and then using more dies from the set I cut another butterfly in yellow and added the silver piece on top but only attachedat the body. Using some water colour pencils through the holes like you would a stencil I added colour. Once I added the body, I realized I had some parts of the folded easel showing so I carefully cut off anything I didn’t want. The sentiment is from Crafters Companion and the shaped edge is from another small die from the butterfly set which I popped up on foam so the rest stays upright. Using a Spectrum Noir shimmer pen, I edged the sentiment strip and the larger butterfly for some shimmer. And this completed my card nicely.

We look forward to seeing your creations in our gallery and hope you have fun creating.

Ruff

The Alphabet challenge is D is for Dogs this time around and I used a set from YNS to create my card. I like the cuteness of the images in this set. I also used an MFT circle die and a banner die from Scrapbook.com. Once I had the images stamped and heat embossed, I coloured them with watercolour pencils and Sakura pens. When die cut I added them to the small circles using some foam tape to lift them a little. I grounded them with some shading underneath. The circle panel was also lifted with foam tape and then the circles were added through the holes. Sentiment was stamped and heat embossed. Embellishments from my stash.

It is a very hot day today and as I got up pretty early, I did some weeding before it became unbearable. I shall probably do the same tomorrow if I can, but my hands aren’t happy, so it may not happen. At least I managed to get this card finished. Thanks for stopping by, I appreciate you and your time.

leaping fish

Anything Goes – Weeks #702-703 at Word Art Wednesday This is a fairly new challenge to me and I decided to enter it with this card. In a recent speed challenge I didn’t get a good cut with this Memory box die and it was easier to cut another one than to try to fix this one. That said, most of you know I don’t throw away anything unless I really cannot redeem it. With a bit of patience and a craft knife I managed to cut around the parts that were not cut properly. I backed the piece with some holographic paper for interest and then attached it to the dark blue layer. The fish were cut with my new Gummiapan dies using scrap CS and the word is a shadow and word die (no idea of brand) gifted to me at Christmas. I used the same blue CS and a white piece for the shadow. The card is 5 x 5″.

It was good to redeem a poorly cut piece and I quite like how it turned out. Thanks for stopping by, I appreciate you and your time.