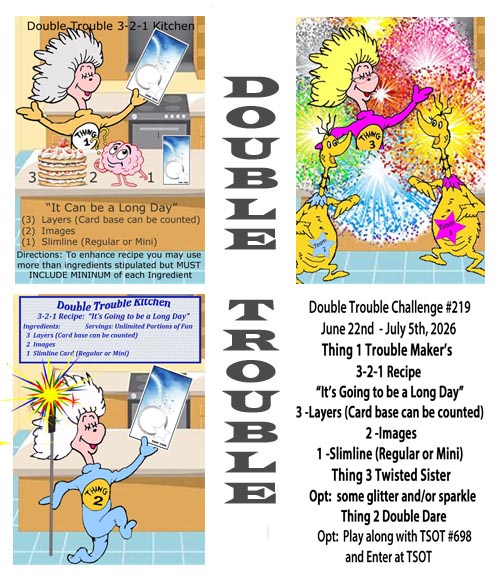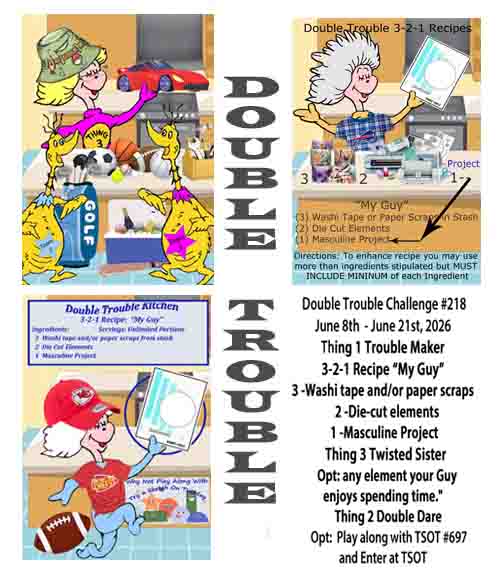
It is once again time for our Double Trouble Challenge #219 and your challenge is to make a slimline card, regular or mini. Recipe is: 3 – layers and the card base can be included, 2 images and 1 slimline. Thing 3, twisted sister is to add some sparkle or glitter and thing 2 is for you to use the sketch and enter it at TSOT #698. Be careful not to back link.
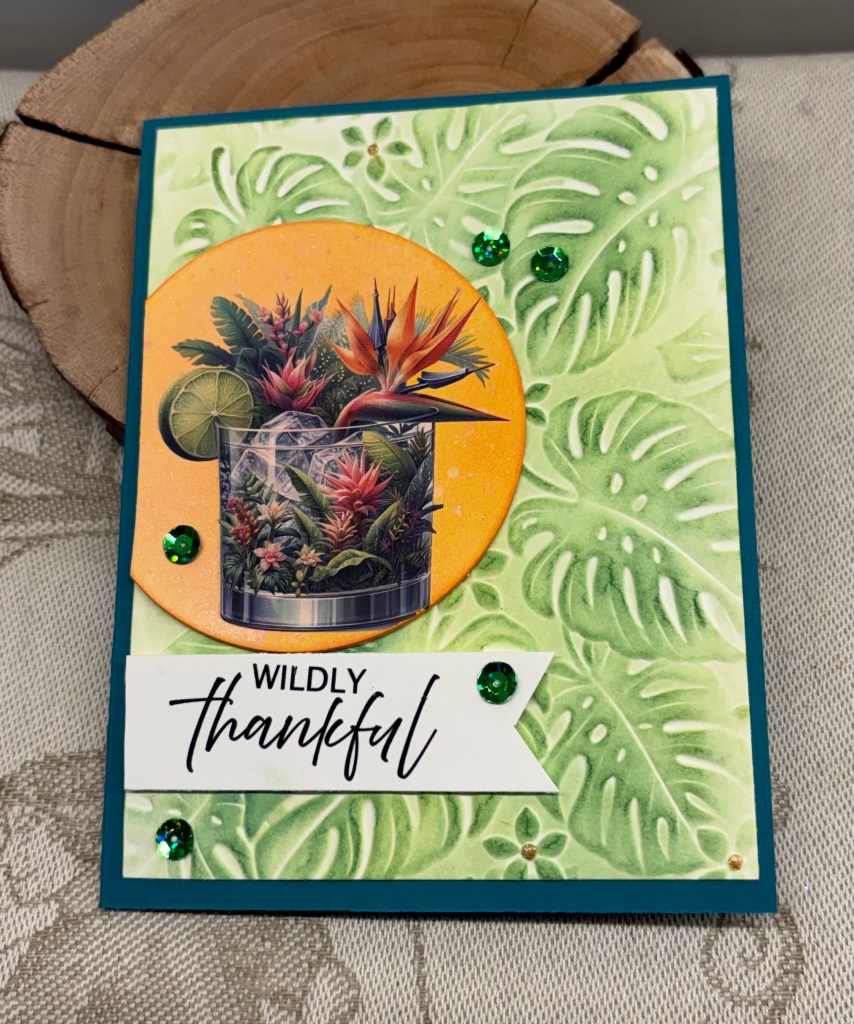
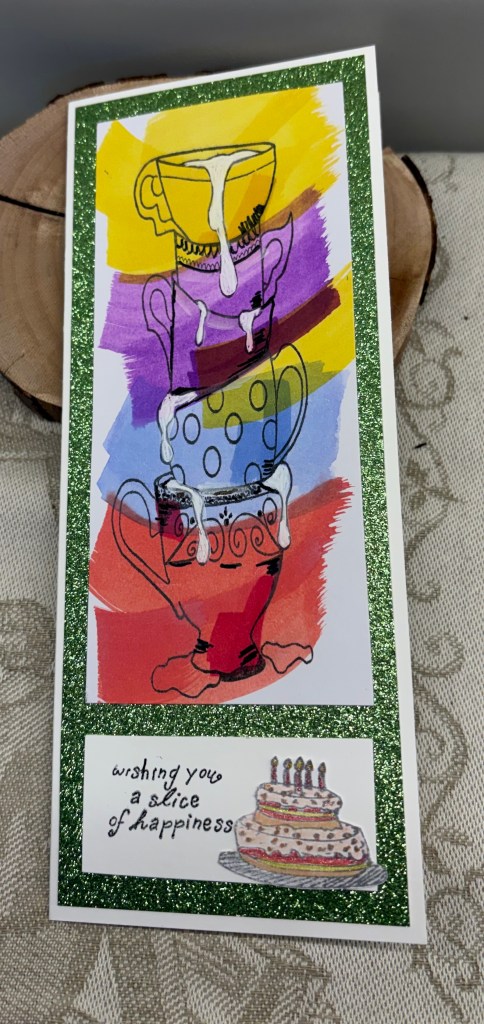
Quite some time ago and I can’t quite remember where, I saw an artist colour some images just using brush strokes with different colours. I decided I would give this a go myself and I created the cup panel where it languished on my desk as I couldn’t decide, first whether I liked it, and second how I might use it. The cup stamp is from Joy Clair. My effort isn’t terrible, but I now realize that the artist was using a special shaped brush which I don’t have. Funnily enough my hubby saw this and said he liked it, which helped me to use it.
Anyway because this panel was already done, I decided it would make a decent slimline card. After cutting my card base I took some glitter CS and cut a piece for the front. Then I added the cup panel on top. Right there that gave me 3 layers plus the sparkle requirement. Then I cut another piece of white CS to the size I required for the bottom and stamped the sentiment heat embossing it for a bit more definition. Stamp set is from a dollar store brand Forever in Time and the cake image is from the same set. I stamped it, coloured with pencils and some Sakura glitter pens and then fussy cut, giving me my second image. If I don’t count the card front there are three layers but with the card front I now have four. Once this was added to the card front I called the card finished.
In the end I quite like the result, but without this challenge, I’m not sure I would have used the cup layer at all. Now it is your turn and we look forward to seeing your ideas and cards in our gallery. Have fun creating.
Thanks for stopping by, your time and comments are always appreciated.