Make a Wish

With guests arriving this week, I have been trying to get the house in order and as much meal preparation as is possible, so we can spend time without me being constantly in the kitchen. I was getting fed up and decided I needed to take a break, so my craft room came to my rescue. I know I won’t spend much time in here after tomorrow so getting one card done makes me feel good.

The challenge at Seize the Birthday, is to include a star, and Peace on Earth is always an anything goes Christmas theme. Stars work for both and the sentiment I’ve used also works for a birthday or for Christmas. I started with the colours and used Distress Oxides in Evergreen Bough and Aged Mahogany. To get the circles I used a couple of plastic caps and inked them directly from the ink pad. Then I sponged the inks and added sparkle spray over a scrap piece so I could cut the stars. This was done using an infinity set from Hero Arts. I added them as you see along with the sentiment which is from a GKD set. Inking a card front to match the colours and some scrap card behind for dimension the focal panel was added. Using some star sequins, intended mainly for shaker cards, I added a few here and there for some additional shine.

This didn’t take long and allowed me to get a few minutes rest before I go back to my preparations. Fortunately most of the meal prep is done and tomorrow I will do a quick vacuum and dust as well as double check the rooms they will be using. My bed and breakfast expertise is coming into play even though these are friends and not customers. They won’t care, but I do, LOL!

Thanks for stopping by, I do appreciate you and any comments you may make.

you’re on fire

Our current #228 challenge here at Cardz4galz is to be inspired by a book. In my case, my card is inspired by the book titled, The Girl with the Dragon Tattoo.

One of my friends is rather fond of dragons and I thought making a card featuring one, would be something she would enjoy. My aim was helped by a card used by my Dragon Boat team to advertise the team. Initially I was going to use a Digi stamp, but I couldn’t find one I really liked so in the end I used a modern oval die from Spellbinders and die cut one of the cards. To give it some dimension I used scraps and die cut layers to add behind the image before adding it to a card front.

For my background I used Distress Oxides in Worn Lipstick, Old Paper, and Blueprint Sketch with a touch of Chipped sapphire on the edges. When it was dry I sprayed it with my shimmer spray so it sparkles. I made the sentiment myself on the computer and added a little leftover pink ink to soften the whiteness. The gems are from my stash.

I’m quite pleased with the result although I can see ways to improve it, should I do another. Thanks for stopping by and I do hope we see your creations in our gallery soon. Thanks too, for any comments you leave me.

People Go …

I have a pad of mineral paper from a while ago and haven’t used it nearly enough to make the expense worthwhile. I decided that today was a good day to try something based on the sketch at AAA. Three different inks were used through a butterfly stencil someone made and gifted to me. Ink colours are: Bundled Sage, Twisted Citron and Cracked Pistachio. I moved the stencil around a bit to increase the quantity of butterflies. Initially I tried doing it slightly differently, but it really didn’t look good, so I just turned the piece over and began again using the smaller butterfly section on the stencil. Then I stamped the leaf, an Altenew stamp as is the sentiment, but from two sets. The leaf imprint was a bit patchy and trying to go over it wasn’t possible so I decided to leave it as is. I kind of like it. I adhered this to the front of a note card and realized that mineral paper is thin enough for images to show from the other side. However, I like the hint of more butterflies behind and feel the card works just as well like this.

A lesson learned, is that inks on mineral paper take forever to dry and I may have to use something to seal it once I’m sure it won’t smudge. Alcohol inks work better than pigment or Oxides do. It is fun to try something new and using the paper meant I could keep the card looking like one layer even though it technically isn’t.

My last card today as it is time to get ready to go out with my hubby. Thanks for stopping by I really appreciate it.

Feelin’ Sketchy

Its a sketch challenge at Sunday Stamps and I used one of my new panels as my initial layer. This panel is actually part of a photograph, printed on artist paper and taken by a good friend. Unfortunately, it got damaged and instead of throwing it out she gave it to me. I cut it up to use as my own PP and this is part of it. I rounded the corners before adding to note card. Then I took a piece of vellum cut down and rounded its corners. The die cut is from MFT and was added to an inked background scrap before adding to the vellum. I used this to hide my glue when adhering the vellum and used the embellishments to stop the vellum from curling up. The sentiment is from a Hampton Arts set.

When I did this card yesterday, I wasn’t sure I liked it, but seeing it again today I decided I do. I didn’t have time to post it until now, but I have an hour before my hubby takes me out and being in my craft room is always a good way to fill in time.

Thanks for stopping by. I appreciate you, your time and any comments you may leave for me.

sparkly thinking of you

The latest challenge at As You See It is a simple sketch and I came up with this card. I did make it with someone in mind as one of my dragon boat team members has had a fall recently. Her injury is pretty serious and involves her eye and vision after she fell into blackberry bushes. I’m pretty sure she is very low in spirits and I thought a bright sparkly card may cheer her up a bit. I dry embossed a Darice folder on the white CS and added a smaller panel of sparkly blue. The circles were left over from previous projects and I just put them together before adding them to the other layers. Using another piece of the bright coloured circle I die cut the butterfly with new Scrapbook.com dies and then added the sparkly piece over the other. Using a body die from a different butterfly set I cut the body in black, resized it a little and added it on top and then onto the card front. The sentiment is a freebie received from Natasha Foote a while back. I feel like it needs something else, but I’m not sure. Let me know what your thoughts are if you can.

Thanks for stopping by, I do appreciate it and I hope you are enjoying the last few hours of the weekend.

wildflower field

It is a sketch challenge at Just Add Ink #707…Sketch! My artist friend gave me a print that was a watercolour originally and which she didn’t consider it very good. She suggested that I cut it up to use as a background, which I did, and ended up with about 5 panels of which this is one. Using my everyday detail dies I cut a few circles, taking colours from the background I coloured one and glued the two pieces together . Then I added the Kokorosa sentiment again taking a colour from the background. Before gluing it to the background I trimmed off the edge as you see. This was then glued to the rest. I added some sparkle black to give a border and then added it to the gold card front. The poppies are leftover from a recent sympathy card, not posted as yet, and I added the red bits over the white die cut before adding it as you see here. Embellishments are from Hampton Art.

I quite like the end result and prefer the painting cut up into smaller pieces, rather than as a whole larger picture.

stars

This card has been inspired by the colours at Inkspirational, an actual entry to the challenge and the mood board at Double D. I masked off a blank card so I could add colour to the middle without worrying about the edges and using a Clarity stencil brush I added Broken China ink letting it fade as I went. On a separate scrap piece of CS I die cut the star shapes using Infinity dies from Hero Arts. I kept using this piece to ensure I had the right placement for the rest. Then using an unbranded background die I cut three in the yellow. I added each one as you see then die cut more stars sponging one in the lighter blue, a couple with the gray/silver tones from scrap CS and two more in a darker yellow with one in a sparkly yellow paper. These were added and layered a little. The sentiment is from a Kokorosa set and was stamped in Broken China. I’m quite pleased with the end result and am happy it works for two challenges.

Thanks for stopping by, I appreciate your time as well as any comments you may leave me.

Birthday pansies

Its a colour challenge at Sunday Stamps, SSC337 IN THE GARDEN and this is my take on it. The embossed layer is something I did a long time ago and only used a portion of piece at the time. It is a 3D folder, but I’m trying to reorganize my supplies and it is temporarily misplaced and I can’t remember the brand or folder name. I mounted the layer onto a patterned piece from Simple Stories received recently as a freebie from Scrapbook.com. The pansies came off a store bought card from last year and I simply couldn’t throw them away. Using the same PP as the back layer and an unbranded die I cut and added the leaves with a bit of paper piecing. I replaced the foam for popping them up and added as you see. The sentiment is from vertical greetings by GKD and I went over the letters with a sparkle pen before adding it at the side. I also used some Waffle Flower Candy dots for added interest.

Thanks for stopping by and I hope you are having a lovely day.

Double Stenciling

At Seize the Birthday #285-Double Stenciling the challenge asked for a, new to me, technique of double stenciling. I am not the best at stenciling but I gave it a go. Initially I used Gesso with a pebble stencil and then realized that I had to wait for it to dry before I could stencil again. So I patiently waited, but did remove the stencil for cleaning before carrying on. Once it was dry I went over it with a faint touch of ink from a sponge and then I replaced the stencil as best I could and using a music note stencil I added the notes using the same ink that was left on the sponge. It kind of worked although I’m sure it isn’t quite what was intended based on the video I watched first. I liked it enough to mount onto a black layer leaving a 1/16″ border. This was added to the card base. Taking the Lavinia stamp and some black ink I stamped the rabbit/hare onto a scrap piece and fussy cut when it was dry. I couldn’t fussy cut the tiny hairs so I did a quick stamp onto the background and went over the hairs with a micro pen to get them darker before gluing the separate one on top. Using an unbranded Love die I cut 3 in black gluing them together and adding it as you see. Three pearl embellishments finish the card.

I am also going to enter this card as a 2nd entry into the June Stencil Fun Challenge.

Thanks for stopping by, I appreciate your time and your comments.

summer vibe

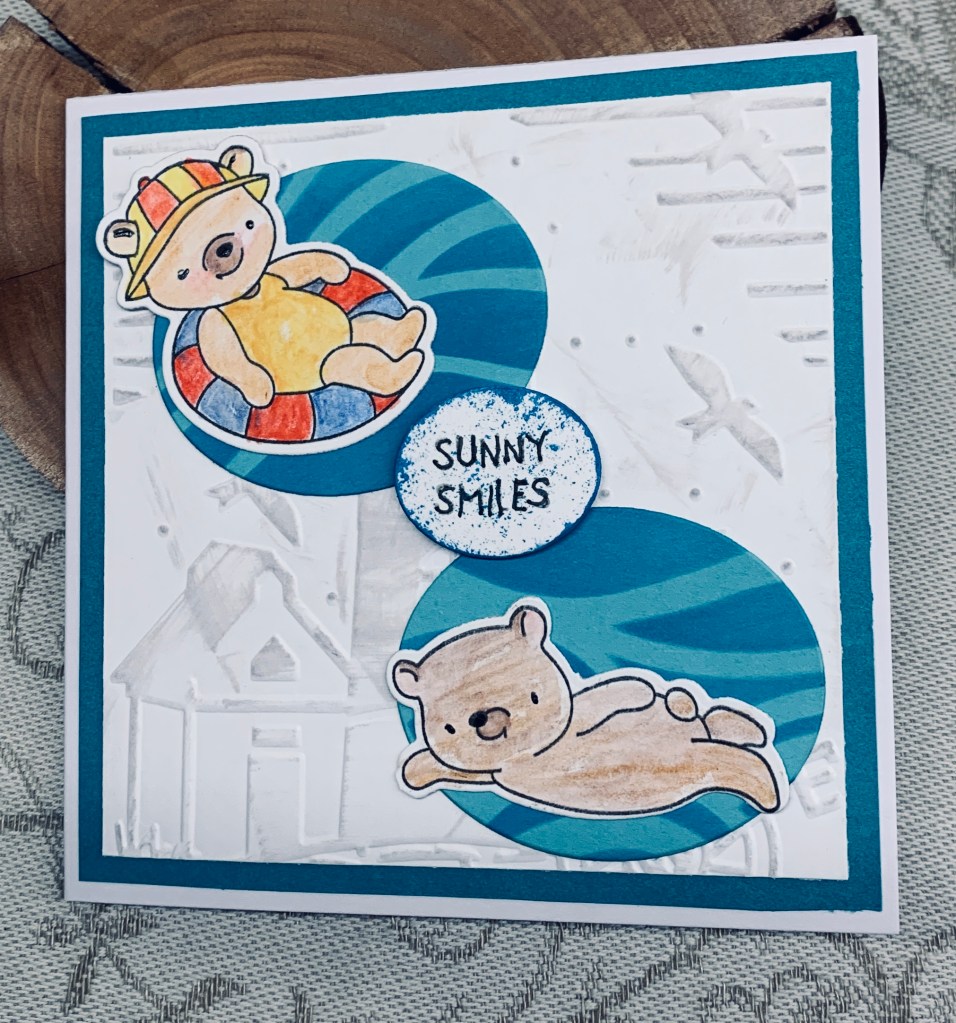
Challenge #228, as chosen by Heather is all about summer fun. I decided to use some new dies, along with a few paper scraps to create my card. I started with the flip flops using a YNS die set and built my flip flops in two colours. The little embellishments are part of the set. Then I pulled out an MFT die and did the sunglasses, after which I cut two sets of letters one in black and one in PP. After dry embossing a scrap piece of blue CS I added some torn strips at the bottom, tucking in the flip flops. This PP reminded me of sand. I had the half sun, from SSS, left from a previous project so it was used here. Before attaching the focal piece I went around the edge with a black Copic pen and then added to the GKD card front. Once I had the letters attached with the black ones behind I added them as you see.

It was then I noticed a small mark underneath the shades and very obvious to the camera if not to the naked eye. At first I tried to remove the shades so I could repair it but it started to do more damage. Fortunately I remembered that I had this 3D hat sticker from way back and I was able to find it. Strategically placed the damage is fully covered without ruining the card. In fact I think I like it better with the hat.

This will be my last challenge with Make My Monday, as I have decided to step down from the design team. Life has become very busy lately and I am finding it difficult to keep up with 2 DT blogs as well as my normal crafting. With my paddling practice for the dragon boat team I am with, I am often physically exhausted and in arthritic pain. It is better to unload something that could become a potential source of stress, before I let people down. The exercise is a healthier option, even if physically demanding, than sitting in front of my computer or at my desk for hours on end.

The card fits the current challenge at CYHTP so I am entering it there: Anything Goes With A Twist of Beach

Thanks for stopping by and I appreciate your time and your comments. Good luck with this challenge.