interactive Flap card

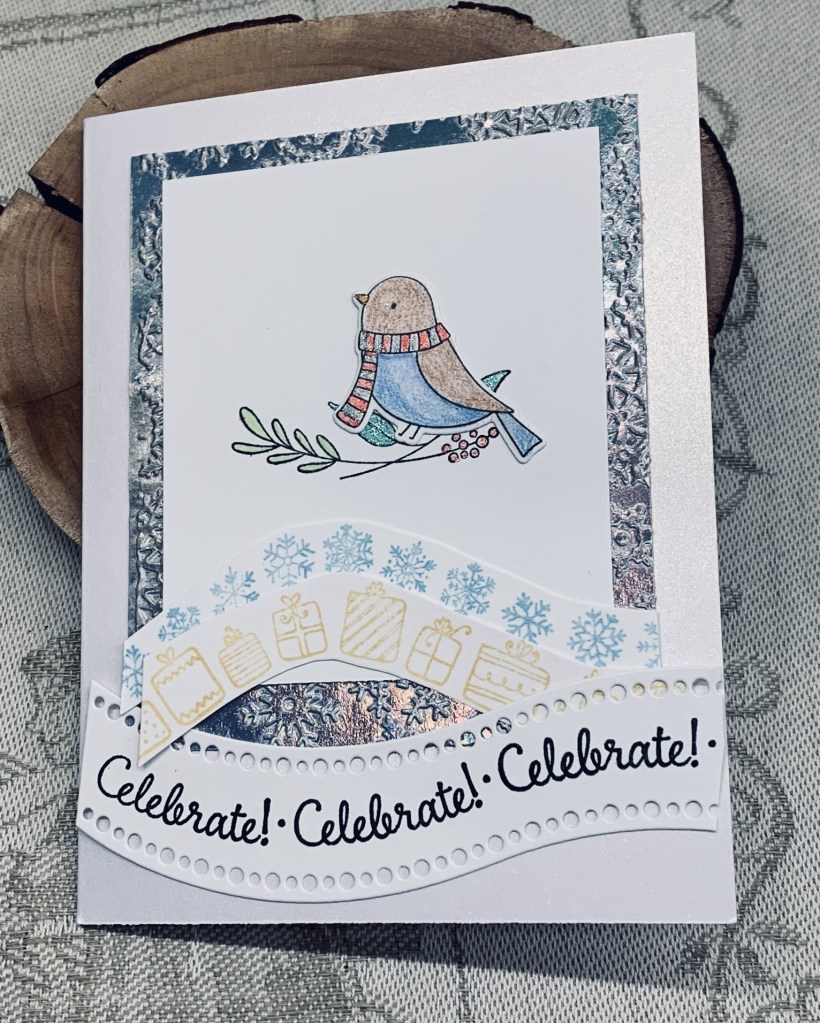
One of my friends commissions several cards per year for her family and I try to do something a bit different each time. I shall add this card to the challenge at Peace on Earth

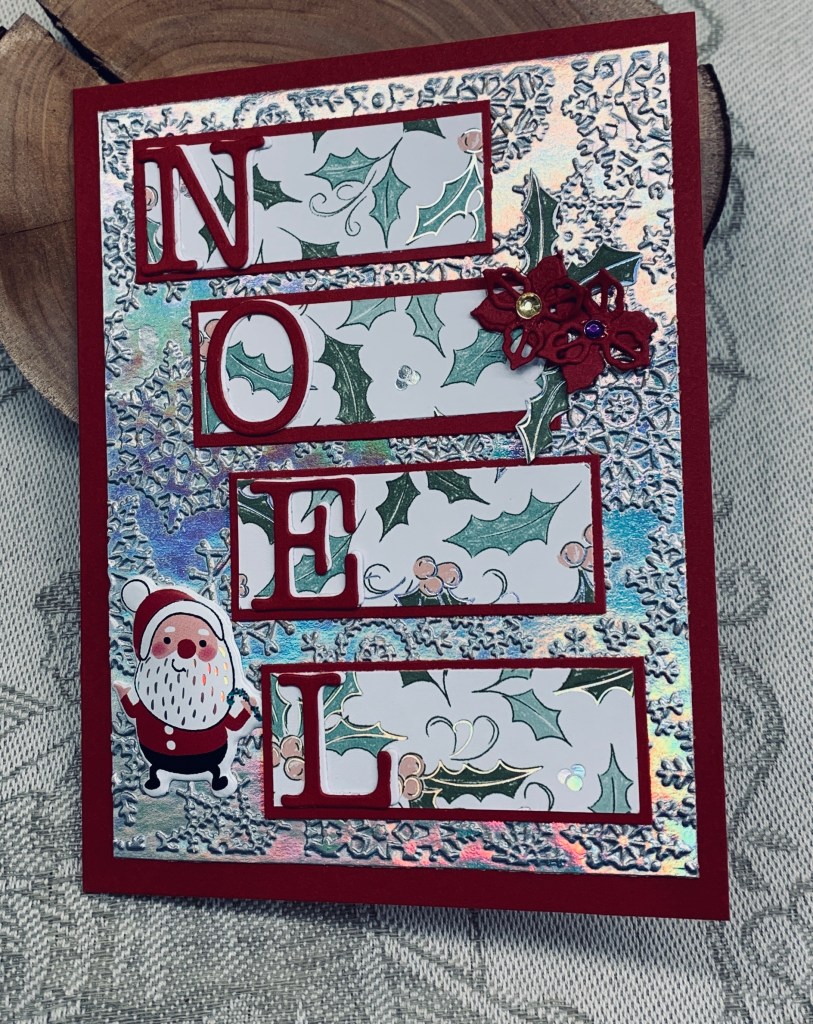
This is my first try at a flap card although I’ve had the Spellbinders die for some time. I found a tutorial to follow and this is the result. One thing I realized is that keeping the pieces in the orientation in which they are cut, makes it easier to put together. The frame didn’t seem to fit until I realized the orientation was off. The die set came with daisy flowers but as it is an intended Christmas card I used poinsettias instead. Mine came from a die by Dee’s Distinctively and I only used three, so have enough left for another card. The PP is from a paper pad but I’ve mislaid the brand name. Sentiment is from a Divinity Design set and I also added a sentiment on the underside of the flaps but it’s another temporarily mislaid set. Its probably underneath the stuff on my work surfaces.

Underneath the flaps

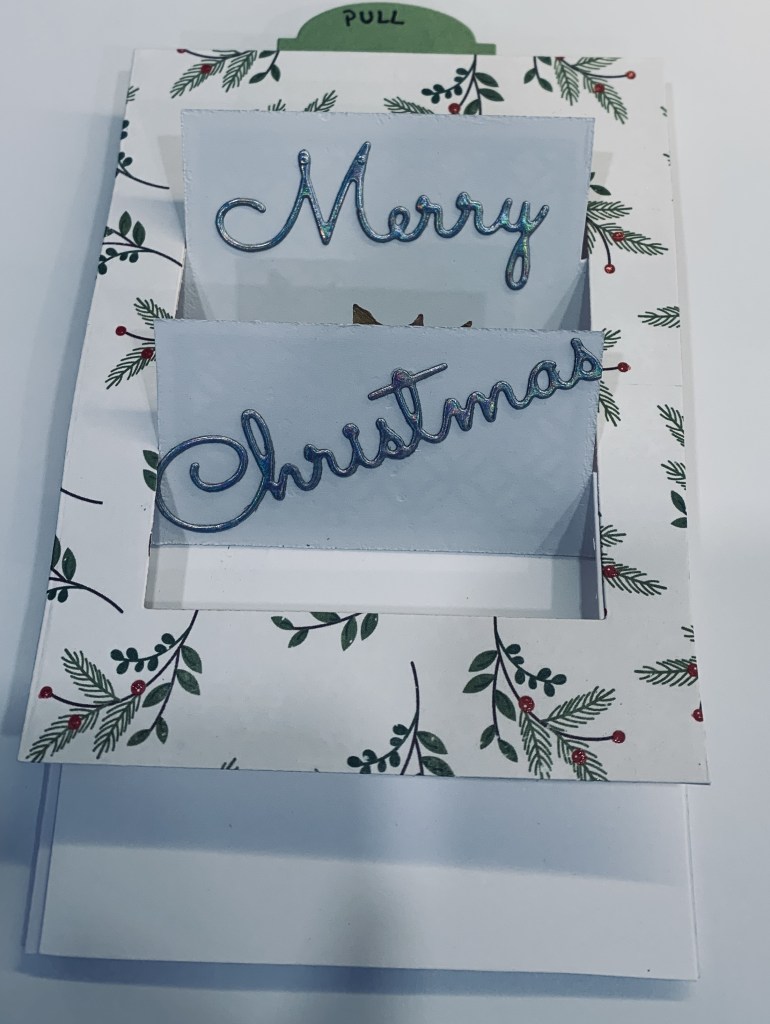
I used a small YNS shape die to add the pull tag at the top, but couldn’t find the stamp set with the words I needed, so I hand wrote pull. The next goal, after our party this weekend, is to sort out my craft room and find the missing sets. They aren’t gone, just hidden.

Once I figured out how it works after watching the video several times, it wasn’t that difficult to do and I’m pleased with the end result.

Thanks for stopping by, I appreciate you and your time.

Skating By …

Billie has chosen a Christmas theme for our last challenge of the year here at Cardz 4 Galz. I actually made 3 cards almost the same except for colours. I used a Christmas background stamp from YNS and heat set it with Verdigris on vellum. After cutting the panel down a little I added the sparkly strip to ground the penguin image. He is from a new set, on sale, by Crafters Companion. Once stamped I also heat set the image so I could colour without worrying about it spreading in places I didn’t want. Watercolour pencils were used. When it was dry, I fussy cut the image and used a black pen around the edges. After adding foam tape he was attached to the vellum piece, which in turn was attached to the shimmer card front. The sentiment is from the same set. The other 2 cards are the same except one is blue and one is gold.

When this set and another similar one arrived, I was surprised at the size of the image stamps. I was expecting them to be smaller. There were no matching dies that I could see, unfortunately. I do like the fonts used for the sentiments.

Thanks for spending time with me today. We look forward to seeing your creations in our gallery. Above all, have fun in your crafting space and enjoy the Christmas season.

sketch challenge

Yay, I did it, I met my goal of entering into the As You See It challenge for the entire year and this is my card for the current and last one of the year, Challenge #338 – A Window into the New Year.

I started with an embossed layer of metallic silver CS to which I eventually added the white layer. EF is an old one by Cuttlebug, so old that the hinge is broken and it is held together with tape. Stamp sets are from MFT and Spellbinders and that includes the curved Celebrate die cut at the bottom. I fussy cut the other two curved strips as I wanted them much narrower. After stamping the leafy branch and colouring it with some Sakura sparkle pens, I did the bird on a separate piece. He was coloured using Prisma pencils as well as a touch of sparkle for his scarf. Once die cut I popped him up slightly and added him to the branch. This panel was then added to the other. I added the curved pieces underneath and then the sentiment piece before considering it finished.

I’m quite happy with the end result, and already have the recipient in mind for this card. After a few days of house guests last week, this week is a bit more on the normal side. We are hosting a potluck on Sunday next for which I have some desserts to make, but other than this, I should have time to finish up in my craft room and actually get it clean and tidy too.

No sign of the mail strike ending so I guess cards will arrive sometime next year. The mind set of the strikers leaves me astonished at times.

Thanks for stopping by, it is appreciated as are any comments you may leave.

Gift wrapped

SSC349 An Elegant Christmas is the latest challenge at Sunday Stamps. It is a colour challenge, but there is an inspiration photo as well, and I chose silver, gold and dark green as my colours. Using a die from Kokorosa, I cut the green ribbon that looks like packaging to me. For the base I used a gray green CS and I stamped some stars from an old GKD set in both green and pale gray. Using a glitter pen I went over each of the larger stars to give them sparkle. The silver/gold bow is from an unbranded set and my gold tag is from a set my hubby bought for me a long time ago. In those days I never realized the importance of keeping the brand information, sorry. The sentiment is from a Divinity Designs set and I fussy cut this to fit the tag. Before I added the tag, I wanted more shimmer so I covered the bow and then sprayed the entire thing with shimmer spray. Its quite pretty in reality.

A simple and relatively easy card to make that looks better in my craft room than it does on the photo. Thanks for spending time with me today. I appreciate you all.

noel

https://daranddiane.blogspot.com/ This challenge is about winter so I created a snowflake background using an old folder by Cuttlebug on silver CS. Using a lot of scraps I figured out sizing and cut background pieces and PP to fit before adding them to the embossed piece. Using a Scrapbook.com alphabet die set I created the word in both red and white so I could offset the top layer slightly. Added them to each strip. I found the tiny poinsettias in a box that I had made from last year and added them as well as the puffy sticker Santa before adding the entire panel to the red card front.

I think I have about 30 cards still to make and the rest are already in envelopes ready to be mailed when the strike is over. The strikers were shivering outside the post office this morning as it is cold and frosty. I do not feel sorry for them at all.

Thanks for stopping by, it is appreciated as are any comments you may leave.

stack the holidays

Peace on Earth Christmas challenge #76 and this is my take on the challenge. I used a stamp that is still fairly new to me from YNS and stamped then die cut the image. I used mostly Copics to colour it, not my go to, so I’m not very good with them. Lots of sparkle from Sakura pens and with foam tape added it to the background piece. PP is from StampinUp. Sentiment is part of the set and I rounded the edges of it so it would fit better. Its quite a large stamp and doesn’t really lend itself to being cut smaller. Actually in thinking about it as I type, I could have cut each individual stamped word and stacked them beside the image. Note to self for another time.

While out yesterday, hubby bought me a Pan Pastel colour set so I’m looking forward to playing with the colours in the box. We hiked a trail with some friends and then had lunch at the local golf club. Lovely day after all the rain.

Thanks for stopping by, it is appreciated.

Favourite Colour combo

Challenge #239, as chosen by me, for Cardz4Galz is all about your favourite colour combination. Personally, I am a sucker for purple in any shade and I especially love it when it is paired with gold or even a bright yellow. As well I really like marbled papers, so I took a scrap piece to cut out the base layer of the ornament and then the fancy layer was done is gold. As you can see, I layered up some of the marbled paper behind a gold piece and then added the white layer on top. The white layer was dry embossed using a Sizzix 3D folder and I added a small amount of shimmer to it which the photo doesn’t pick up. The sentiment is a rub on left from last year. I have a few others that I shall use fully as I begin to get serious about Christmas cards. Once the ornament layer was dry I added some very thin foam pieces to lift it slightly from the rest. I cut a thin piece of gold CS, for the cord, and added a ring to it. Once this was attached I added the ornament. I don’t remember who made the ornament die and I’ve had it for a long time. Most likely it is either Sizzix or Memory Box. In those days it didn’t occur to me to keep the information about my supplies.

This card wasn’t difficult to make although the fancy gold layer is a bit challenging to adhere and requires some patience. We look forward to seeing your favourite colour combo’s in our gallery. Have fun creating. Thanks for stopping by to spend time with me today.

Christmas in space

The latest challenge at CYHTP is: Anything Goes Embossing with a Twist of WINTER FUN. I guess the twist isn’t taken with this creation as although its a fun card it isn’t strictly winter fun. As some of you are aware, occasionally I do a commissioned card for a friend and this is one of those times. This is for her step dad who loves anything scientific. I thought space and robots were perfect and turning it into a Christmas theme card was fun. After my recent Colorhues pink and aqua card I wanted to do another using the same layout and style. It took a few days of thinking before I had the idea to use rockets as the side panels and I got these from an Adobe graphic and photo program. I used my computer to get the images sized correctly and then added them to a dark gray CS to give a border. The center panel was using CS and some Rub On images along with a stamp from the Robot set by Brutus Monroe. The Christmas sentiment stamp is from Hero Arts. Puffy Sticker’s are from a sheet I got at the local market. For the embossed panel I used a Sequin folder from StampinUp, on a metallic silver CS and I backed it with a dark gray for the border. I know sequins aren’t really a Christmas theme, but I don’t have a folder with stars and I thought these at least gave a space look to the background. I stamped the robots onto a scrap piece of heavy CS as fussy cutting is easier on a heavier weight. Once stamped I also heat embossed clear and then I fussy cut each one before adding a bit of sparkle to them. The bottom robot needed to look more Christmassy so I added a Rub on hand bell that I also fussy cut. Before I actually glued the panels onto the background I sprayed them with shimmer spray so they twinkle and also it has the look of snow in real life. Messed up the spacing slightly putting on the panels but I don’t think it is something that a non crafter would notice.

This was such fun to make even though fussy cutting was a challenge for my achy hands and I’m really pleased with how it turned out. I’m blowing my own trumpet, but hubby loves it and I’ve shown it to one or two friends who also think its a great card. Once in a while I think I’m truly inspired. LOL!

Thanks for spending time with me today, I really appreciate it.

More Speed trees

I honestly couldn’t have found an easier card to make for a speed challenge than this one. I had it completed in 5 minutes and without any mishaps during the creation. It isn’t often that I enter more than one card to the same challenge but I am doing so for this one at As You See It.

Using some StampinUp paper scraps and a new die set from Scrapbook.com I cut the 3 trees all at the same time by layering the scraps together. It needed two passes but they cut well. After playing around just a little with placement, I added some thin foam tape to the backs and added them to the card front. The sentiment stamp, from YNS, was already in my Misti, as I’ve been using it a lot recently and I just added it as you see and the card was finished. I like the simplicity of this card, not only in the end result but in how quick it was to make so I am doing a few more with different papers.

Thanks for stopping by, your time is appreciated.

speed Christmas Trees

Challenge #337 – Turbo Trees is the new challenge at As You See It and this is my take on the challenge. These speed challenges get my heart racing at times and this one almost gave me a heart attack, but I had the presence of mind to turn off the clock during the mishap. I was adding the dies to the gray CS so I could cut out the shape, when the entire sheet flew out of my hands and under my desk. It was so far back that I couldn’t reach it with my foot. I turned off the timer so I could go crawling about to retrieve it and as soon as it was safely in my hands turned the clock back on again. If that is cheating, so be it, but for sure had I not done this, I would have banged my head or worse in my panic. Not only that, getting down on my knees is a challenge at the best of times these days. So there is your chuckle for today. The rest of the card went mostly to plan although gluing the gold frame oval was a bit fraught and I didn’t get it quite right. I used a YNS background stamp on white CS and then took 2 small tree dies from a StampinUp set to die cut the trees. I added foam tape to one. Once the background PP was glued to the panel I added the oval and frame before adding the trees and the sentiment. Oval dies and sentiment stamp are from Hero Arts. I managed to colour a few of the gold embossed decorations using Sakura pens.

I completed the card with 54 seconds to spare. I may add a bit more colour, when I’m not worrying about the time involved.

My mess and the clock showing how much time was left.

We are still experiencing the left over effects of the cyclone bomb from the other day. No wind at our home, although we can see it on the ocean below and a lot of rain again. Apparently the ski hills are open with a lot of snow, but for now we just have the rain. At least the ferries are running again.

Thanks for spending time with me today, it is appreciated.