fun florals

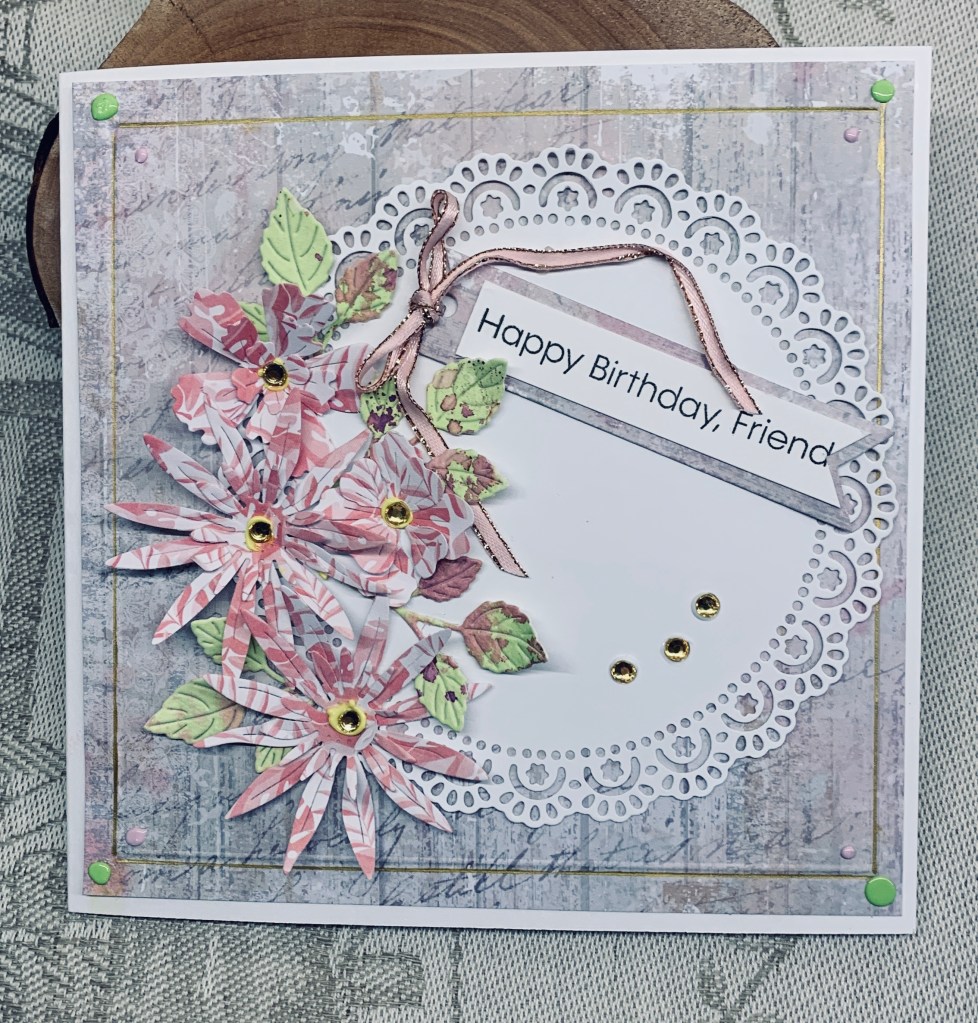
Welcome to a new challenge here at Cardz4galz. Challenge #249 as chosen by Billie, is all about flowers and this card is my take on the challenge. I chose a doily die from GKD and cut that first. I measured it to see what size card front I would require and cut a square card at 5 and one half inches. Then I cut the PP (from Crafters Companion) slightly smaller. Before gluing I went around it with a score tool and then added gold ink over the line. Once it was dry I added the doily on top. Using some Scrapbook.com paper and some Memory box flower dies I cut my flowers and layered them together. I cut the leaves out of a mop up inked piece and then played around until I liked the placement. Glued them down and added some pops of colour to the flower centers and before it was dry added in the gold gems. I used more pops of colour at the corners and 3 additional gold gems on the doily. The sentiment is from an MFT set and I used a banner die from them to cut the back piece before adding the sentiment on top of it. I threaded some ribbon through the hole and added the bow to finish the design.

Thanks for stopping by. We hope you have fun and look forward to seeing your creations in our gallery.

sympathy circles

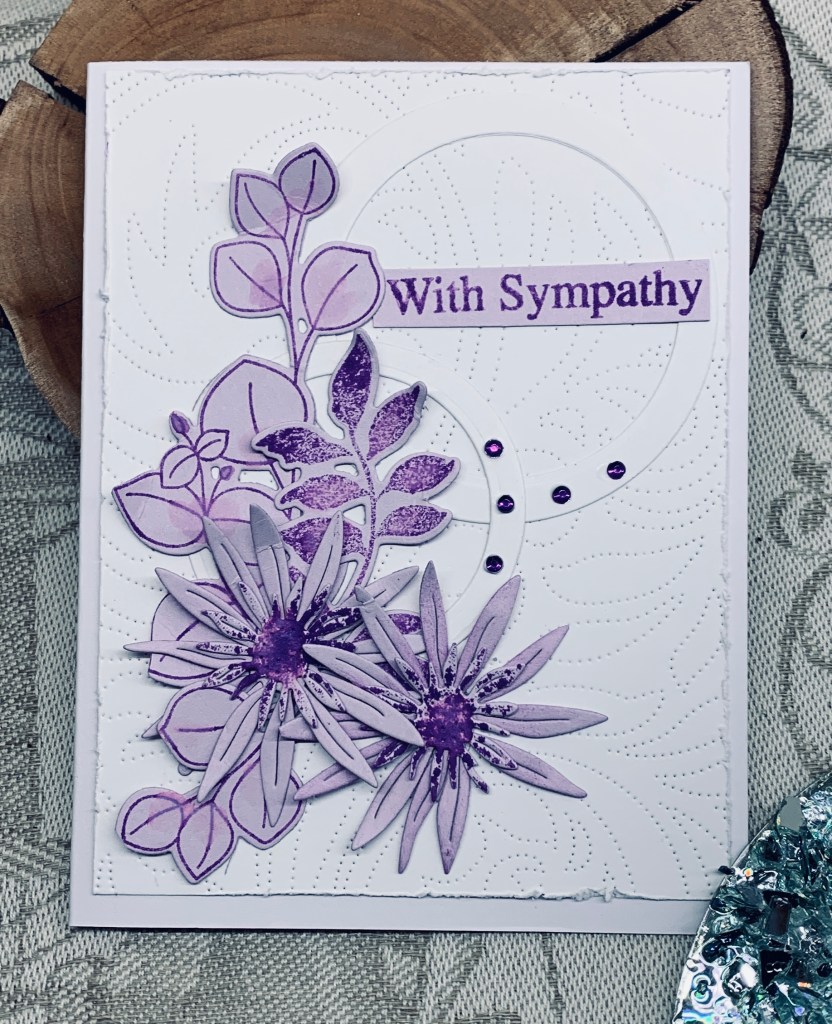
Sadly, I needed a sympathy card for a friend who just lost her dad. This is what I came up with and it seems to fit into the new challenge at Sunday Stamps called going in circles, so I am adding it there.

I used an Altenew background plate and Hero Arts Infinity dies to cut circle frames. Then using some scrap CS from GKD, I die cut the flowers using a Memory box die and stamped leaves then used the matching dies from Altenew and SSS. The sentiment is from an older GKD stamp set. Embellishments from my stash. For some additional definition on the leaves and flowers I added a bit of ink.

Before adding the background layer to the card front I went around the edge with a distress wheel. And in case you are wondering, the little bit of glitter you see at the bottom edge is a piece I did with resin and glass along with alcohol inks. I used it to hold the card flat for the photo. I’ve been working in our garden a lot as the weather is perfect and some of these resin pieces will become garden decor when they are finished. I have to say I’m pretty tired and sore from the outside work so I’m pleased I managed to make this card without major issues.

Thanks for stopping by, your time and any comments you leave are truly appreciated.

Birds and flowers

The mood board at Just Add Ink shows a lot of yellow and gray and I quite like that combo so decided to be inspired by the colours. Just Add Ink #747…Inspiration! Double D is all about Spring flowers so my flower filled boots fit the bill for their challenge too.

The card front is a warm yellow from GKD and I added a crimped gray band across it. The challenge for me, is that the photo shows everything as warm colours making the boots look brown, but in reality are soft gray with yellow dots. And the grass at the bottom looks brown too but is a dark green in actuality. The stamp sets are from SSS and GKD. The little birds are from Poppystamps. Bling is from my stash and I used some pops of color on the yellow dots for more dimension. My background is a wash of blue, dabbed off a bit to try an illusion of clouds, but it didn’t work as well as I had hoped. I added some white spatter before popping up the main image. This is definitely a card that looks much better in person than online.

Thanks for stopping by, I appreciate you and the time you spend with me.

splish splash

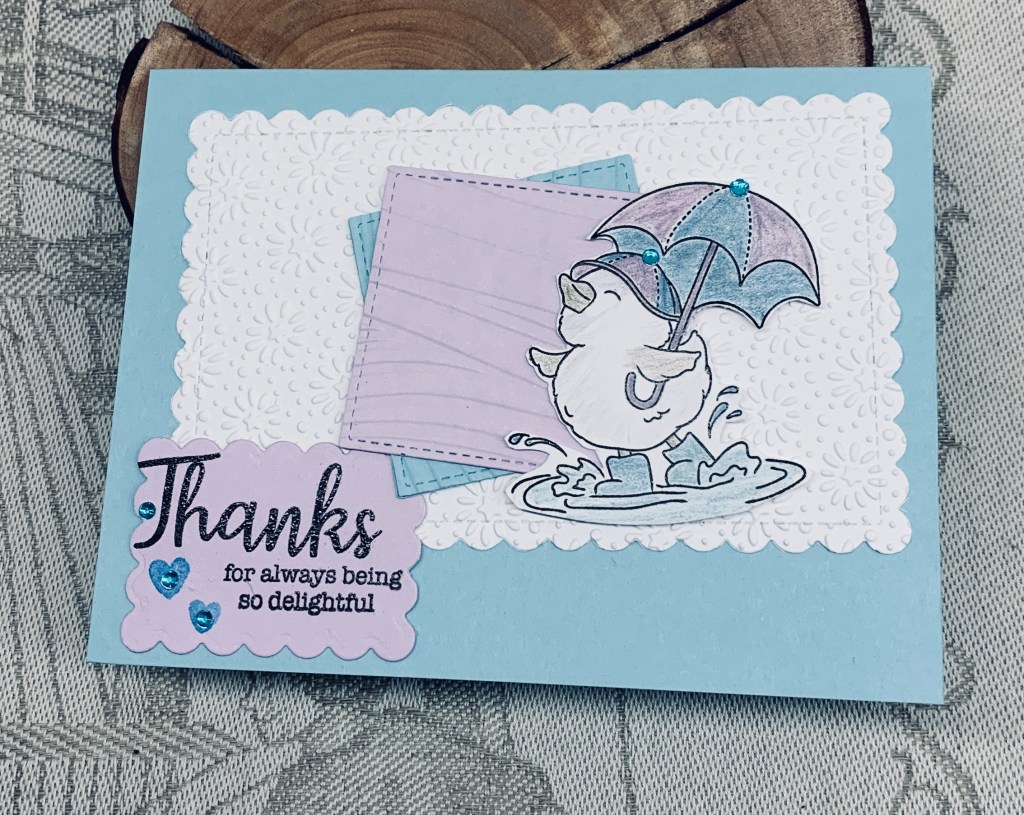
It was a given that I would do a card for Color Hues, given that I love the colour Lilac, actually any shade of purple is hard for me to resist. Pairing it as they requested – Color Hues #108-Lilac and Aqua – just made it more fun. I’m also adding this card to CYHTP although I didn’t use the twist option.

My card is a CASE of this one with my own take on the design. Thanks for the inspiration. Using a very old Lawn Fawn die set, I cut the squares in the two colours, then did the larger background panel, and once I had stamped and heat embossed the sentiment, I die cut that too. I dry embossed the white background piece using a StampinUP folder called Starstruck and another called Softwaves for the two squares. The fun little image and sentiment come from another old set by SSS . The image was coloured with some metallic pencils and I used a blending pen to enhance the colours. Foam tape was used to pop the image up slightly. The tiny gems are from my stash.

Thanks for joining me today. I really appreciate your stopping by.

Flipped over Christmas card

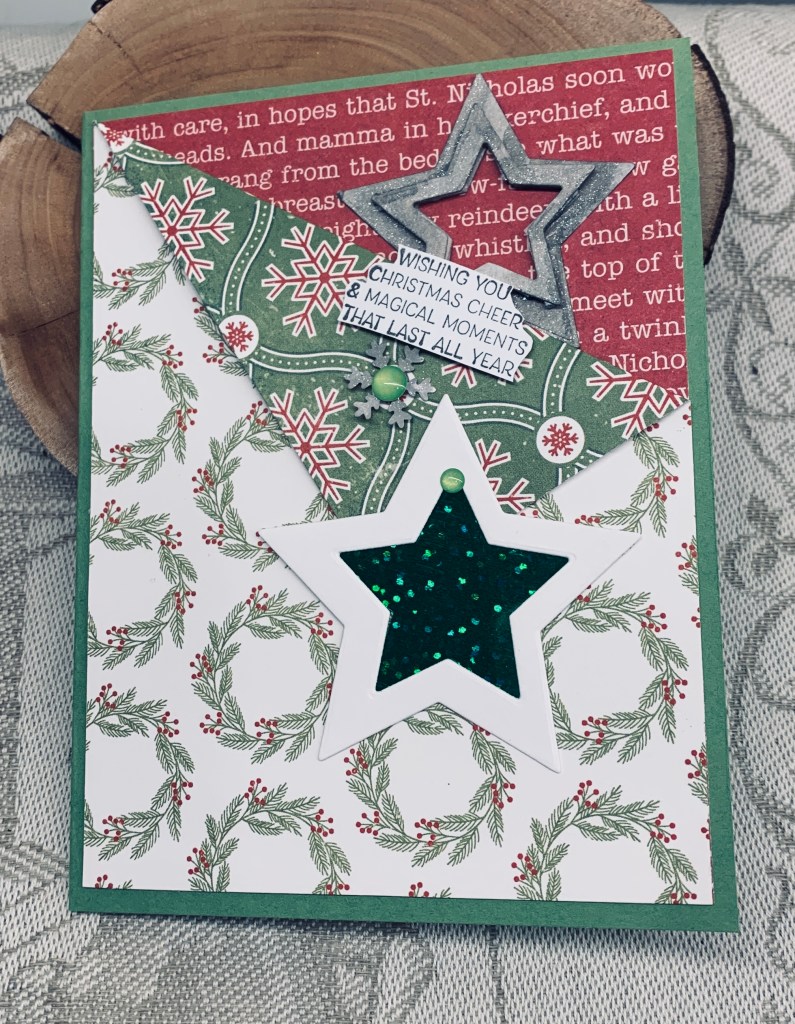
There is a sketch challenge at Sunday Stamps and this is my take on the challenge. It is the second one of two as I wasn’t 100% happy with my first try. I like this much better. I am adding the card at Peace on Earth as well.

I started with some silver metallic CS which I dry embossed with a SSS folder called Filigree snowflakes. To get the flip side I added a piece to the back and when properly attached scored the line for the fold. I wanted more depth, so I went over the piece with some ink and then heat set that with some WOW powder. It needed a bit more oomph, as my hubby would say, so I also spritzed some mica spray. I learned that mica sprayed embossed bits don’t stick well so it took some doing to get the fold to stick down. While waiting for it to dry I took an old GKD set and stamped the snow people using watercolour pencils and Stickles to colour them. After checking placement was what I wanted I glued them flat to the card front, after which I added the embossed panel. Using a die from GKD I cut two snowflakes in a blue CS, added some sparkle and attached them together before adding them to the folded corner. The sentiment is from a Divinity Designs set. A small blue gem completed the card.

Here is a photo of the first one, which is okay, but not quite what I envisioned.

Thanks for stopping by, I appreciate you and your time. Two more cards for my Christmas stash is nice to have. And I have a few other stamped images that I thought I might use for one of this style card so hopefully another couple will get done when I have time.

Happy Easter to all.

art deco step/easel card

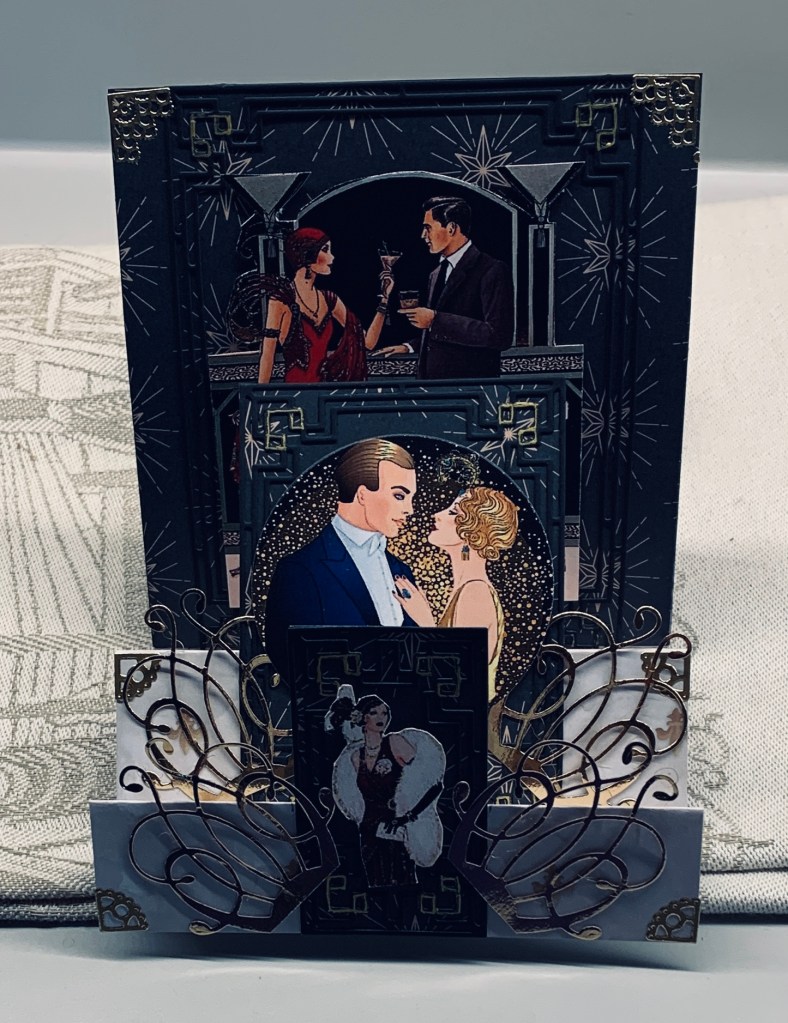
Challenge #248, as chosen by me, here at https://cardz4galz.blogspot.com/ is all about Art Deco. I shall also be choosing the winners for this challenge.

Recently I purchased a new paper pad that has a lot of night sky designs as well as patterns that I’ve used here. It is a good quality pad, but still a little flimsy to use without a card base. That said the card design called for a card base that is bigger than any heavier stock I have so I used the PP on its own and reinforced it underneath in a few places with scraps. The easel part of the card wasn’t holding the steps up properly so I added a band underneath that holds them more securely.

The black art deco frames are a set by Altenew and don’t show up as much as I wanted them to because of the darker PP in the background. I jazzed up a few sections a little with a gold pen. The corners are done with stickers from my stash, I don’t use them that much these days but at least I remembered I had them. The swirly bits are from a Memory Box die and I cut 2 then cut them in half. The images are off the Internet and then jazzed up with sparkle pens. The smallest image on the front I fussy cut and just popped up. The middle one I die cut with a Hero Arts circle and the back panel I fussy cut around the lamps and the arch before popping up with foam tape.

The photo doesn’t do the card justice, as although it’s somewhat dark, it isn’t as dark as it appears here. My hubby likes the card, and I’m sure it will grow on me over time. Right now I’m not sure how I will use it but there is space on the back to write a message when the time comes.

Thanks for joining me today, and I hope to see some spectacular designs in our gallery. Have fun creating.

layered butterfly birthday

https://seizethebirthday.blogspot.com/ challenge #303, is requesting layers and this is what I came up with. I started with a 5 and one half square card front and layered a half size smaller pattern piece, then half size again with the pink sparkle layer. Next I used a darker pink scrap that I ensured would fit in the rotation and layered another pattern piece on that before gluing to the rest. It seems that right now I am fixated on my butterfly bundle from StampinUp as this is the 4th or 5th card I’ve done using it. Using up a scrap piece of pink vellum I die cut the lacy part of the butterfly and then layered this onto a regular piece of vellum. Before I attached the layers I decided the pink vellum needed to be brighter so using a Wow embossing pen I went over it, then used some glitter embossing powder before heat setting. I also went around the edge of the plain vellum with the pen and heat set the edge in gold. When I placed it onto the PP it still didn’t have enough presence so I added a bottom layer in gold metallic CS, which I also used to create the sentiment and the body of the butterfly. The sentiment is from Hampton Arts and I heat set this in black before die cutting. Added 2 pink embellishments from Studio G to the label. Not counting the card front, this became a 9 layer card, but fortunately it is still thin enough to mail easily. The PP is very old and is from Recollections. Because I store my papers in vinyl sleeves they seem to stay clean and don’t fade so I can use them even when old.

Thanks for joining me today, I appreciate you and your time. Its a dragon boat paddling event for me soon, so this is it for today’s crafting. I’m glad I managed one card.

sunshine and rainbows

With a twist of rainbows being the latest challenge at CYHTP and a sentiment being focal for Word Power, this card works for both challenges. I used a tutorial from Natasha Foote to make my background.

As I still had two pieces of a photo my hubby discarded I decided to use them by cutting them into half inch strips and then weaving them. Once I had them stuck down I trimmed the panel and added it to the white card front. Then using a scrap piece of white I stamped the sentiment, and the sun rays, both from Concord and 9th and heat embossed clear. The embossing is from a small folder that came with my mini die cutter – brand We R. I then used my Hero Arts oval infinity dies to cut and went round it with a sponge and Chipped Sapphire ink. I used one of the smaller ovals to cut the sun ray piece as well. I attached the two together, added some foam to the back and then glued the lot to the woven piece. The gem sticker, which I’ve had forever in my stash, and never used, was added at the bottom. On the photo it looks a bit lost, but in reality it shows better. The photo here makes everything look a little darker than it does in my craft room lighting.

Thanks for stopping by, I appreciate you, your time and any comments you may leave.

linked together decorative

Having recently purchased these Decorative masks from StampinUp, they’ve been languishing on my desk waiting for me to use them and I finally got around to playing with them yesterday. For some reason the colours at As You See It were stuck in my head so this first piece was the result of using the first 3 masks and colours. I hadn’t planned on a second entry but as it works it will be added and it will also be added to the April 2025 Stencil Fun Challenge at Crazy is our Fame – Stencils are our game. Quite by accident it meets the pattern twist, which is fun for me. As I don’t do a lot of stenciling I wasn’t too sure if I liked the result at first. I had some fall outs on my desk from a previous project and thought I could use them but they kind of disappeared initially. After a bit of thinking I pulled out an Altenew stamp and die set and used one of the leaf stamps, which I stamped in green, and then heat embossed clear. After adding some foam tape to the back I placed it on the stenciled piece but didn’t like it much. More thinking and I cut a panel of vellum and then added the leaf to that. The fallouts were added on top and I attached it all to the stenciled piece. I stamped the sentiment, heat embossed that, then added it to a black piece and attached as you see. As I didn’t have the colour Peach Pie I used Tea Dye ink and edged the card front with it before adding the other piece on top. Stamped the sentiment in the same colour ink and heat embossed clear. The vellum mutes the background just enough for the rest to work and I’m happy with the solution.

For a card that I didn’t plan this turned out much better than I expected. I still have several other stenciled pieces to make into cards when I feel like it. Thanks for joining me today, your time and comments are appreciated.

daisies

It always surprises me, how a photo seems to change colours so that they don’t quite look the same as in reality. https://www.asyouseeitchallenge.com/ has a colour challenge and my card uses the colours but here the garden green looks much darker and somewhat teal like than it actually is.

To make this card I used a Kokorosa die and cut the shape from the grape coloured CS, here it looks lighter than in reality. I attached it to the green card front and decided to cut it again in the two closest colour matches so I could paper piece some pieces into the open shapes. I used some Nuvo drops for the flower centers which is close in colour to the pieced daisy. The little die set was a gift and I have no idea of the brand, but I cut the shadow in the peach and the word in black.

We have had a few warmish days that were also dry so the blossoms on the trees are looking really pretty now. Today we are back to some rain, but signs of spring are everywhere. Depending on where you live, I hope that you too are also seeing some signs of spring. The east coast of Canada has had a bad ice storm, which makes me thankful to not be living on that side anymore and I know there has been some weather catastrophes in parts of the USA. I always feel so sorry for people living through this kind of thing.

Thanks for spending time with me today, I really appreciate you.