When I saw this diamond stamp (from Spellbinders) on a tutorial, I knew I just had to have it and as a sale came up on Scrapbook.com I bought a bunch of things with this being one. I wanted something simple but different for the challenge at JUG’s and it seemed the perfect time to ink it up. The ink used was Distress Oxide Tea dye which was the closest I could get to a tan colour, then I added tumbled glass and the flowers were done with Spiced Marmalade and a Prisma pencil. The flower stamp and leaves are from 2 different Altenew sets that are also new purchases.
While the ink was still wet on the lines I added some clear heat embossing and then I watercoloured the diamond centre. I fussy cut the flowers but the leaves had their own die which made it easy. Popped up the sentiment so the rest could be added slightly behind. Added some sparkle with a Sakura gelly roll pen to the sentiment and the flowers. The Kraft card base is from GKD.
I quite like how this one turned out. Thanks for stopping by, it is appreciated.
When I saw this challenge, I remembered that I had this gorgeous copper metallic CS and I thought it would be great to use. I decided to die cut it with the largest frame from a Recollections set and cut the card base so it would fit. During a recent sale at Scrapbook.com I purchased a few new stamp sets with matching dies and this is from one those sets. It is by Altenew and I really like the set. I chose a CS from my stash that was close in colour to the challenge and stamped my image with Blueprint sketch to get some depth. I deliberately didn’t season my stamp first knowing I wouldn’t get an absolutely great image because I really wanted it to look a bit smudged and not crisp. I added a bit of clear embossing powder and heat set it so it had a tiny amount of shine. Once it was die cut I played around with placement but before gluing it I decided to step it up a bit using some copper Nuvo Drops. The idea for doing this came from a tutorial by Natasha Foote only she used a pen to add lines to her leaves. As well I didn’t do all the leaves. When it was dry I once again played with placement and marked where I wanted my sentiment to go. Stamped this directly to card front and of course smudged it. Oh no! Starting again I stamped it on a scrap piece, die cut it then die cut another piece out of copper and offset the two so I could cover up my mess. Adhered the leaves, added a few more copper dots and declared it complete. I’m quite pleased with how this one turned out.
We have much needed rain today and most likely it will continue tomorrow. I’m sure I shall be complaining about dreary weather as the months progress, but for now I am accepting it. Thanks for stopping by it is appreciated.
Having seen this technique done by Natasha Foote, I wanted to give it a try. I also needed another Halloween card, requested by my neighbor for someone who likes owls. As my buddies know, not my go to type of card usually. Seeing the pink challenge at DD gave me the opportunity to combine the new technique and a Halloween card so here it is. I watched the video a couple of times and then came up with this background. Tash used fine embossing powder but I used Ultra Thick as I wasn’t going for a smooth finish here. I did apply several layers of UT though. I added it to the black card front and set it aside. Using an Infinity circle die from HeroArts I die cut my circle and stamped it with a few images from 2 holiday sets. I added some silver sparkle to the stars and to the owl. It seemed a bit empty so I took the face stamp and used it to fill in a few areas. I managed to smudge them a bit and was going to start again but decided that ghostly faces may be a bit smudged so I left them alone. Then using an alcohol pen I went around the edge of the circle so it had a thin pink border. The sentiment is flat but I added the fussy cut spider to the bottom just for fun. The background is very shiny but the photograph makes the colours look more coral than pink. In reality it has 3 different tones of pink and one dark shade that is kind of burgundy. Stamp sets used are from GKD.
Thanks for spending time with me today and for those living in Canada, Happy Thanksgiving.
Autumn Colours is the theme for the current Make My Monday challenge and we look forward to seeing your creations in the gallery.
My card features two new items, a background plate die that cuts autumn leaves and acorns and 2 stamps all from Your Next Stamp. The panel behind the vellum die cut piece is a smooshed watercolour paper layer. I was a bit disappointed with the vellum die cut as it disappeared and the leaf openings didn’t show up well. To combat this I added additional colour through it along with some copper and gold Perfect Pearls which improved it a lot. The focal image is done with pencils and a little Sakura glaze on a cream scrap piece which I then die cut. I added it to a slightly larger oval. The leaf outlines are from some I found in my stash and had forgotten I had. They are sticker leaves (from the Netherlands) and I thought adding them behind the oval layers adds some extra interest. The sentiment as popped up with foam tape and I added a few gold embellishments too.
I think the focal image is cute and hope you do too. The squirrels are busy in my garden and likely planting things I don’t want – more weeding Sigh! Thanks for stopping by, it is appreciated.
The challenge for the next two weeks at https://cardz4galz.blogspot.com/ is to use green and cream on your creations. I have used a technique found on Natasha Foote’s Youtube channel that gave me two for one with only the orientation of the stripes being different. It is a great way to use up scraps and is an easy card to make. After choosing the greans I wanted to use I proceeded to cut them into strips and following the tutorial added them to a thin piece of CS. I die cut the heart one by one after I had marked the placement with a tiny pencil mark. Then I cut the heats in half. Each piece was backed with foam tape before being added to the card front. In both cases I turned the cards into a get well message using stamps from a Joy Clair set. I added green embellishments to one and gold to the other along with a tiny gold bow. I like them both, which do you prefer?
I hope to see your creations in our gallery and look forward to viewing them. Thanks for stopping by, it is appreciated.
It’s colour challenge at Sunday Stamps this time round and I chose not to do anything specific to Autumn, but it is at least a thank you card. Hopefully I managed the colours with this effort as it is challenging to match colours. My stamp order from Your Next Stamp arrived last week and this was one of my choices. Sadly they are closing down, which for me is a shame, as they are located in Canada and therefore Canadian dollars and less postage.
Using a scrap piece I stamped the bird and then coloured him with pencils trying to use the challenge colours as much as possible. I fussy cut him out and added some foam tape before carrying on. I had a cream scrap piece of CS so I stamped the sentiment at the top using two ink shades and then I added the bird underneath. Gave him a small amount of shading underneath so he was grounded. Using some shimmer CS from SSS I cut 2 panels, slightly larger each time, from gray and a darkish pink similar to the shade next to the gray swatch on the photo. It looks a bit darker here but is actually a fairly close match. I added each layer and then decided on a Kraft card front (neutral) but felt the smaller layers were not quite right. I remembered that I had this shimmer CS which is close to the swatch on the left side, second one in, and die cut it using an unbranded rectangle scalloped edge die. I thought about bling but decided to leave as is for now. I can always change my mind.
I quite like the result and appreciate your stopping by to take a look and comment. Your time is precious and I am always happy if you spend a little of it with me.
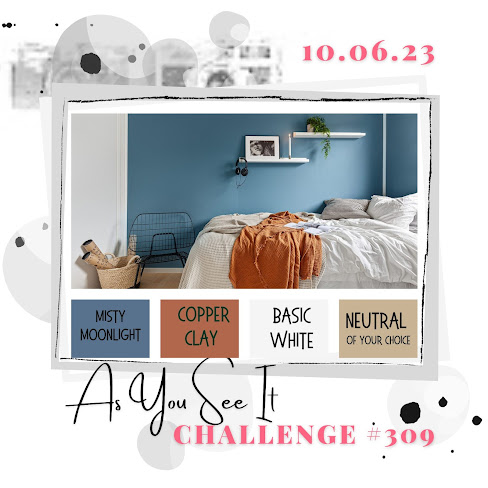
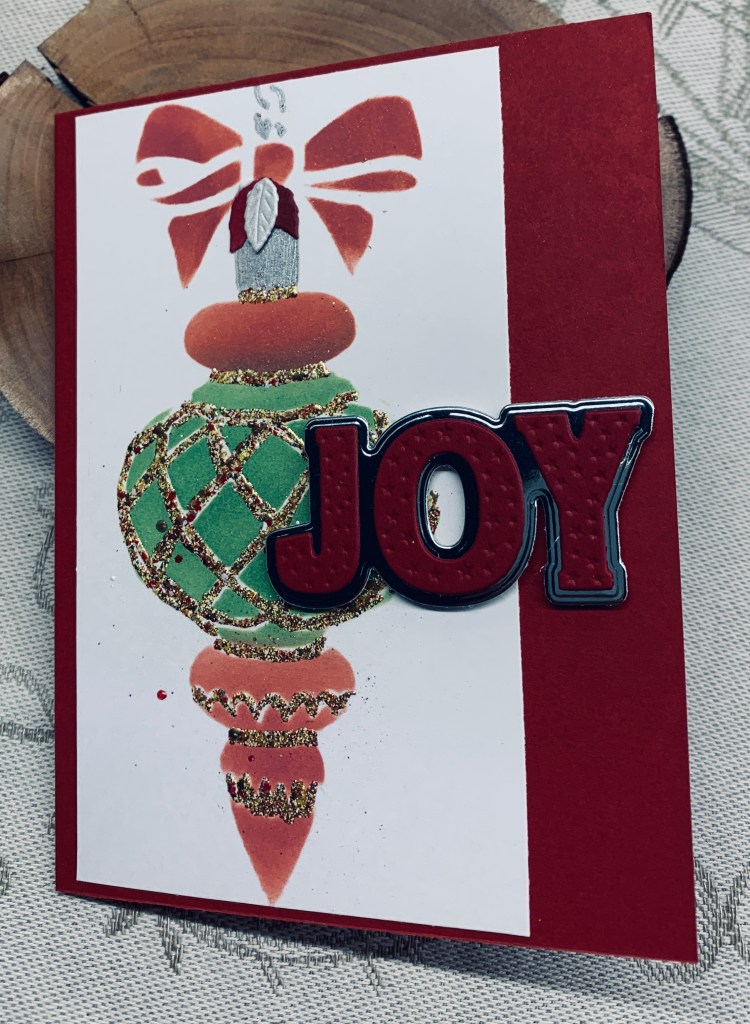
This image is a Kaisercraft stencil from a set I got at a long ago card crafting day in a local store. I made it weeks ago and hadn’t decided how I wanted to use it so it sat on my desk. Because of its size I wasn’t sure if I wanted to make a smaller slimline or keep to my regular size card. In the end I cut it down so it would fit onto a regular card front because it seemed to work best for the challenge at As you See It. It also fits the anything goes Peace on Earth challenge too. Once the ink had dried after stenciling I went over the lines with an embossing pen and added in the Cosmic Shimmer gold embossing powder which also has some red dots in it. This powder gives it all subtle sheen as well as dimension. I used a silver pen to complete the chain and the hanging portion of the bauble. The die is a new one from Scrapbook.com and is in two parts so I used mirror card for the back and red for the rest.
I was just about to post this when I took another look at the photo and realized there was a bad mark on the hanger. How it happened is anyone’s guess but it needed fixing. I went through some odds and ends and found a few small leaves and these were added to cover up the error. Hopefully it hasn’t spoiled the card too much.
We have one of those crisp fall days today, so it is pretty outside although a bit chilly if one is in the shade. Tomorrow we are supposed to get rain, which we still need, so no complaints about the weather for the time being. I hope you are all enjoying some decent weather wherever you are. Thanks for stopping by, it is appreciated.
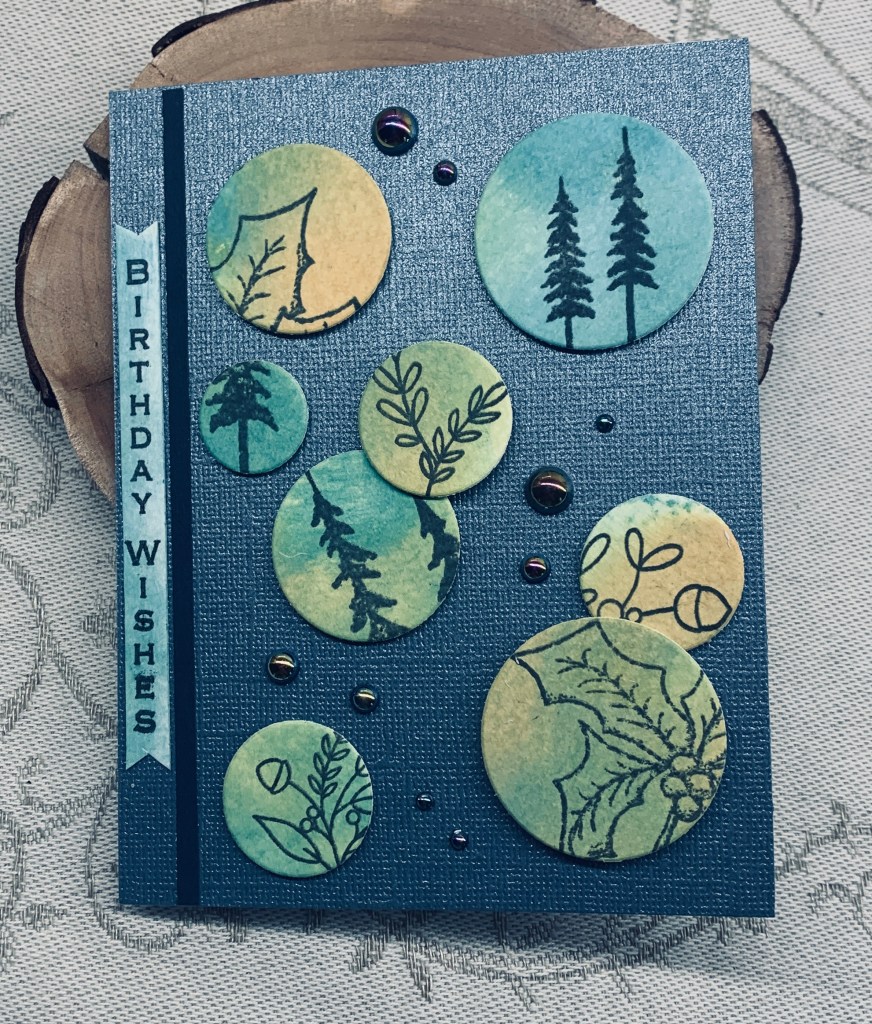
It is an honor to be guesting at Seize the Birthday with the challenge theme being Repetitive die cut. I was fortunate because when I found out about being the guest designer I was already mulling over an idea that involved repetitive die cutting. Having seen quite a few cards that used something along these lines I was eager to try my own and this card is the result.
Using a piece of watercolour CS I inked it using the ink pad directly to the paper. Then I took a sponge and spread it around a bit before adding another colour. I used Broken china and Wild Honey Distress Oxides using a sponge as with the first colour, and because the ink wasn’t dry before I added the second colour they mixed well in places to give a green blend. I left it overnight to fully dry before moving on to my next step which was to stamp images all over the piece. For this I used two stamp sets, one an MFT set and the other by GKD. When I had enough images on my piece and had ensured the ink was a deep enough black, I used a infinity die circle set from Hero Arts and cut out various size circles with selections from each stamped image. I took a piece of Glimmer CS from a small pack from Lawn Fawn and cut it to size for the card front gluing it onto a white note card. Then, I took a scrap piece of navy CS making a small strip down one side. The next step was to play with the circles moving them around until I found the right placement. Once I was happy with the placement I took each circle and added foam tape popping up each one as I did so. One or two circles had a doubled up piece of foam tape giving room to add another just behind.
I added some Trinity Stamp gems that change colour as the card is moved and a Vertical Greeting from an old GKD stamp set. I cut off a small strip from the inked piece as the background for the greeting. I think this set is probably the very first one purchased from Gina K actually. It was fun creating this card and I love how it has turned out. I like that it can be used for either a male or a female too although most likely it will be for a male’s birthday.
Thanks for spending your valuable time with me today and good luck with your own creations for the challenge.
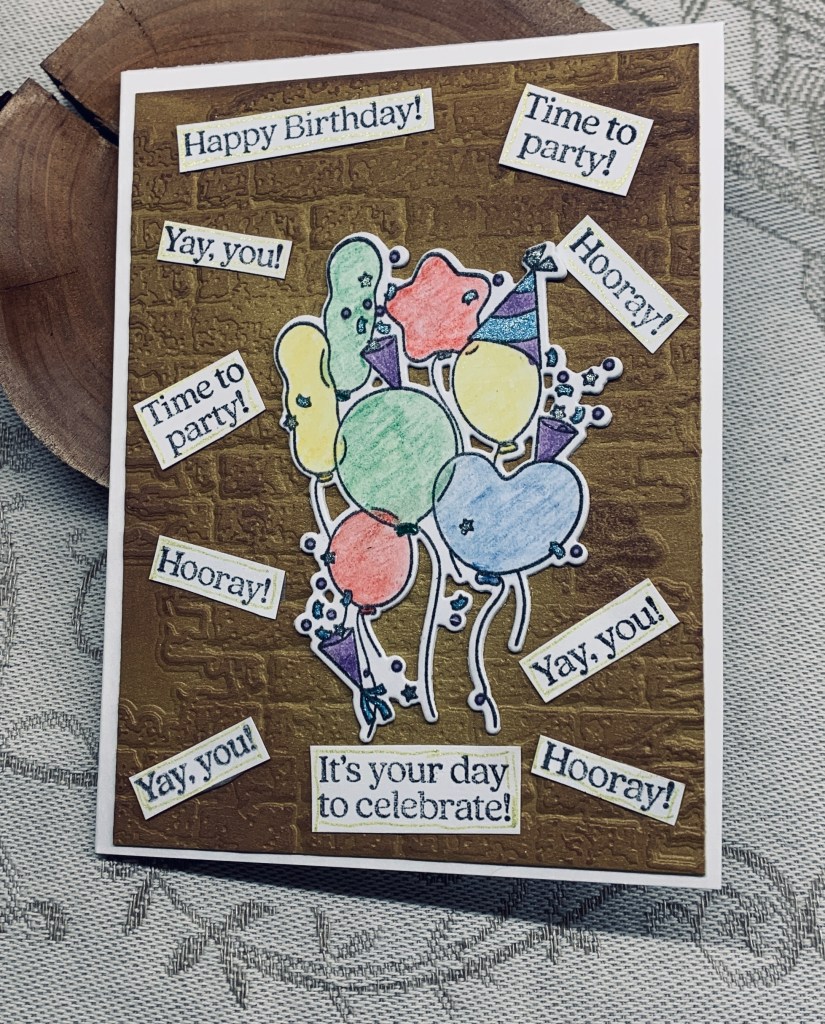
After I had made this card I realized that one of the design team members had used the same stamp as mine. I received this one as a gift from SSS and had not yet inked it. Without really going through the design team examples until after I had done mine, I found it interesting to see how we each use the same stamp and yet made a completely different card.
I chose to use an older EB Folder from Sizzix and a scrap piece of old gold CS to which I also sponged some Vintage Photo ink so it darkened a bit. I stamped, coloured and die cut the balloons adding 2 other die cuts behind for stability and dimension and then added it to the panel. Using all the sentiments in the set, I stamped each one several times and hand cut them, not worrying if they were completely straight. I fooled around with placement before gluing them as you see. I found them a bit too stark so I went around each with a Sakura gold glitter pen and was satisfied with the result.
All in all, I’m happy with the card and appreciate your stopping by to spend time with me today.
Make your own background is the challenge theme for MMM and I went with a night sky look. As I’ve mentioned, I was commissioned to make 4 Christmas cards, each with their own theme based on the recipients taste. In this particular case science is the interest requested although no specific science was chosen. I had to think quite hard about this card, particularly because I have no science related stamps. I thought an Aurora Borealis was somewhat science related so began with that idea. This one here is my third attempt at a background as I didn’t really like the other two. They will be used eventually and hubby likes them so he is making photographs as I type. Once I had the colours sponged I went over the entire piece with some black soot. Let it dry and then used a Hero Arts star stencil and Versamark which I heat embossed silver. Set it all aside as some more thinking went on. I went through many online images that were sort of science related but not a lot popped for me. Then I came across this equation and I thought it would work. It was already a jpeg image but resizing it wasn’t going to work, so I recreated it using CorelDraw. I think recreating it took me longer than anything else I’ve worked on recently. The Santa hat is from a Tim Holtz set stamped and die cut. This was then coloured using glitter pens. I added some Cosmic Shimmer Fluffy stuff and used it as the tree topper. The equation is kind of tree shaped and the baubles are all glittered. The Santa and Reindeer came from a store bought card that I deconstructed and I used them because they are small. Anything I own would have been too big.
The card will be entered into the Anything Goes Peace on Earth Christmas challenge. I quite pleased with the end result and it is certainly different. Thanks for stopping by.