Huey Chameleon

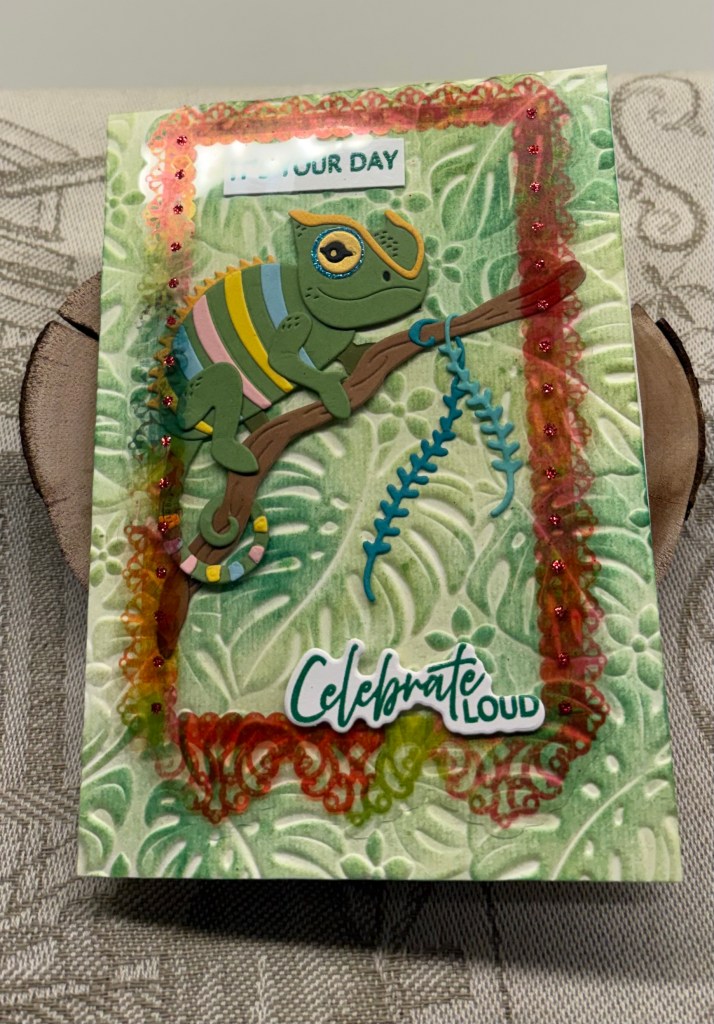
I started this card mainly with Seize the Birthday in mind, but it sat on my desk for a couple of days because I didn’t have enough time to continue with it. In the meantime a second challenge began at CYHTP and I realized it would work for that too.

The printed acetate sheet is the last of a bunch I purchased many years ago because I thought they were pretty. Then I couldn’t think how to use them due to my lack of knowledge and skill. These days I wouldn’t have kept them so long unused.

The challenge at Seize the Birthday is to use acetate or vellum and the one at CYHTP is always an Embossing Folder, but with an optional twist. The twist this time is Boys to Men. My card fits both challenges, although I acknowledge that Huey would work for a woman as well.

Using my latest folder from Spellbinders and some watercolour CS I embossed the background and then used ink in two shades to add colour. I like the texture on the watercolour, it takes ink well and it seems to work great for these leaves. I wondered about adding dimension around the sides of the acetate, but it showed through too much so that idea was clearly not going to work. I already knew I was going to use the chameleon die set, and I set the acetate to one side giving me time to think about it and proceeded to cut and build Huey. Once he was built I took another 2 dies from a different set in this kit and cut the branch and the vine fronds.

I added Huey and the fronds to the branch and then placed him on the card front laying the acetate piece on top. Deciding this would work I glued him down and added a strip of scortape to the acetate at the top only. Using the sentiment and matching dies from the kit, I stamped the sentiment and heat set it clear. The It’s your Day was placed underneath the acetate at the top and the other part was added on top of the acetate at the bottom.

The card size is slightly larger than I would normally do, but I wanted to be sure the acetate would fit nicely and making an envelope for it is pretty easy. Although making Huey was time consuming, it wasn’t difficult and I was smart enough to print out the explanation for each piece which I’m keeping with the set. The hardest part of this card was taking the photo and it took several tries to get this one, which is still not that great. No matter where I put the card there was a light source that glared on the acetate, which is why you can’t see the entire sentiment at the top. All in all, I’m pleased with how this turned out and I have a few coloured stripes left to have the next Huey partially prepared.

Chellenges entered:

Thanks for stopping by, I appreciate both your time and any comments you may leave.

Blossom Window Arch

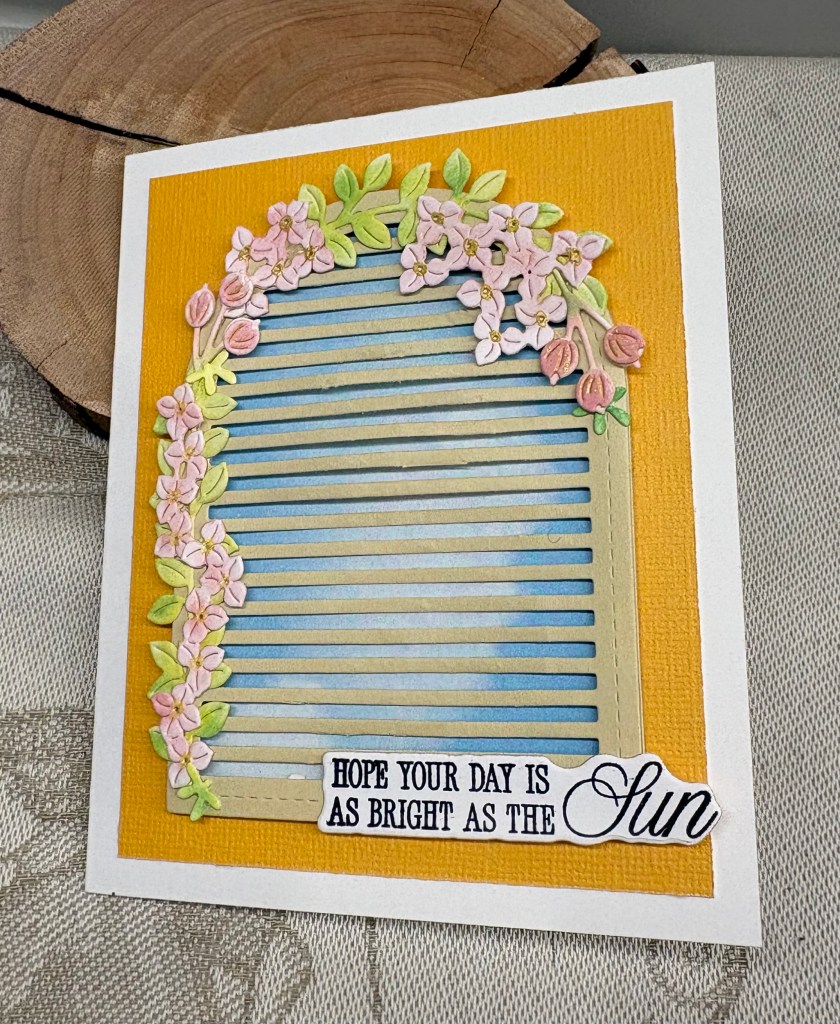
This card has been created with 2 challenges in mind. The first being As You See It who want to know which occasion cards we make the most. In my case mostly birthdays. And the other is Seize the Birthday who ask us to create a Spring garden.

Having just acquired my second set of Craft Addiction Arched slatted dies, I decided to use the larger in the set to create my window. Once die cut, I used foam tape and added some sky paper in behind and an additional arch to give the piece more support. I pulled out a couple of Spellbinders die sets, La Dolce Vita and Citrus spritz, and proceeded to cut the leaves and flowers. I thought I might combine both sets on one card but quickly realized this wouldn’t work so there are only a few pieces here that are from the Citrus set and I have the rest ready for another card.

I used ink and brushes to add colour to the die cuts and then played with placement until satisfied. Once glued I used an off cut linen look yellow card for the background and then added it all to a white card front. The sentiment is part of the collection and this set has its own dies making it easy to use.

I’m quite happy with the end result and had fun putting it together. I won’t be around much this coming week as we have a guest here from tomorrow for 6 nights. It will be great to see her in person after several years of absence.

Sadly I have to make a sympathy card today as I’ve just learned that a cousin has passed away rather suddenly at age 68. It is a shock for everyone, but the diagnosis he received 2 weeks ago told him there was no hope and no treatment available. At least it wasn’t a long drawn out painful end, which doesn’t help his family, but from my own experience, is still a better outcome than watching someone suffer for weeks as happened with my youngest sister. I’ll get the card done now so I don’t have to think much about it during the visit with my friend.

Thanks for stopping by, I appreciate you and your time.

Birthday Fishes

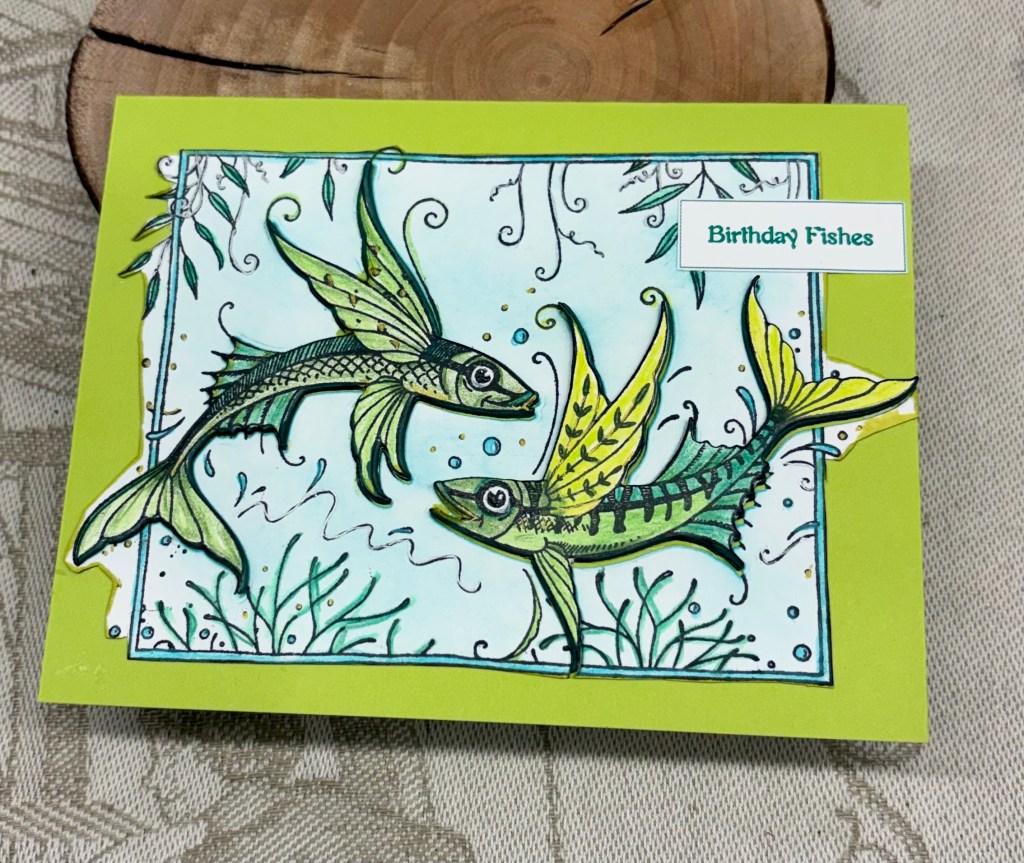
I bought this stamp and die set, by Pink Ink Designs, along with other items from a sale basket at a local craft store late last year. The items were set aside and then our computer tech friend came to install my new computer and to transfer all my files from the old one. He needed a lot of desk space while using two monitors and two CPU’s so I cleared everything away. In the process I put these items somewhere and couldn’t find them until today. They were safely set inside a cupboard but until I pulled out my stencil storage I couldn’t see them. I knew I would find them eventually haha.

Anyway the challenge at Seize the Birthday #322-Green as Main Color so I went to town with different shades. After stamping the image I used Prisma pencils to colour it and using the dies I cut the fish from the frame. I also used some scrap card and cut several fish layers so I could stack them for dimension. Before I popped the fish back into their places I used a little ink on the background. After playing with it I decided I wanted to cut the frame down so I carefully went round it with scissors. Before adhering I also went around the edges with a green marker. I did the same to all the fish layers before I glued them together. Then I just popped them back into their places on the image. Initially I had a white card base ready, but decided to go with this green one instead.

My sentiment was created on my computer as I had nothing that I liked enough in my stash. I had no idea of whether this card was going to work, but now that it is done, I’m quite pleased with it. It took me most of the afternoon to make, but as the day progressed the weather also deteriorated so being inside crafting was just the ticket.

Thanks for spending time with me today, I appreciate you and your time, as well as any comments you may leave.

art deco step/easel card

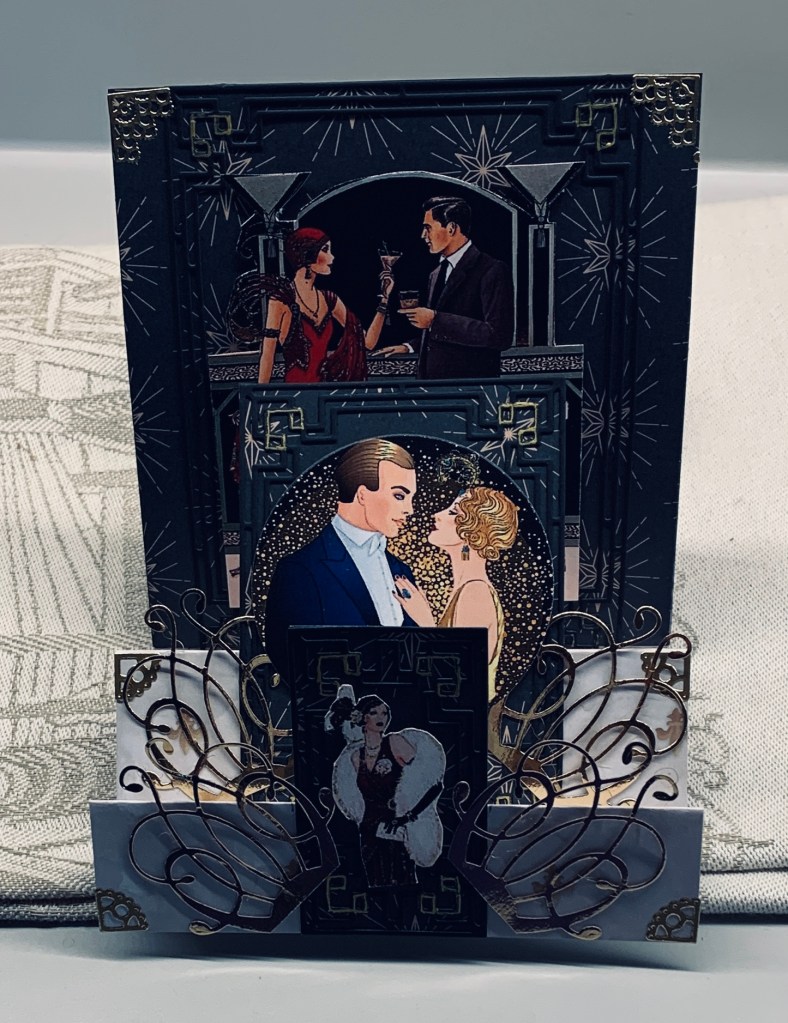
Challenge #248, as chosen by me, here at https://cardz4galz.blogspot.com/ is all about Art Deco. I shall also be choosing the winners for this challenge.

Recently I purchased a new paper pad that has a lot of night sky designs as well as patterns that I’ve used here. It is a good quality pad, but still a little flimsy to use without a card base. That said the card design called for a card base that is bigger than any heavier stock I have so I used the PP on its own and reinforced it underneath in a few places with scraps. The easel part of the card wasn’t holding the steps up properly so I added a band underneath that holds them more securely.

The black art deco frames are a set by Altenew and don’t show up as much as I wanted them to because of the darker PP in the background. I jazzed up a few sections a little with a gold pen. The corners are done with stickers from my stash, I don’t use them that much these days but at least I remembered I had them. The swirly bits are from a Memory Box die and I cut 2 then cut them in half. The images are off the Internet and then jazzed up with sparkle pens. The smallest image on the front I fussy cut and just popped up. The middle one I die cut with a Hero Arts circle and the back panel I fussy cut around the lamps and the arch before popping up with foam tape.

The photo doesn’t do the card justice, as although it’s somewhat dark, it isn’t as dark as it appears here. My hubby likes the card, and I’m sure it will grow on me over time. Right now I’m not sure how I will use it but there is space on the back to write a message when the time comes.

Thanks for joining me today, and I hope to see some spectacular designs in our gallery. Have fun creating.