The current challenge at Shopping Our Stash is to make a card without white. My challenge was to make a new baby card for a dragon boat team member and hubby, who have the joyful experience of becoming a grandparents for the first time. Being able to combine what I needed with the challenge was a bonus.
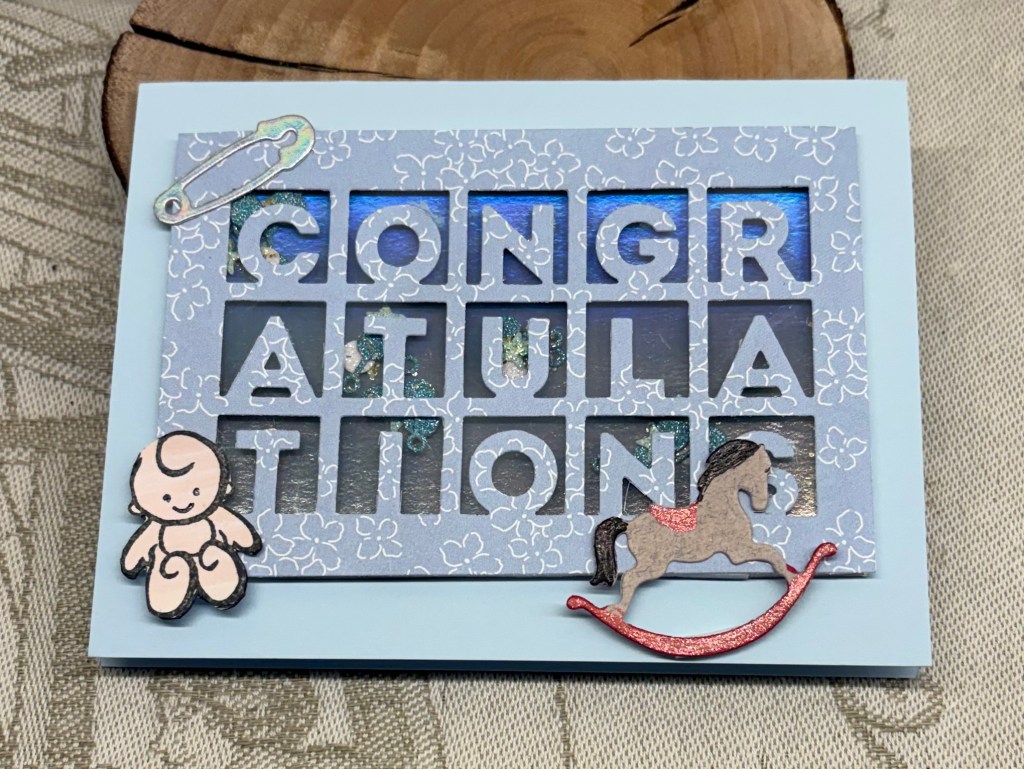
Its funny how one can own a die for quite a number of years and not really use it, then in one week suddenly find uses for it. I had this MFT die set on my desk and the idea came to try to make a shaker card. (I’m generally not good at these, so rarely do them). As the baby is a boy I went with some blue DSP and cut the panel. I then backed it with some packaging plastic and adhered some of the letters that were sticking up a little too much. Using 3 of the confetti dies and some scrap glitter CS I die cut the confetti. After going around the congrats layer with some foam tape strips I added the confetti bits inside and used a scrap piece of silver CS to cover it all. This layer was then added to the card front. Taking a very old wooden block stamp, I scribbled some flesh coloured alcohol ink, let it dry, then stamped the baby on top, after which I fussy cut it. The safety pin and rocking horse are from a set made by a company called Little B. Don’t think they exist anymore as this is another set I’ve had for a very long time. I coloured the rocking horse with some Sakura gelly roll pens. Unfortunately the glitter CS confetti tends to clump together and it doesn’t shake freely so another lesson learned here. Told you making these isn’t one of my talents. The inside words were generated on my computer – Between the earth and the sky above, Nothing can match a Grandparent’s
LOVE.
I guess you could say, I truly shopped my stash to make this card. It is now in the mail and I hope they like it. Many thanks for stopping by, I appreciate you and your time.