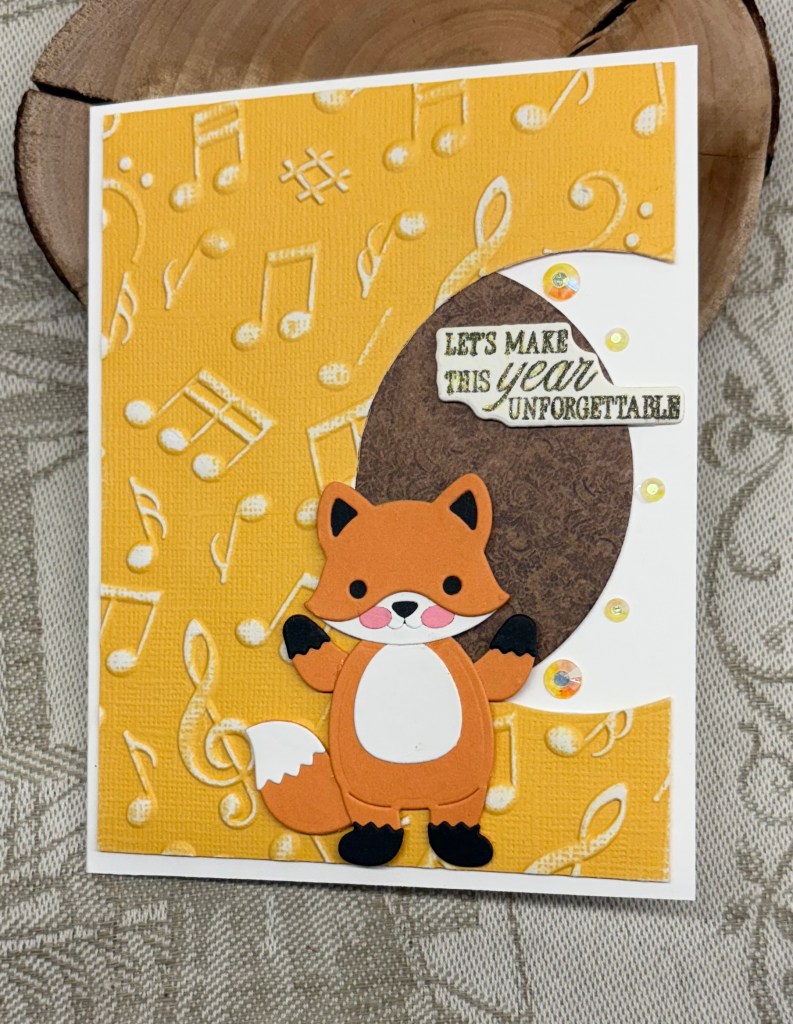
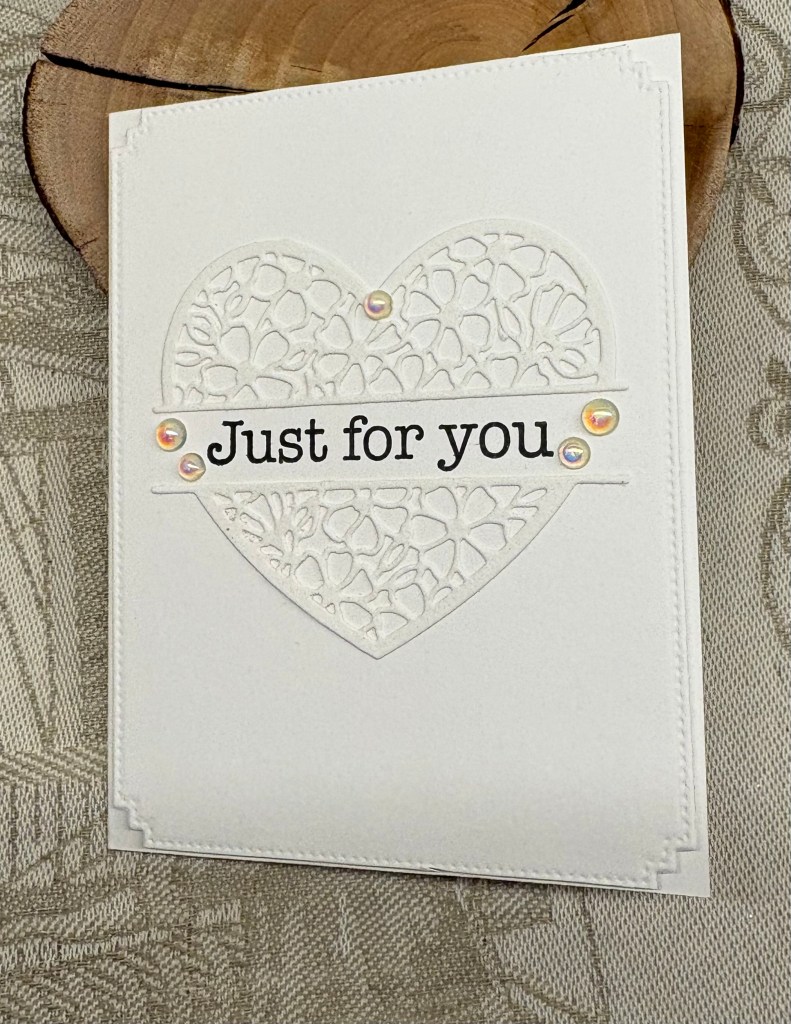
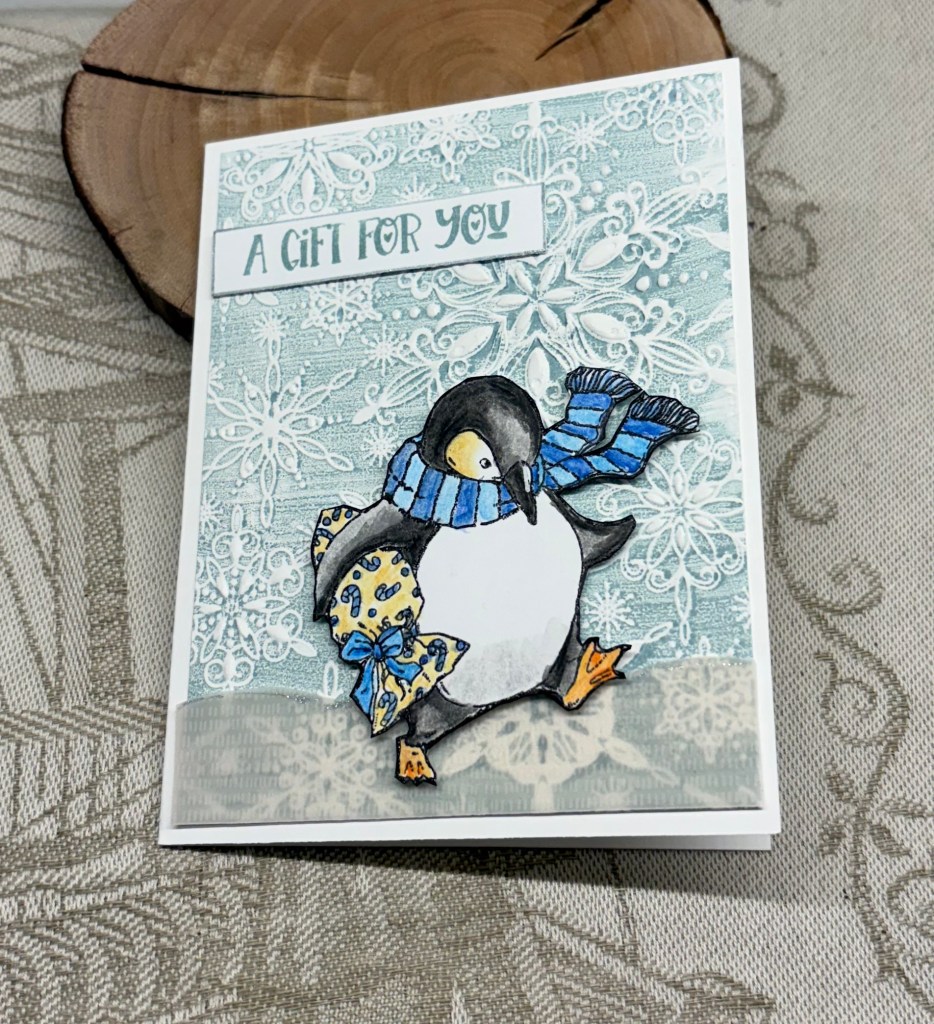
May your stocking be full

September 2025 Peace On Earth Challenge #95 which is an anything goes Christmas challenge although there is a mood board for anyone needing a boost for ideas. I had the stocking already done as I was playing with this die a few posts ago, and I decided to use it here.

The stocking is from a small die by Marianne Designs, purchased in the Netherlands and I cut it using different PP so I could paper piece a little to give it more definition. PP is from a Recollections pad. The background layer is actually from a store bought card received last year that I thought would work for something else one day and it works well here I think. The tiny sentiment is from a GKD set, and the star banner is from Scrapbook.com. The lacy piece is a border die from Crafters Companion that was poorly cut. I layered it with another poorly cut piece and decided it would work as a kind of mantlepiece to hang the stocking from. The twine is from my stash and it took me forever to tie it into a satisfactory bow. The threads kept separating but I managed in the end. I added some sparkle to the snowflakes in the stocking as well as some red dots to the leafy area.

This card is a fairly simple one and although there are layers its still flat enough to be mailed as regular postage, although not to the USA, as their regulations have changed and anything that isn’t paper means it has to go as a package, which is becoming expensive.

Thanks for spending time with me today.

fall colours

Yesterday I posted to the As You See It speed challenge and after I had, I realized that perhaps I hadn’t met the challenge properly. The Challenge #355 – Lively Leaves clearly says speed stamping on the image and my card had no stamping on it at all. Given that AYSI is one of my favourite sites to enter I decided I had better make another one and this is it.

I started by using some inks on a plastic sheet and a wet brush and swiped the brush across the panel in curves at the corners and not bothering to be careful. Then I took the Altenew leaf sprig stamp and stamped the leaf over the top. This took several tries as my inks weren’t quite dry. Sentiment is from the same set. Using a new die set from Amazon, I proceeded to cut the layer and then did a second one in gold. Why dies don’t cut properly when we are hurrying always puzzles me, as I had to repeat the cut and then spend more time than I wanted on getting all the bits out of the gold layer. I did take time to add the enamel dots but they were easy compared to poking out the gold piece. Had the die cut properly my card would have been finished in 6 minutes (a record for me) but hey ho, it took more time and I finished the card in 8 minutes and 30 seconds.

I’m not sure I like the end result, as my colours are a bit darker than I wished, but when doing something for speed it is not easy to fix or change.

Thanks for joining me today, I hope your Sunday has gone well. Ours has been so hot being outside was virtually impossible, but we shall do a BBQ tonight and eat on the patio.

put a bow on it

It has been a while since I had the time to enter into a Sunday Stamp challenge, but today I managed it. SSC367 Put A Bow On It is the theme and because I had been playing the past two days with using kitchen foil, alcohol inks and some leaf printing, in a way this card almost made itself.

I placed the leaf panel into a stitched rectangle unbranded die and cut it to size although it required some replacement of the die to achieve the length I wanted. Yesterday I had added some crumpled kitchen foil to some card stock and earlier today I played with adding inks to it. I quite liked how it ended up so using an Altenew die, I cut the leaf sprig you see here from part of it. After adding foam to the back I added it to my leaf print panel. The little tag is from a set that my hubby bought many moons ago and I didn’t keep the info on the 2 sets he gave me. The sentiment is from a SSS set and I heat embossed in gold. I found the red and gold thread in my box and by pulling the threads apart I was able to combine both and make a bow. A lot of blue air, as my fingers would not cooperate, but I managed in the end. After adding a bit of colour to the tag I attached it and using tweezers pulled a bit of the thread through the hole.

While playing I hadn’t really thought about a design for the finished panel, but I did have the Sunday Stamps challenge open on my computer and when I took another look at it, I realized I had the makings of a card to meet the challenge. As you can see I added a border of some CS that was similar in hue to the colours in the leaf and then using the leftover piece I added it to my card base so it fit the sketch. Once the top layer was added it met the theme perfectly.

I’m pleased with how it turned out and had fun playing with the inks although if you had seen the mess I made of my glass mat and fingers you would laugh. Fortunately a little alcohol on a sponge helped me to clean it all up easily. Many thanks for stopping by, your time and any comments you leave are truly appreciated.

Vellum thanks

It is my turn to choose the theme for the latest challenge #257 here at https://cardz4galz.blogspot.com/. My theme is that you use vellum and here is my example. I found a piece of pink vellum in my scraps and decided it would work well. I used a very old rubber block stamp and stamped the words using Versamark ink which I then heat embossed in gold. I wanted it to pop up a little so it took me some time to figure out how to add foam tape so it wouldn’t show but I managed it. I had a scrap piece of gold card and I used an unbranded stitched rectangle set to cut out a piece the right size. I couldn’t find a way to turn it into a frame using a die, so I carefully measured and then with a ruler and craft knife cut the inside to give me a frame the thickness I was hoping for. I used some foam tape around all the sides for dimension and added the vellum to it. Taking an old corner floral stamp from a GKD set and using a slightly darker pink than the CS I stamped each corner not worrying about any doubling up as I knew most of it would be covered. Taking a butterfly stamp from Crafters Companion and a piece of regular vellum I stamped 3 and heat set them using clear embossing powder. When it was cool enough I turned it to the backside and used some inks direct to the vellum. Let that dry, but it was taking a bit too long so I did use some heat to hurry it a bit. Fussy cut them out and added the bodies in black glitter using a small die from a StampinUP set. They were added to the frame as you see and I finished the card off with 3 gems from my stash.

I honestly wasn’t sure this was going to work or even be pretty, but in the end I am happy with the result. It does look better in R.L. than on the photo.

Thanks for spending time with me today. We hope you join us in our gallery and we look forward to seeing what you create.

fall is coming

On a dog walk yesterday I found a beautiful fall leaf that was mostly intact so I brought it home. Not having the time to play with it, I set it aside with a damp cloth on top so it wouldn’t dry out too quickly. This morning I decided to use it and while thinking about it, I also checked out the latest challenge at Double D. They were calling for butterflies so I decided to combine my leaf with a butterfly.

I cut a 6X6″ card then spent some time painting the back of my leaf with colour, which when done, I spritzed slightly before laying it in position on my card. Using the tool I generally use to press stamps in my Misti or Stamping wheel, I carefully ensured it was pressed fully onto the card. I left it for a minute or two and then gently peeled off the leaf and what you see here is the result. I did stipple a little bit of green with a brush. There was enough colour left that I was able to do another much smaller piece for use later. The sentiment comes from a Joy Clair set and my butterfly is die cut using scraps and a StampinUP set. I chose to use some green embellishments from my stash that came from a package purchased at Michaels a long time ago.

My hubby was so enamored with the leaf print that he stole the card from me before I put it together and proceeded to take photos of it. When I got it back I went around the edges with a brown Spectrum Noir marker and then added the rest. I have to say I’m quite pleased with the end result and the leaf sure makes an interesting texture on the card.

Thanks for spending time with me today, I appreciate you and your time.

dale’s place

above showing card standing upright left side it is lying flat.

Our friend, who is always so generous with her time and talent, has a birthday coming up soon. She is a keen gardener and I wanted to make her a special card. Having done a bench style card for my hubby earlier this year, I had the idea of making another in a garden theme. I returned to Sam at https://mixedupcraft.com/2020/06/13/cute-bench-fold-card/ and this time CASE’d her card. In my case I don’t have a garden stamp set or dies, but I did have some pieces cut from a store bought card that I had saved and with my new Spellbinders kit could make florals and some pots. The gloves, rake and shovel were Internet sourced which I resized, printed and fussy cut. Like Sam I created a tray even including handles and I added some tiny flowers I’ve had forever and incorporated a few die cut leaves as well. The window is an A.I. die and the scene in the window is cut from another item I saved, which I think came from a chocolate box or similar. The wood grain paper is a dollar store product and the counter top is from my stash. I hand made the sign adding some cord and a tiny gem to hang it from. I did the same thing with the gloves and also with the saw hanging on the inside right panel. The planter is from my stash and I cut it down to make it work better and disguised the section where I added the piece together, with flowers. My flowers and leaves were sponged with distress oxides and I coloured the two pots with a copper marker and then some Sakura gel sparkle. I figured out how to add the watering can so the card can still be folded flat although as we see our friend often I’m hoping to give it to her rather than mail it.

When I began the card, I wasn’t really thinking about adding it to any challenges, but after checking a few I found that it does fit into some themes so I’m going to add it to the following:

https://thefourseasonschallenge.blogspot.com/, Colour around birdhouse and pots help my card fit into this challenge

https://secretstamper.com/2025/08/creative-creases-106/#more-47548, Anything goes fun folds

https://dd-tripleb.blogspot.com/, the butterfly in the window and the blooms on the shed.

Thanks for stopping by, your time and any comments you may leave are always appreciated.

favourite colour

The latest challenge at Seize the Birthday #310-Use Your Favorite Color. My favourite colour is almost always purple in any variation and I like it paired with yellow and or gold. I wasn’t too sure of what I might make for the challenge so decided to just play around with a few scraps and some dies. This card is the result of playing. I had no real idea in my head, except that I wanted it simple. My card front is from GKD, the dies used are from Essentials Mixed edge rectangle layering basics and a heart shape from Hero Arts infinity dies. I cannot remember which stamp set the sentiment is from as it was one of several I had in my stash of oddments although I suspect it is from a dollar store stamp set. The purple paper is from StampinUP and was sitting around on my desk for several weeks. I didn’t like the patterned side but I love the variation in tone on the purple side. The yellow is what I have in my stash. I cut another heart from gold which I then cut in half and added behind the purple one to give an edge to it. This was then popped up with some foam tape and added after I had glued the rectangles in place.

This is quite a simple card, and I like how it turned out. Using this die set was also a good idea as I’ve had it for some time and not used it nearly enough. Thanks for stopping by, I appreciate your time and any comments you may leave.

musical note Christmas

The Christmas challenge at Peace on Earth Challenge #90 had some lovely colours in the inspiration photos with the bottom right corner one appealing to me the most. I’ve used a few here but slightly muted.

The other day I was playing with a napkin image of musical notes and I attached a larger portion of it to some card stock for a future background. With the piece leftover I was about to set it aside when I wondered what it would look like behind an opening? On my desk was a scrap piece of CS that I had already die cut some banners from and I placed this over the top. It looked good so I cut two more banner openings from the opposite direction then attached it to the napkin piece. After trimming the edges I decided to ink around them and slightly on top to age the CS a little. I remembered that I had this MFT set of bird and die stamps so on another scrap piece I stamped two birds and some foliage. Coloured it all with pencils and water, die cut them and attached as you see here. I used the Just a Note sentiment, from the set, at the top, but as I’d decided I wanted it to be a Christmas card the wishing you and Merry sentiments came from a Divinity Designs set. I had the embossed piece leftover from a project and I added the bird piece to this. Taking some copper thread I added a few turns and tied into a bow before adding the small gem to the middle. Then I added the layers to the main card front. Not a good day for tying bows as it took me more than 10 minutes to do with a bit of swearing thrown in.

Its a Dragon Boat paddling evening, so I have to leave in a few minutes, but thanks for stopping by and for any comments you may leave.

Sympathy window

Once again I needed a sympathy card, 5th one this month. As Double D Frames Challenge is looking for frames, I figured I might as well make a card that works for that as well as for the friend it is intended for. At the same time it gave me a chance to use part of a Spellbinders die set that came with my kit for the Weekender Retreat. I used just the window arch and interior piece, plus the steps, along with a Gummiapan floral as a small topper, sentiment is from GKD and the background is DSP from StampinUP. Florals were coloured with pencils and because I messed up I had to add an additional flower near the sentiment as well as a fussy cut bird from the DSP to disguise the mess. I guess experience in card making means that we know what to do when we make a mistake. I used my score board to get the lines behind the scene. In the end I quite like the result.

We have heat in a big way, and I am glad that where we live usually means we also have a breeze as it helps to keep the house cool. Down in the town it will be almost unbearable. Tomorrow my dragon boat team are racing in an area that will be even hotter and I am glad that I will not be participating. I tried one race last year, did not enjoy it and decided that racing is not for me. Practices I enjoy as there is less pressure and fortunately the team understand my limitations. My hands sometimes just won’t hold onto the paddle properly which is disastrous if in a race. And if any of you are wondering whether your scissors are sharp, just do what I did and have them slip when cutting something. My finger is now bandaged so I don’t get more blood on anything. All I was trying to do was to cut my sentiment stamp in half so I could use it differently and I didn’t notice that the points of the scissors were going to hit my finger. BooHoo!

Thanks for stopping by, I appreciate you, your time and any comments you may leave. Have a great weekend.

balance

prepared pieces ready to begin.

Well this almost turned into a disaster, but I coped and still had 3 seconds left on the clock when done. Why, you ask – its the ‘dreaded’ speed challenge at As You See It Challenge #349 – Rapid Water and of course when in a hurry, whatever can go wrong usually does. In this case my die didn’t cut properly and I had to repeat the process on another piece of CS. That will teach me to make sure my cutting plates are in good shape LOL. After I stamped the image I quickly coloured using Inktense pencils and a water pen and then fussy cut as best as possible. I also stamped the sentiment and fussy cut around that. Stamp set is an unbranded one and the quality is definitely not there so the sentiments don’t stamp really clear on the word edges. With the more expensive brand sets this is never an issue. Anyway once I had these pieces ready it was mainly an assembly of the parts. After a quick glance at the clock and a deep breath, I cut down the blue layer to fit over the top fold square card base and adhered it. Then I added the water layer and even used two of the fallouts to create a wider splash zone. In adding the yoga frog and the sentiment the glue point jammed so I didn’t get enough glue to stick them properly. Doesn’t show here and is an easy fix now I’m no longer in a hurry. The die used is from Memory Box and I’ve had it for a long time.

After I’ve improved it one of my yoga group will receive this sometime this year. I shall also give my glass mat a good clean in a minute. Actually my entire desk needs a good clean. I need a craft fairy to magically inventory my new supplies and put them away and then to clean my entire space.

Had a fun Friday evening and full day Saturday with the Spellbinder’s Weekend Retreat. The items in the kit are going to be fun to use. I could have crafted along with the designers, but chose not to as it was more relaxing to just view. Had I tried to craft along I think I would have gotten quite frustrated. As it was, I became exhausted and fell asleep in my chair. I only woke up when I almost fell out of the chair. At least it was done in my time zone. Some attendees were watching and crafting at ridiculous times of the day and night. Took me all of yesterday to stop being so tired. The entire event is available to watch at anytime so I can always watch again if I need to.

Thanks for spending time with me today. We have sunshine with a cold wind here but it is supposed to get quite warm this week. Wildfires are burning in other provinces and our hope is that they don’t start here. It is so sad for those affected.