more stacked shapes

It isn’t often that I enter a challenge with more than one card, but for some reason the current one at As You See It, wouldn’t leave my mind. I suspect it was because I wasn’t that happy with my previous entry and unfortunately, I think I may have spoiled this one. However, I am happier with it than my previous try so will add it.

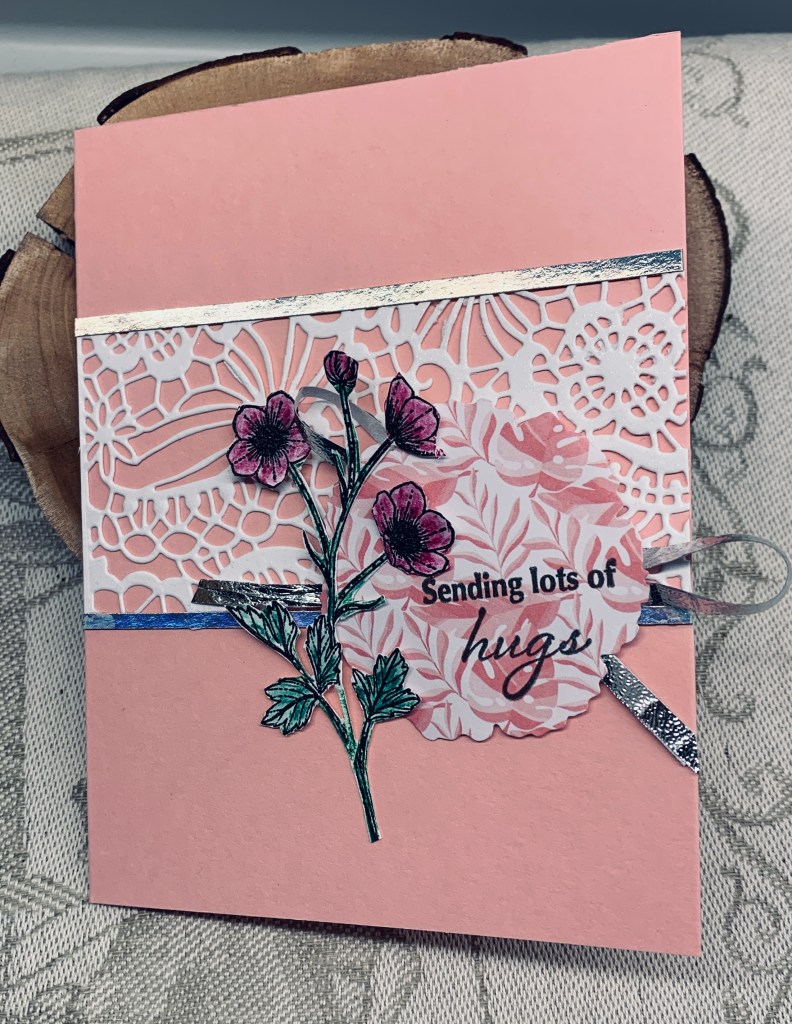
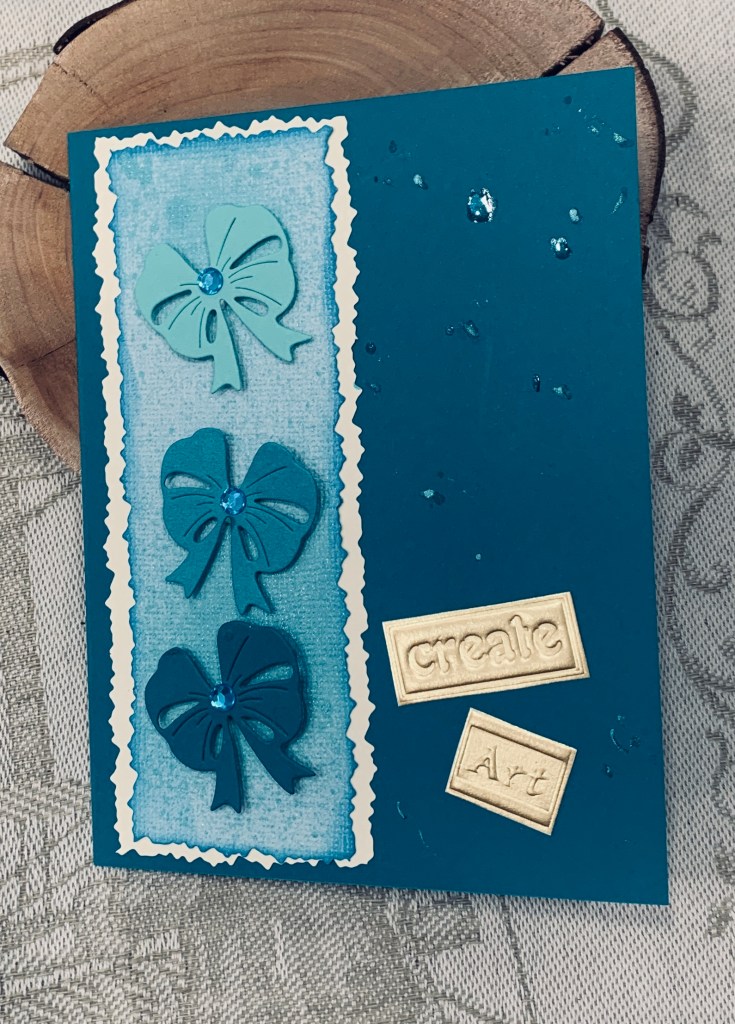
I found the textured piece of blue CS that already had a deckle edge on one side so I cut the other sides to match and then went around the edges with some Distress Broken China. I messed up slightly so used a Distress Mica Stain spray and added a little on top. I mounted this piece onto a cream layer that also was deckle edged. My idea was to use differeent bows but I found it looked best with the same shape cut three times. I graduated the colours from a light to dark. Then using foam tape added them to the top layer. The embellishments are from my stash and the sentiment strips are from a Hot off the Press words and quotes pad that I bought and then forgot about.

My mistake was thinking it needed more and I used the mica spray to add some spatter in the empty space. Sometimes it is smarter to leave something alone, but such is life, we often can’t. I will say it does look nicer in reality than on the photo.

Thanks for stopping by, I appreciate your time and any comments you may leave for me.

Stepper Fashion

This card was made a few weeks ago and has been sitting on my desk waiting for the right challenge to enter, so I’m only posting it now. It will be entered into a new to me challenge, https://timeoutchallenges.blogspot.com/2025/03/challenge-284-red-carpet.html and also to SOS544 – Fun Folds

To make it, I used a new Art Deco die set from Tattered Lace that I found second hand on E-Bay recently. I did use a tutorial for the stepper part but now I can’t find it so cannot attribute properly. When I do find it I’ll edit this post. I did, however, find that the design was a bit top heavy and the stepper section kept collapsing so to stabilize it I glued two of the folds together in the middle. I also added a small panel (kind of like an easel) at the back which helps to hold the heavier section upright and gives me a place to write my message. I used some StampinUP DSP for part of the design along with some gold mirror CS. My fashion lady is an online image I found, resized and then fussy cut. As I’m not certain yet about which occasion I shall use this card, for now I’ve not added a sentiment.

My hubby was rather impressed with this one and I have to acknowledge that I like it myself. Thanks for stopping by, your time is appreciated as are any comments you may leave for me.

Easter Chicks

Challenge #344 – Stacked Shapes is the latest challenge at As You See It. Not being in a creative frame of mind the last few days, meant that this challenge had me stumped for a while, even though it is a sketch. I was going through some dies and came across a set I haven’t used very much and I’m not 100% sure of the brand. Most likely it is an old Spellbinders or Sizzix as these were the ones I purchased most in the beginning.

I picked the next to last smallest and die cut three shapes using some scrap StampinUP DSP. From an old paper pad I chose the background piece and added it to the card front. Then I added the die cuts. In my die search I came across this Kokorosa set of chicks and decided to use these as my images. I coloured them with a mix of inks initially, but they were a bit pale so I went over them (after drying) with an alcohol pen which darkened them up a little. Gems are from my stash and the sentiment is from an old GKD set.

Thanks for spending time with me today. I appreciate you and your time. Hopefully you are all beginning to see signs of spring in your various locations. Right now we have heavy rain and it is quite cool outside, even our dog isn’t happy in this and we’ve all come home wet and chilled.

using up scraps

This card is made entirely from scraps left from other projects. I hate to waste stuff so often find ways to use up the bits. The little chicks are from a die set from Kokorosa and have been in my scrap box since last year, the sentiment is from Hampton Arts, the little embellishments are actually nail art and the rest is all bits and pieces. All I did was play around with the shapes until I liked the layout. Added the circles, striped piece and stamped the sentiment, after which I added the nail art. In the end I quite like what I came up with.

Because my card features the chicks, I’m entering it into the challenge at Double D.

Thanks for stopping by, I appreciate you and your time.

Tulip season

Challenge #246, chosen by Sue J, is all about springtime here at cardz4galz. Nothing says spring more than tulips in my mind. Having been fortunate enough to see the Keukenhof gardens one year when visiting my sister I decided to try to create a scene of my own.

I bought this windmill stamp on another visit and it is by Marianne Design. I stamped it and then fussy cut carefully before colouring with pencils and water. After adding some foam tape I set it aside to dry. Using a stamp from an old flower set by GKD, I stamped it in various colours to show the fields full of tulips. And taking another stamp from the same set I added some green here and there. These tiny stamps are actually the center of other flowers in the set, but they were the only things I had that were small enough for this scene. As it was an illusion of flowers rather than precision I made it work. Using a stencil by Tim Holtz, I added the sun rays and added some clouds using a SSS stencil. My sentiment is from another old GKD set. My hubby saw this before I had fully completed it and was impressed which made me feel good.

We look forward to seeing your ideas in our gallery. Have fun, and thanks for stopping by to take a look.

butterfly wishes

This card has been made with a specific person in mind. She adores butterflies so using my new StampinUP bundle die set, I created this for her. I did use a couple of tutorials as inspiration, but changed things up enough that mine is different. Once I had the folded over part done I added other elements. My background is from a photograph my hubby did. The print wasn’t good enough for his purposes but fit mine beautifully. It makes a great background. I sponged ink over the folded shape and added some clear heat embossing. Using another die from the set and the folder that is part of the bundle, I embossed and die cut the layer out of a scrap note card someone gave me. Then using another piece of the background photo I die cut the top layer. Also did a body from some scrap. After gluing them together I added them on top of the inked layer. Used some stickles to create the sparkle. I added another of the large butterfly pieces underneath so I could write my own message. My sentiment uses another of the dies in the set and a Hampton Arts stamp. Added some Waffleflower dots at each end. Then I realized that the card wouldn’t stand up so I created an easel for it and added it at the back. All in all, I’m happy with how it turned out and the sparkle is really pretty in real life.

Thanks for spending time with me today, I really appreciate it.

bee happy

The challenge at Seize the Birthday #301-Anything that Flies and I decided to use my dollar store bee stamp set and both a stencil and a die from Woodware. Firstly I used the stencil and added Scattered Straw and Fossilized Amber through it. When it was dry I added the different images mostly from the bee set, but a couple from Crafter’s Companion as well. Each time I stamped I clear heat embossed. I added some glitter to the bees using a Sakura pen and used a few small glitter stickers from a Doodlebug design sheet.

When I was happy with the overall piece I used the center part of the 2 part die set to cut the postage stamp look. This was backed with some black paper to make it stand out more from the base card. I cut it down slightly before gluing, as the sizing is a bit different with these dies.

This is only the 2nd time using these stencil and dies so there are mistakes, but none so bad that the card can’t be used. I should use it more so I can get better at it.

Thanks for spending time with me today, I appreciate you and your time.

punched snowflakes

9 minutes and 59 seconds

This particular speed challenge was especially challenging for me as punches are almost impossible for me to use lately. That said, I never give up, so yesterday I went through all my old and not very good punches to see what if any I might be able to use. I tested a few – realized there was no way, so turfed them into the trash. Had a chat with my hubby to see if any could be adapted to make it easier but unless they are a lever type my hands cannot cope. Even the lever type are challenging but I can use both hands together with some of them. I found a corner style punch that is smooth in operation and big enough for me to use both hands, and this little snowflake punch that was also not too difficult. Running out of time I decided to think about a design and come back today.

This morning I had an idea I thought might work so sorted out all the bits I would need and set them ready. Starting the timer I punched the decorative corners on the layer underneath the lacy piece. Then I added the leftover lace piece to this. The strip, StampinUp DSP, behind was cut into two pieces and glued to the 4 X 4 card front and the other was added on top. I quickly punched the snowflakes from silver CS and added them randomly. Sentiment is from Divinity Designs and in my hurry I smudged it, but speed challenges aren’t about perfection thankfully. Card completed with one second to spare!

Challenge #343 – Peppy Punches at As You See It.

Thanks for stopping by, I hope you have a great week.

simple Elegance

The challenge at Just Add Ink is about an elegant yet simple card and this is my take on the challenge. Just Add Ink #741…Simple & Elegant!

Taking a Sizzix lace die and some white CS I die cut the piece, added some shimmer and then cut it down to what you see here. Cutting it created some jagged edges so I used some thin silver strips along the edges. I found a PP from Scrapbook.com that gave me a pattern that was similar in tone to the card front and die cut a circle using an old shaped die set. It is most likely from either Sizzix or Spellbinders, but in those days I didn’t keep brand information as I do now.

Using my Crafters Companion stamping kit, I chose the flowers and the sentiment and stamped them, one directly onto the die cut PP and the other onto scrap CS. I added some silver ribbon and foam tape behind the die cut before placing it onto the lace. The flowers were coloured with Inktense pencils and then fussy cut before I added them on top. I thought about adding some gems but decided against for now.

Its a very feminine card and I quite like how it turned out. It does look nicer in reality than on the photo.

Thanks for stopping by, I appreciate your time and any comments you may leave.

in the green

Needing a masculine style birthday card and wanting to participate in two challenges meant a little bit of thinking was required. I decided to be inspired by Stamp Buddy Gayle’s recent entry into a challenge and pulled out a Gnome stamp set from SSS. Taking a piece of card stock I used Distress Oxide inks in 3 different greens and sponged on an angle until I was happy with the end result. Then I used a Darice EF and got my background. To this I added a few spatters of darker green and then attached to the card front. After stamping my images and sentiment, I coloured them using Inktense pencils mostly. I did the hat freehand with pencils so my lines are wonky. As I had a piece of vellum on my desk I took a Sizzix scalloped edge die and cut a circle. I felt this needed more definition so I took a Posca pen and went around the edges of the scallops and then used a gold sparkle Nuvo pen to create some spatters on this. I used foam tape behind the images and placed them as you see. When the circle was added I also placed some sparkle green tape across the bottom and added the sentiment to this. Because my hand slipped when edging the sentiment I used some gems to hide the mess. A couple of shamrock stickers finished the card.

I am entering it into the challenges at: Going Green Challenge and at: Anything Goes With A Twist of Lucky/St Patrick’s Day

Thanks for stopping by, I appreciate it and I hope your day goes really well.