It is my hubby’s birthday soon and I made this card for him. I followed a post from Jennifer McGuire to get the look I wanted. I’ve had the set for a long time and only used a small portion of it, but I remembered seeing the post and decided to give it a go. Initially I had begun another card altogether but although the colouring of the digi stamp worked how I wanted to add it to a card didn’t so I’ve set it aside and will likely use it differently down the road. As my hubby is an Aussie I thought surfing was a good idea and I’m really happy with how this turned out. Every thing used is from the kit except for the birds. They came from a different set but I can’t remember the name. I added some opal blaze to the surfer and the sun which you can just see on the photo. The surfer really shines in R.L. Once in a while I make a card I’m really proud of and this is one of those times.
I have some new stencil pastes called stencil butter in both gold and copper and I wanted to try one of them out. As well I have this new stencil called Doodle genie by Chatter Box so I thought using the butter would be a good idea. I did the stencil and set it aside to dry. After going through my PP I found the piece I used here from StampinUp and thought it would look good as a background. Once the paste was dry I used some inks to add a bit more to the top layer and I also used an outline stamp that came with another set I bought in Holland. After adding the twine I popped up the layer onto the card front. The sentiment comes from a Joy Clair set called everyday sentiments.
So the other day when making a similar card I stamped this little whale and then messed up the colouring process. On that project I simply started again and set this image aside for a while. After playing a little bit I managed to fix the image enough that it could be used and this is how I used him. I had the textured blue scrap and added him to this piece after I had cut the corners off the scrap. Then I cut a couple of other hearts (slightly distressed look to these) and added them before popping the whole piece up with foam tape. The PP was a gift from a friend who didn’t want to use any more of it herself and it works beautifully with the rest. Stamp set is Newtons Nook and sentiment is from the same set. I added a few gems and a bow and he fits the sketch I hope. Its a simple card but I like it and hope you do too.
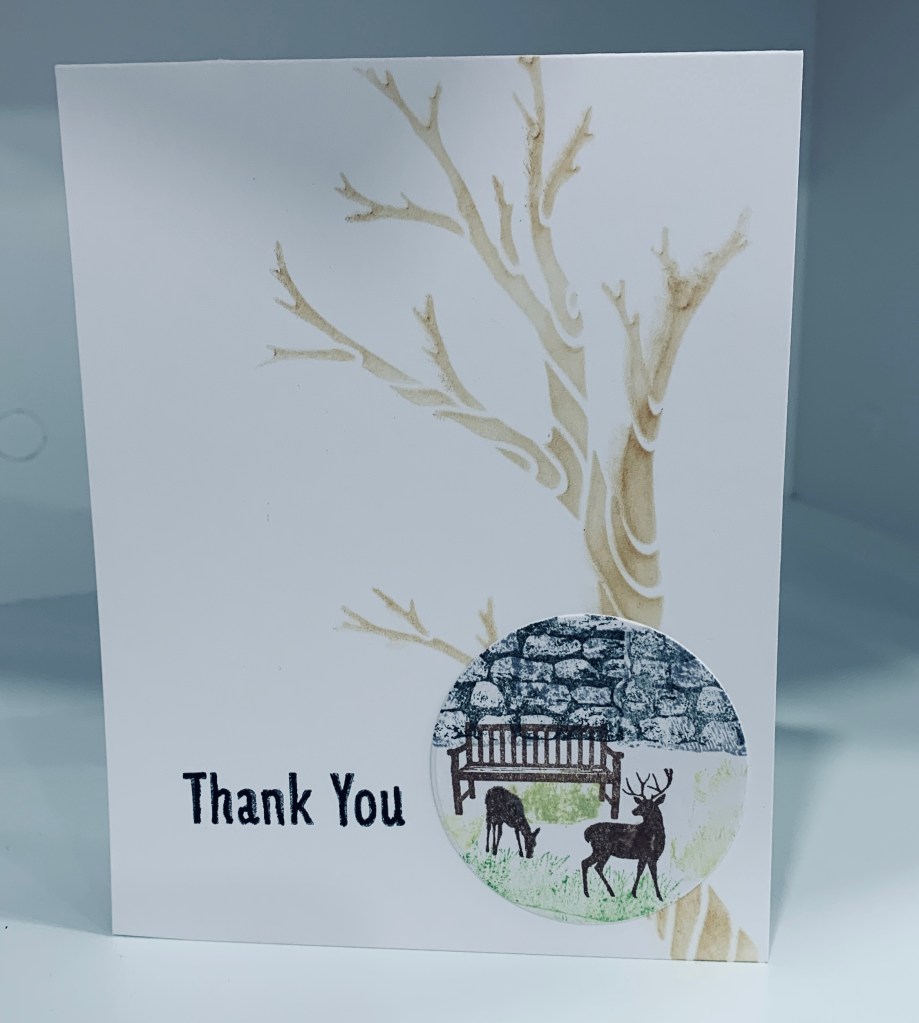
This is my last card for today and was designed for the Paper Players challenge which requires a critter of some kind. Considering I have deer in my garden daily it seems appropriate to use a deer stamp. I’m not the best at scene cards or CAS cards but I enjoy trying to make them. For this one I used a fallout circle from an MFT die cut and a multi step stamp set (very small set) from Kitchen Sink Stamps. I’ve had it for a while and never got around to inking it till today. I began by stamping the grass and then the deer. I added the stone wall at the top and the bench in between. When placing the circle on the card front I played with what to put behind it. I thought about some sky or clouds but wasn’t sure. In going through my stencils I found the tree which is by Designs by Ryn and decided this would work. After adding the tree I adhered the circle over the top and then stamped the sentiment which is from my Spellbinders new set. I decided not to add any bling to this card although I may change my mind prior to using it.
When doing the first card for the JUG’s challenge the idea for another popped into my mind. Then I also noticed the challenge at the Sisterhood of Crafters was a blue challenge so I created this card for both. Using the last piece of the shimmery blue CS I die cut the floral elements using a set from MFT called In Focus Floral frames as well as a slimline circle die from the same kit. In my scrap stash I found another piece of pale blue mulberry paper that has a slight silver tone to it so I used it for behind the circles die cut from the silver CS. I pieced in the floral elements. The silver CS is quite thick and I didn’t notice that the die had left marks in it until I had everything together so to cover the marks I added the silver chain border using stickers. I added the layer onto a white card front and then added some flat back pearls here and there. I also found silver happy birthday stickers so I used those on the top layer. This is a very soft pastel looking card and it looks better in R.L. than on the photo.
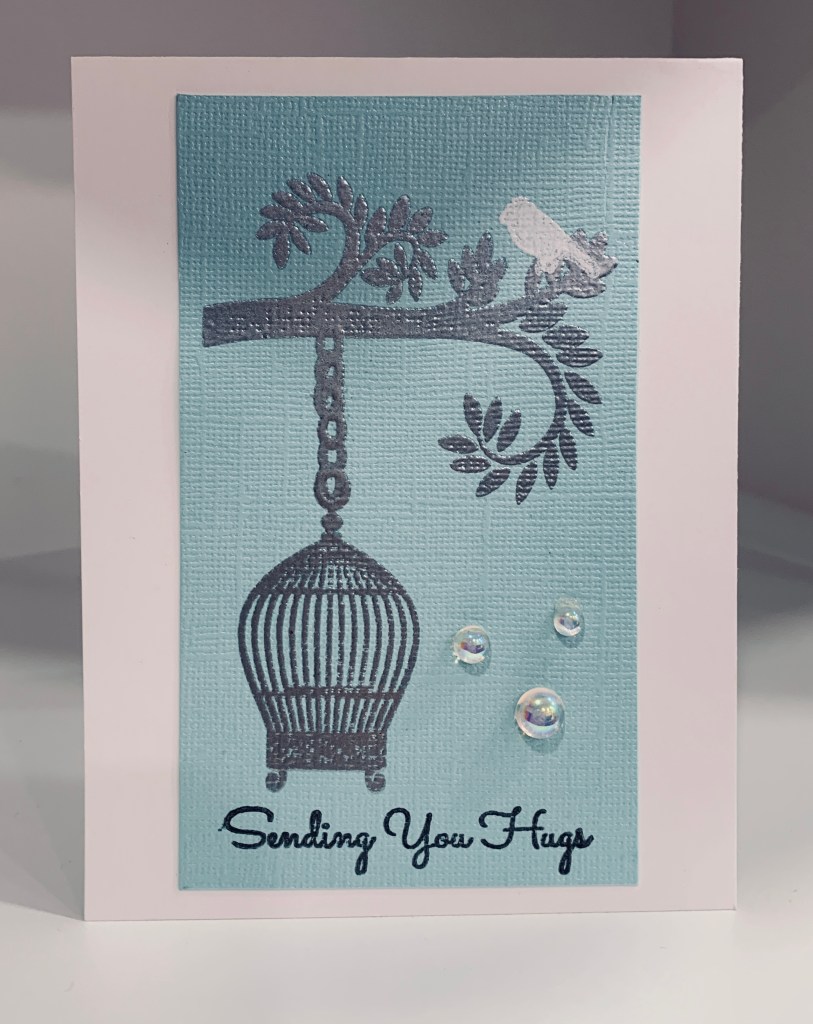
The pale blue layer is a leftover piece of CS that I’ve had for a while. It has a slight shimmer to it in R.L. and I’m a fan of subtle shimmer. I wondered if I could stamp on it and get a good impression so I tried using Versamark and it worked beautifully. Heat embossed in silver and the set I used is an old one I won, by Impressions by Stamping, called Sweet Aviary. I haven’t use this set much so figured it was about time I inked it more. I heat embossed a bird in white at the top and added the sentiment in black at the bottom. Sentiment is another one from my new Spellbinders set and again I like the font a lot. I cut the piece down and centered it on the card front. Added a few gems and avoided the temptation to add more to the card.
When making my previous post for a winter challenge I also had an idea for another card and this card is the result. It seems to be perfect for this, new to me, challenge too so I’m entering it. In going through my paper scraps file I found some precut pieces of cs that I had forgotten about. The cs is blue and I wondered what would happen if I stenciled different blues using a circle stencil directly on top of the blue card stock. This is what I ended up with and I quite like the look. At first I wasn’t sure what I was going to do with it and set it aside so I could finish up my other project. After searching through my stamp sets I found the windmill stamp, by Marianne Design, that I bought during a visit to my sister in the Netherlands. Windmills, Holland and blue fit together in my mind so I stamped the windmill, fussy cut it and popped it up on the bokeh layer. By the way, the bokeh layer worked out because I used Distress Oxides. Any other ink probably wouldn’t have worked over the top of the blue cs and I used several different blues as well. It took me a while to figure out which sentiment I wanted to use and in the end I used a new Spellbinders set, I got on sale at SSS, called Just a note sentiments and tag. In this case the sentiment wouldn’t work in the die and I didn’t want to do stamp surgery, so I used another Spellbinders die set called labels. I really like the font used for this stamp too I also stamped thank you from the same set on the inside. After adding this to the layer and then adding it to the card front, I set it aside as it needed something else and I wasn’t sure what until this morning. I remembered that I had some coloured flat back embellishments and the blue ones were perfect for finishing this card. I am happy with how this turned out and using coloured inks on coloured cs is a good idea too.
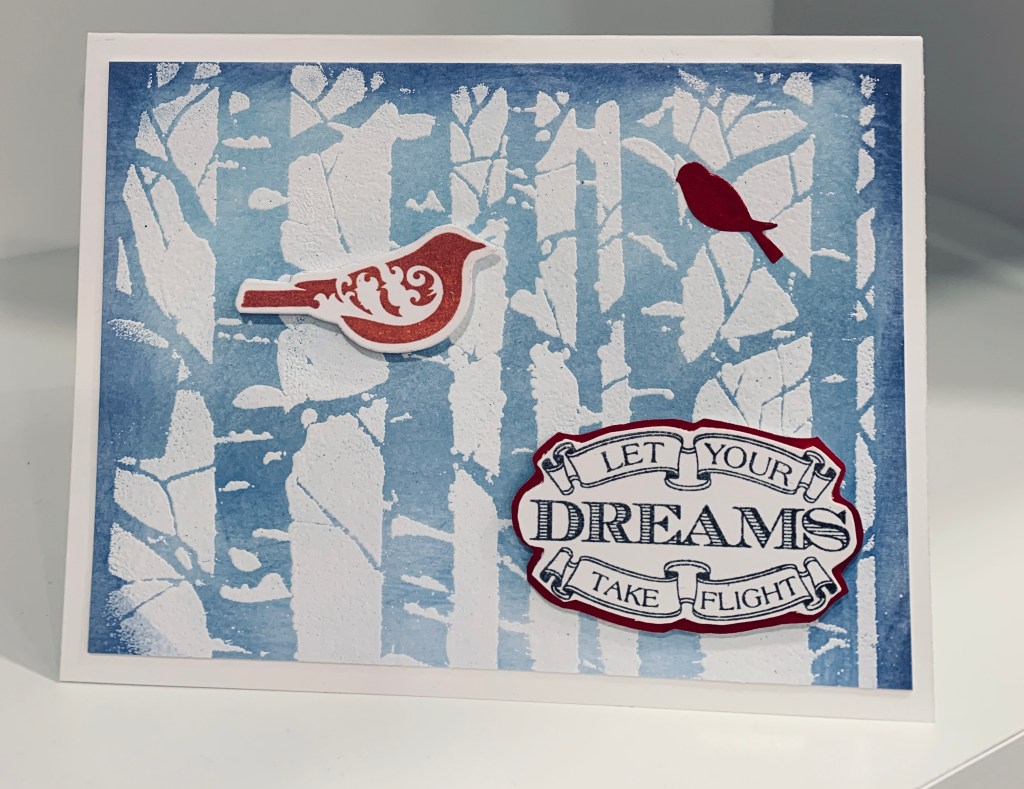
I believe this is the first time I’m entering into the Four Seasons challenge which is currently winter season but I did like the mood board and it inspired me to use a birch/aspen tree stencil. It was started yesterday and in the meantime a new note for the Make the Card challenge showed up so I decided to make the card fit both challenges. As mentioned I began with a stencil and I used VersaMark through the stencil and then heat embossed in white. Using Distress Oxides and various blues, I sponged over the piece until I got the coverage I desired. I wanted to add a pop of red so I took a stamp from the Bird Friends stamp set by the Cat’s Pajamas and I stamped one of the birds in red ink. Using a die from this set I cut him out and popped him up on the panel. From the same set I used the sentiment stamp, which to me suggests encouragement making it fit the make the card challenge, and once stamped I fussy cut it out. Not being happy with how it looked on the card front I added it to a red scrap and then fussy cut again leaving a thin border. As well I die cut one of the tiny birds from a SSS die set and added him. I quite like how this one turned out.
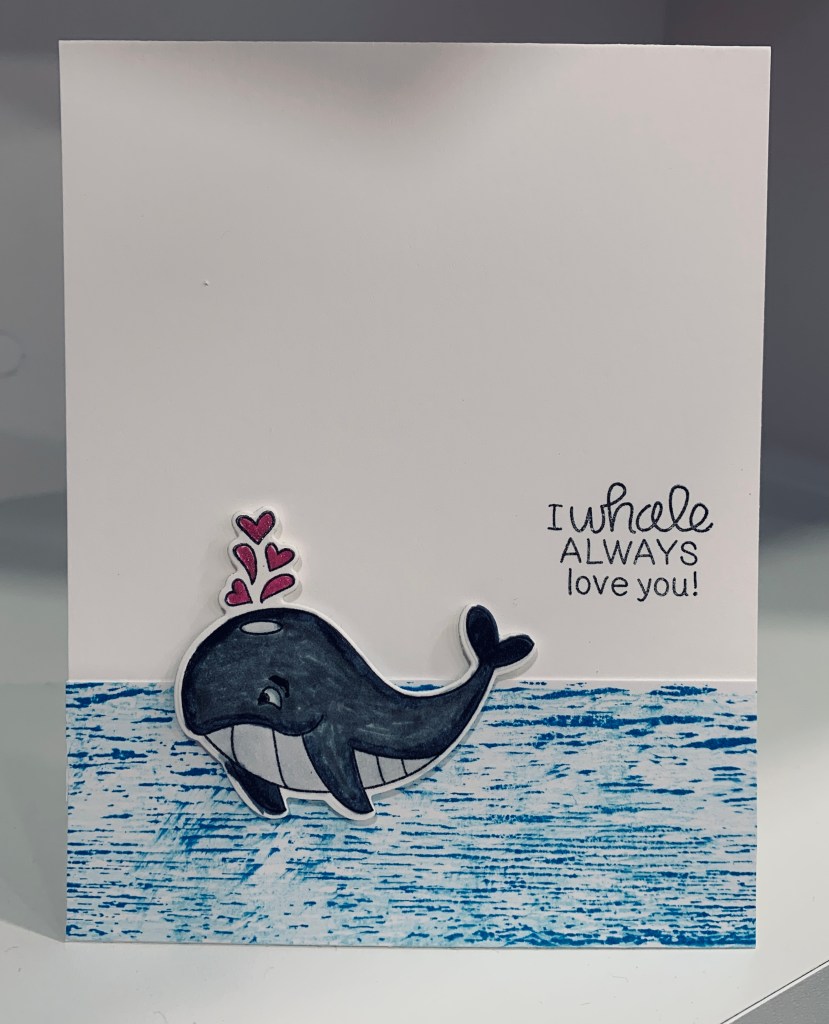
It has been quite a while since I entered a card into the Perfectly CAS challenge so I decided it was time to do so. I’ve had some new stamps, not yet inked, for quite a while and figured inking them was a good idea. Using a Kitchen Sinks multiple step stamping set, that I won in a challenge, called Isle of Big Bay Lake and also a Newton’s Nook set called Tides of Love I set about creating my card. First I inked up the water stamps using Distress inks, Tumbled Glass and Salty Ocean to get my ocean. While that was drying I stamped the whale and coloured him using a mix of Spectrum Noir grays, Sakura Glaze and Sakura glitter pens. I used the glaze pens all over him so he has some shine, but the camera doesn’t pick it up well. He was die cut with the matching dies from Newtons Nook and then I popped him up onto the water. Before I actually adhered him, I placed him in position so I could see where the sentiment should go and then stamped that first. I didn’t actually measure 1/3, but think it is about right for the rules. This may be a Valentines card but it can also work for a birthday too.
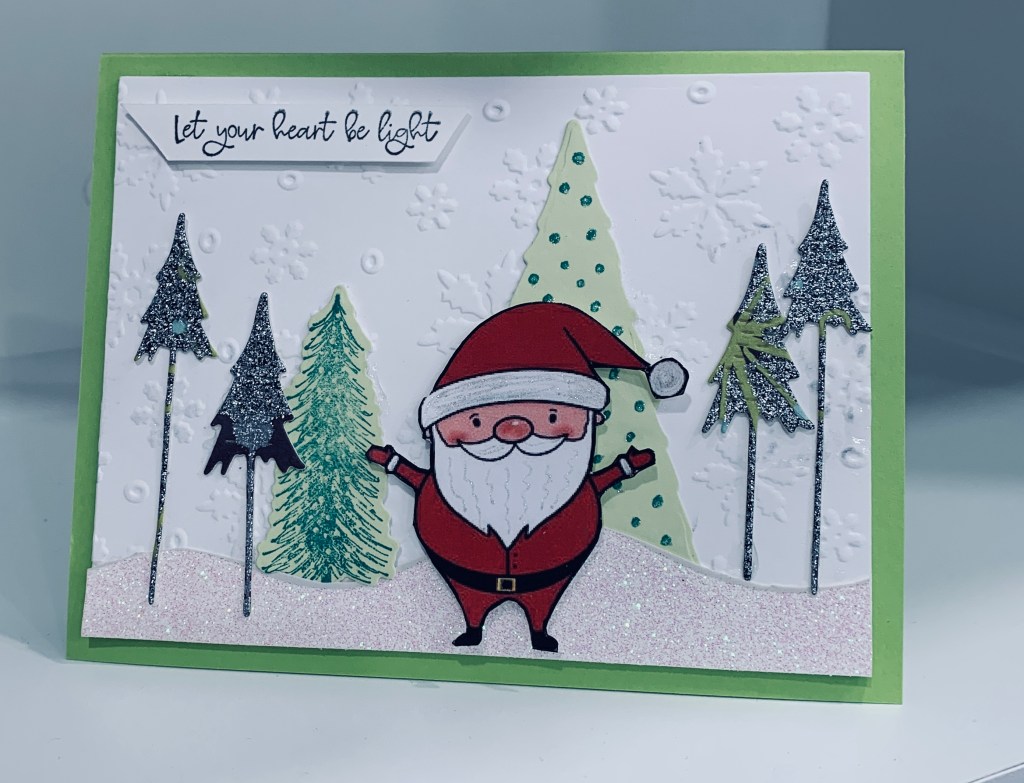
This challenge is great, because it means I get to make Christmas cards throughout the year and that means a head start on them. I also enjoy the mood boards as inspiration. My card is made up of some repurposed bits from other cards as well as uses my new stamp and die set from StampinUp. The background is obviously a snowflake EF and I attached the sparkly snow base cut from a store bought card. Then using a scrap piece of green card I stamped and cut out the larger trees. The small pointy trees were die cut from another store bought card that had a ton of sparkle on it. I wanted the sparkle and a bit of the design and it worked great. Santa is hand drawn using a Pinterest – how to draw a Santa instruction sheet. Then I coloured, fussy cut and popped him up on the front. To get clean edges I went around the cut marks with a black pen. I added some sparkle to his beard, hat and mustache using a Sakura pen. I’m no good at drawing but after a few tries I got this one right.