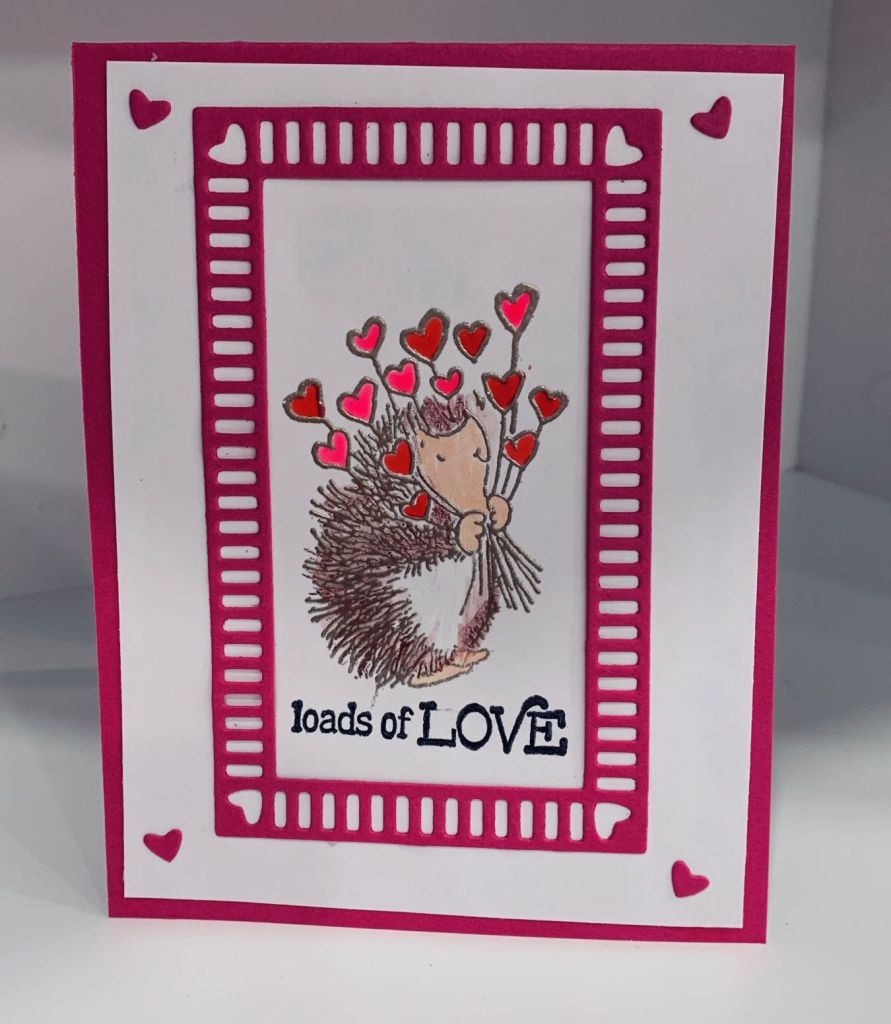
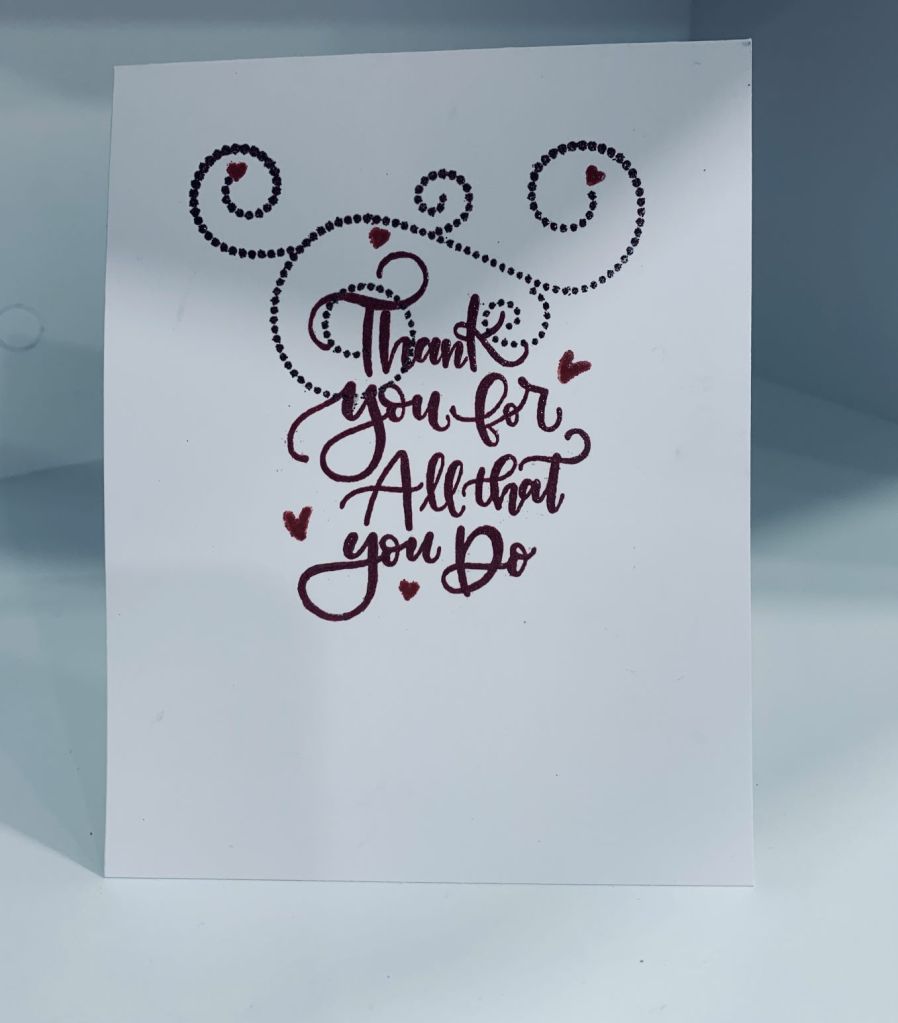
Balloon Fun

Party Balloons Challenge

Using a set of dies from MFT called Balloon stax, I cut 3 shapes out of paper scraps after which I added liquid glass to give some dimension. I did a few things backwards making this card. Firstly I should have chosen brighter papers for the balloons and I added the gloss before figuring to add some fun to the shapes. I decided to try to add the fun faces over the top of the gloss using an older SSS set. To my surprise it worked although I did go over the image with a pen to fill in a few places that were uneven. The smallest balloon I did by hand and am chuckling at my effort with the mouth. It looks like bat wings lol. Should have used a finer pen for this but too late to fix now. The background piece uses a stencil called sunrays and I inked it with Distress Oxide Ink in mustard seed letting it fade to the edges of the paper. I mounted this piece onto a scrap gold piece and in turn added to the card front. Positioned the balloons and drew in the strings before popping them up on foam tape for more dimension. The sentiment comes from another SSS set called Lifting Hearts. At first I wasn’t sure I liked this card but have since decided it is not bad. Am adding to the Double D challenge, but I’ve also got another one finished for this challenge too.

HI

Happy New Year # 32-Red and Purple

I recently replaced my old Big Shot with a Spellbinders Platinum 6. I’m happy with the change and this die was included with the purchase. I decided to use it and see what I could come up with using the colours from the challenge. The red paper, almost foil paper, is a chocolate box wrap that has a faint snowflake pattern on it. It was too nice to throw away so I cut it into 4 by 5″ pieces and used some of it to cut the floral piece. I cut it several times and glued them together as the paper is thin and I wanted it to be a bit more robust. The word Hi is cut from a scrap piece of the same card stock and then glued to the floral layer. I added the red layer to a white strip so it would stand out from the purple more. I’m happy with how it turned out and will likely use the card as a get well or thinking of you for someone needing a lift in spirits.

Snowy Cardinal

Anything Goes Winter~December

The upper left corner inspired this card. A bird and falling snow seem to go well together. I used a new Pretty Pink Posh snowfall stencil with white embossing paste to get the background on the navy card front. The layered piece was cut with a double stitched rectangle die from GKD and I stamped the cardinal using a set from CTMH that I’ve had for a long time and don’t use enough. Once he was stamped and dry I masked him off and added some sponging to the background using Tumbled Glass Distress oxide. Then using various pencils I water coloured in the bird and the holly branch. I added some highlights with darker pencils to give variation to his feathers. I also used Sakura Glaze pens to add some shine to his beak and berries. Once it was dry I used the same stencil and some Brutus Monroe Glitter Glaze in Alabaster over the top of the inked piece. It gives a subtle sparkle without detracting from the image. I also added a sparkle pen to the sentiment which is from Divinity Designs. I think this is my first time entering into this particular challenge and thanks to my friend Gayle for her card, as it made me aware of the challenge. I did another card using this same stamp and fussy cut the bird out to add to the frame.

I can’t remember where the frame is from and the snowflake piece behind it is a scrap leftover from other projects.

Ocean Side Winter Cabin

https://makethecardschallenge.com/make-the-cards-challenge-44/

For a winter theme this card seems to fit the bill quite well. It has been done using a Hero Arts die set that I got about a year ago. I die cut the mountains and added them to the navy card front. I then die cut the cabin/tree piece and laid it in front of the mountains leaving the look of water in between. The bottom part of the card has been left blank so it looks like ocean and I added some sequin stars to the sky area. I also added some sparkle to the mountains but it doesn’t show up well on the photo. As yet I haven’t decided on a sentiment for this card.

CAS Die Cut Christmas

PP570 – A Theme Challenge from Jaydee

For this challenge I decided to keep the card very simple and except for the sentiment, I used dies. The sentiment is from A divinity Designs set called Beary Christmas, the village is from Cottage Cutz and is one I’ve used a fair amount since its purchase and the mountains were almost an accident but were cut with a Hero Arts set I’ve had for about a year. While working on another project I used the Hero Arts dies to cut mountains along with some trees and a cabin and the piece on this card was leftover similar to a fall out would be. I also had 2 navy card bases ready on my desk and I set this offcut on top of one of them while continuing with the other project. Once that was finished I realized that the offcut looked interesting on the navy base so I trimmed it a little to make it look tidier and added it. Then I die cut several of the village out of the same white CS and glued them together to give them some dimension. I added this layer to the card base under the mountains. After stamping the sentiment I contemplated adding some embellishments but decided against it. I rather like the starkness and simplicity of this card and hope you do too.

Christmas Joy

For three challenges: https://makethecardschallenge.com/make-the-cards-challenge-43, https://colorhuesthecolorchallenge.blogspot.com/2021/12/color-hues-31-red-and-green.html, https://daranddiane.blogspot.com/

I’m uncertain as to whether I Iike this card, but it isn’t terrible so I’m posting to the three challenges. I started with the red plaid and green card base which I die cut using a background die. I don’t know which brand this die as I forgot to label it. Initially I thought to die cut the large Joy word I have but it didn’t look good so I set the pieces aside. Then I used the set by Creative Expressions Festive poinsettias and die cut several of them out of red, gold and cream papers. Put them together and placed as shown on the card front. Added some leaves and foliage behind and some gems for the centers. Then I remembered a Lawn Fawn die that is actually the whole word Joyful, but once it was cut I trimmed off the single word and added the curved end to the Y. Using another of the word stamps in this same set I stamped Winter onto the cream CS and hand cut it to make a small banner. I quite like this part of the card, but the rest seems quite busy to my eyes.

Just Snowflakes – MSC

Just Snowflakes & PP569 – A Sketch Challenge from Anne Marie

It has been a while since I entered a Modsquad challenge so I decided to do so with this card. As well I decided to make it work for the weekly Paper Players challenge too. Theirs is a sketch challenge and as I had a few paper scraps that were all with snowflakes it seemed to make sense to combine the 2 challenges. PP is all from a Reminisce Package and is mostly from bits and pieces leftover from previous projects. I combined several of the papers to fit the sketch and adhered them onto a plain blue piece before adding to the card front. The die cut snowflakes are from GKD and are among my favorite snowflake dies and I used some SSS sparkly paper for them. The hexagon shape is from a group that came with my Gemini. I die cut it in gold and added it to the card front before adhering the snowflakes on top. Sentiment is 2 from Divinity Designs. I seem to be using these 2 almost exclusively this year. I added a few pearl embellishments here and there before calling it finished.

Fur Babies

Challenge #264

For this card I decided on a Z fold and some paper scraps so I scored each of the fold lines and then added the pp. Using a Hero Arts Christmas set from last year I chose both the dog and the cat and with some masking got the stamping done. Then I coloured in both images using mostly pencils but also some Sakura Glaze pens. I added the die cut Santa hat to the dogs head after I had die cut the circle using Sissix scalloped circle dies. After gluing the image piece to the fold I realized I had forgotten to sponge the edge of the circle so I grabbed a blue sparkle pen and carefully went round each scallop. The sentiment is from a Divinity Designs set and is actually 2 put together. I rounded a couple of the corners and popped it up on the card front. I also added the same blue sparkle to the edge of this piece. Once the embellishments (from my stash) were added the card was finished. A simple card to make and one I am happy with.

Blue & Silver Christmas

Peace on Earth Christmas Challenge #4

There is something about Navy and Silver that appeals to me and I really like the mood board shown below. For this challenge I decided on a slimline design and using a navy piece, silver heat embossing along with an incentive stamp set called Holly Jolly from GKD, this is what I came up with. I die cut a silver snowflake with an older GKD snowflake die to add at the bottom. The background glimmer layer was done using some new ombre look StampinUp CS. I added a layer of silver mirror CS behind the navy layer and like the subtle difference in the 2 navy card stocks used. Doesn’t really show on photo but is visible in R.L. Added a gem center to the die cut snowflake and it was finished.

Believe in Magic

PP568

I decided to go with fairies for this challenge and it took me 4 tries to get my stamping right. I messed up 2 with inky fingers and on the next one didn’t get my mask in place properly. The fourth one I liked. The stamp set is from GKD and is one I’ve used once or twice. I used Sakura Glaze pens to colour in her wings and pencils for the mushroom. Added a touch of glitter to her wings and the edge of the mushroom. For the fairy dust I used a metallic gold ink by Delicata. Originally I thought I might heat emboss, but instead went with the ink as it looks more delicate than embossing would. Keeping it CAS is always a challenge for me but even with the addition of sequin stars I’ve managed it. I die cut the panel with an unbranded stitched edge rectangle set and added it to the card front. All in all I’m happy with the result.