interactive Flap card

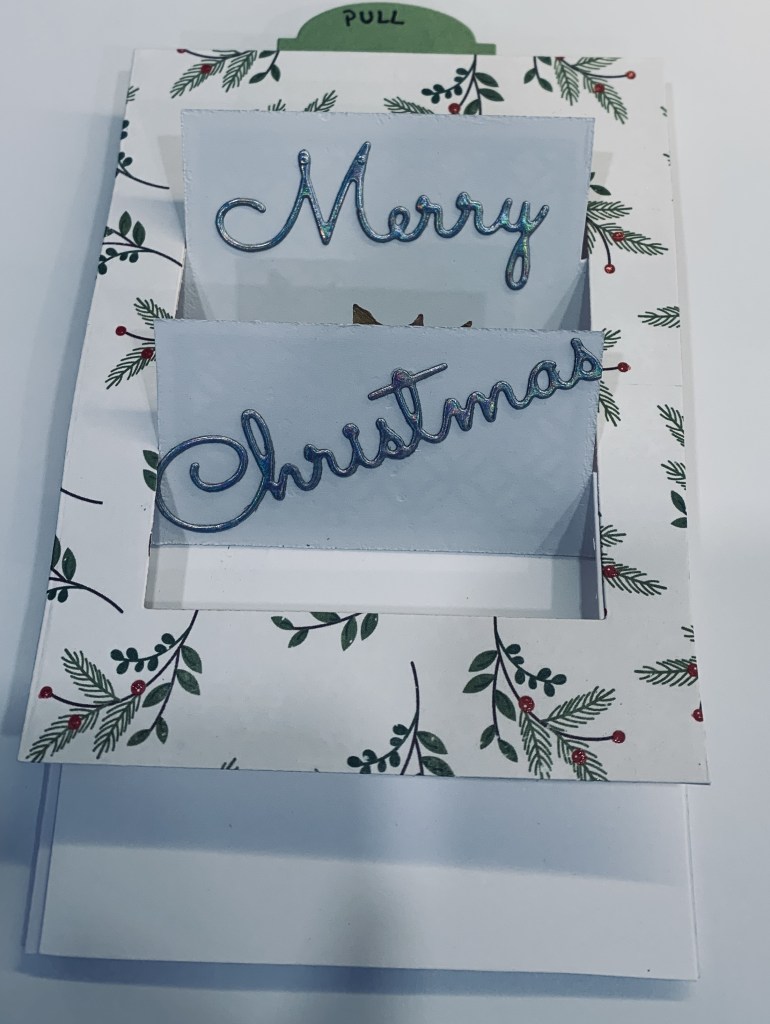
One of my friends commissions several cards per year for her family and I try to do something a bit different each time. I shall add this card to the challenge at Peace on Earth

This is my first try at a flap card although I’ve had the Spellbinders die for some time. I found a tutorial to follow and this is the result. One thing I realized is that keeping the pieces in the orientation in which they are cut, makes it easier to put together. The frame didn’t seem to fit until I realized the orientation was off. The die set came with daisy flowers but as it is an intended Christmas card I used poinsettias instead. Mine came from a die by Dee’s Distinctively and I only used three, so have enough left for another card. The PP is from a paper pad but I’ve mislaid the brand name. Sentiment is from a Divinity Design set and I also added a sentiment on the underside of the flaps but it’s another temporarily mislaid set. Its probably underneath the stuff on my work surfaces.

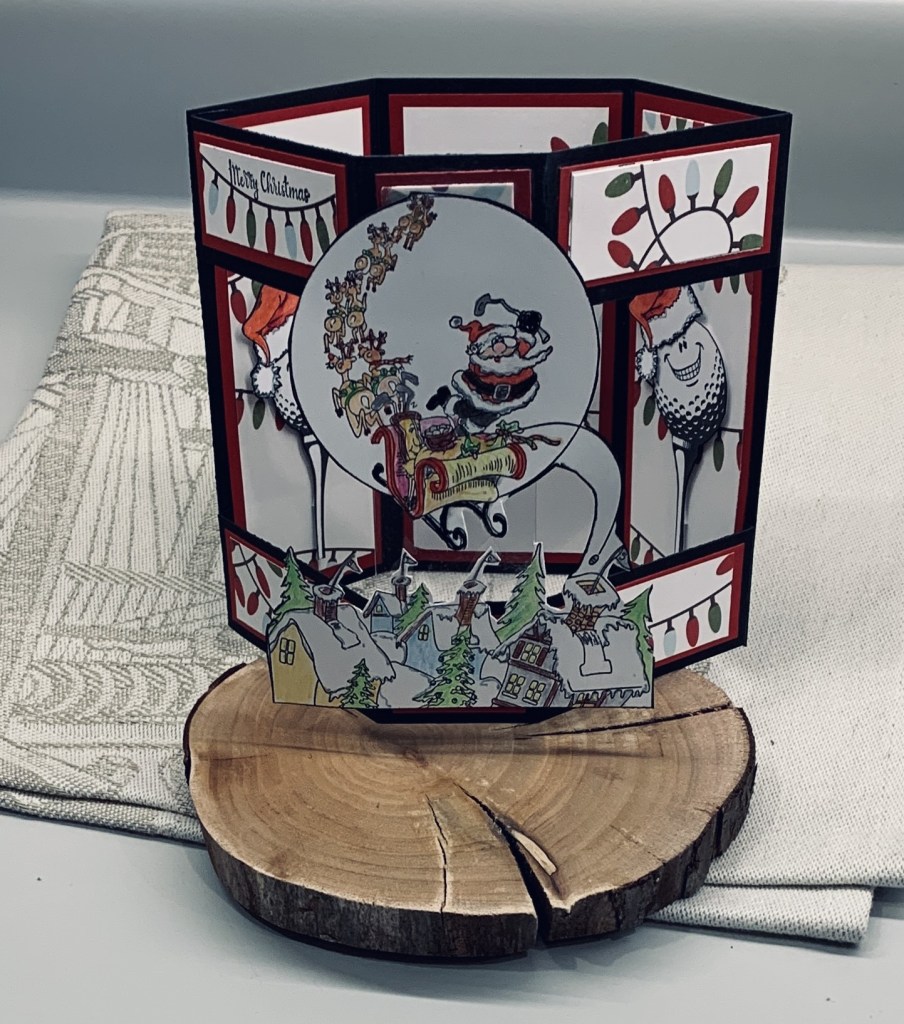
Underneath the flaps

I used a small YNS shape die to add the pull tag at the top, but couldn’t find the stamp set with the words I needed, so I hand wrote pull. The next goal, after our party this weekend, is to sort out my craft room and find the missing sets. They aren’t gone, just hidden.

Once I figured out how it works after watching the video several times, it wasn’t that difficult to do and I’m pleased with the end result.

Thanks for stopping by, I appreciate you and your time.

Skating By …

Billie has chosen a Christmas theme for our last challenge of the year here at Cardz 4 Galz. I actually made 3 cards almost the same except for colours. I used a Christmas background stamp from YNS and heat set it with Verdigris on vellum. After cutting the panel down a little I added the sparkly strip to ground the penguin image. He is from a new set, on sale, by Crafters Companion. Once stamped I also heat set the image so I could colour without worrying about it spreading in places I didn’t want. Watercolour pencils were used. When it was dry, I fussy cut the image and used a black pen around the edges. After adding foam tape he was attached to the vellum piece, which in turn was attached to the shimmer card front. The sentiment is from the same set. The other 2 cards are the same except one is blue and one is gold.

When this set and another similar one arrived, I was surprised at the size of the image stamps. I was expecting them to be smaller. There were no matching dies that I could see, unfortunately. I do like the fonts used for the sentiments.

Thanks for spending time with me today. We look forward to seeing your creations in our gallery. Above all, have fun in your crafting space and enjoy the Christmas season.

Christmas in space

The latest challenge at CYHTP is: Anything Goes Embossing with a Twist of WINTER FUN. I guess the twist isn’t taken with this creation as although its a fun card it isn’t strictly winter fun. As some of you are aware, occasionally I do a commissioned card for a friend and this is one of those times. This is for her step dad who loves anything scientific. I thought space and robots were perfect and turning it into a Christmas theme card was fun. After my recent Colorhues pink and aqua card I wanted to do another using the same layout and style. It took a few days of thinking before I had the idea to use rockets as the side panels and I got these from an Adobe graphic and photo program. I used my computer to get the images sized correctly and then added them to a dark gray CS to give a border. The center panel was using CS and some Rub On images along with a stamp from the Robot set by Brutus Monroe. The Christmas sentiment stamp is from Hero Arts. Puffy Sticker’s are from a sheet I got at the local market. For the embossed panel I used a Sequin folder from StampinUp, on a metallic silver CS and I backed it with a dark gray for the border. I know sequins aren’t really a Christmas theme, but I don’t have a folder with stars and I thought these at least gave a space look to the background. I stamped the robots onto a scrap piece of heavy CS as fussy cutting is easier on a heavier weight. Once stamped I also heat embossed clear and then I fussy cut each one before adding a bit of sparkle to them. The bottom robot needed to look more Christmassy so I added a Rub on hand bell that I also fussy cut. Before I actually glued the panels onto the background I sprayed them with shimmer spray so they twinkle and also it has the look of snow in real life. Messed up the spacing slightly putting on the panels but I don’t think it is something that a non crafter would notice.

This was such fun to make even though fussy cutting was a challenge for my achy hands and I’m really pleased with how it turned out. I’m blowing my own trumpet, but hubby loves it and I’ve shown it to one or two friends who also think its a great card. Once in a while I think I’m truly inspired. LOL!

Thanks for spending time with me today, I really appreciate it.

Stained glass look

When I did the stenciling here it was just an experiment. At the time I didn’t have a clue whether I would use it, however as you can see I was able to and it is being entered into the November 2024 Stencil Fun Challenge. My concession to sparkle and shine is the two metallic frames around the image.

So why did I experiment, you may ask? Well sometime next year I need a design that is art deco in look and I have nothing in my supplies for it. My husband uses a metal bookmark which he left on the table and when I picked it up I immediately thought this has an art deco look. So I borrowed it, taped it to some card stock, masked off a little and proceeded to ink the sections, moving the mask as needed. I liked it so I placed the stencil beside the already completed section and repeated the process. My thinking was, it’s not bad and how can I use it? Last year I acquired these small transparencies which I didn’t really use, but as I had pulled them out to possibly use now, I realized that the angels would look quite good with the background. I made the two frames using metallic CS and some HeroArts infinity dies and added them around the panel. I already had the sentiment done and layered from yesterday and this too is from a HeroArts set. I used some foam tape to add the angels and although it shows through a bit it isn’t detracting from the look.

I’m quite happy with the end result and I may borrow the bookmark again to do some more stenciling. Thanks for stopping by, your time is always appreciated. I hope your weather is better than ours. We have one of those atmospheric rivers passing through so it is a very wet and dreary day. Even the dog prefers to be inside on a day like this but the local deer don’t seem to mind.

Poinsettia CAS

The aim was to make a one corner CAS card with the optional twist of colour. I chose red and green for mine and created another Christmas card for my stash.

CAS game #151

This is a stamp by Gina K Designs and was gifted to me by a stamping friend as she had two of them. Crafting people are so kind. There is a die set included so I used it for creating a mask of the flower prior to stamping the leaves. I stamped in black Amalgam ink but didn’t get a good impression and couldn’t overstamp without messing it up. (Next time the Misti will be used) I used a fine tip black pen to go around the image where it wasn’t properly stamped. I coloured it in using Prisma pencils and some gamsol. I also added some Nuvo red dots and some gold ones to the flower centers. CAS cards aren’t my forte although I admire many talented designers who make such beauty. That said I’m pleased with this one.