diamond fold Christmas

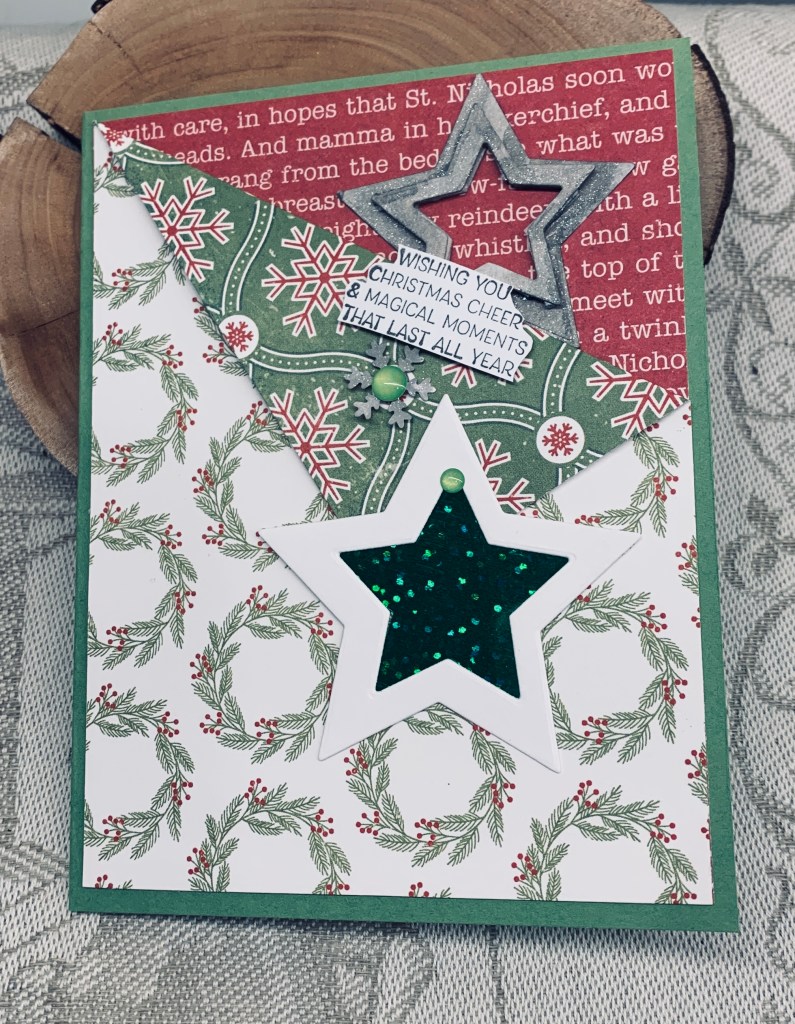
Having seen Sam at Mixed Up Craft, and her new mini series on Diamond fold cards I chose this one to try for myself. I watched the video twice so I understood the basics and then as she suggested took a screen shot of the template so I could keep the measurements handy. After that I chose my base card and the PP before proceeding to follow along with the video. My base card is from Recollections and isn’t a heavy weight type which made it easier for scoring and folding. My paper is from a pack by Alchemy of Art purchased in a sale. And the silver CS is also from Recollections. The die sets used are from Spellbinders, and Essentials.

It isn’t a hard card to make, but it does take time as the scoring and folding are fiddly. I had to stop and start as my neck and shoulder kept causing my left hand to cramp, but I got there in the end. This is another card that will be given by hand to the recipients even though it does fold flat and will fit into an envelope. They are coming to visit soon so it will be waiting for them in their room. If postage wasn’t so high I would enjoy making more of this style and posting them, but the costs involved are making it prohibitive. The card I made for my sister cost me $8.50 to mail.

Thanks for joining me today. In between posting and keeping up with my little DT jobs, I’m also baking for my upcoming party. This particular dessert can be frozen for several months so it is an good one to make ahead.

I shall enter this card into the following challenges:

Just Us Girls Challenge #801 – WORD Week – Winter

Krafty Chicks challenge #794 – Christmas

MLCCB #65 Anything Christmas Goes

merry birth-mas

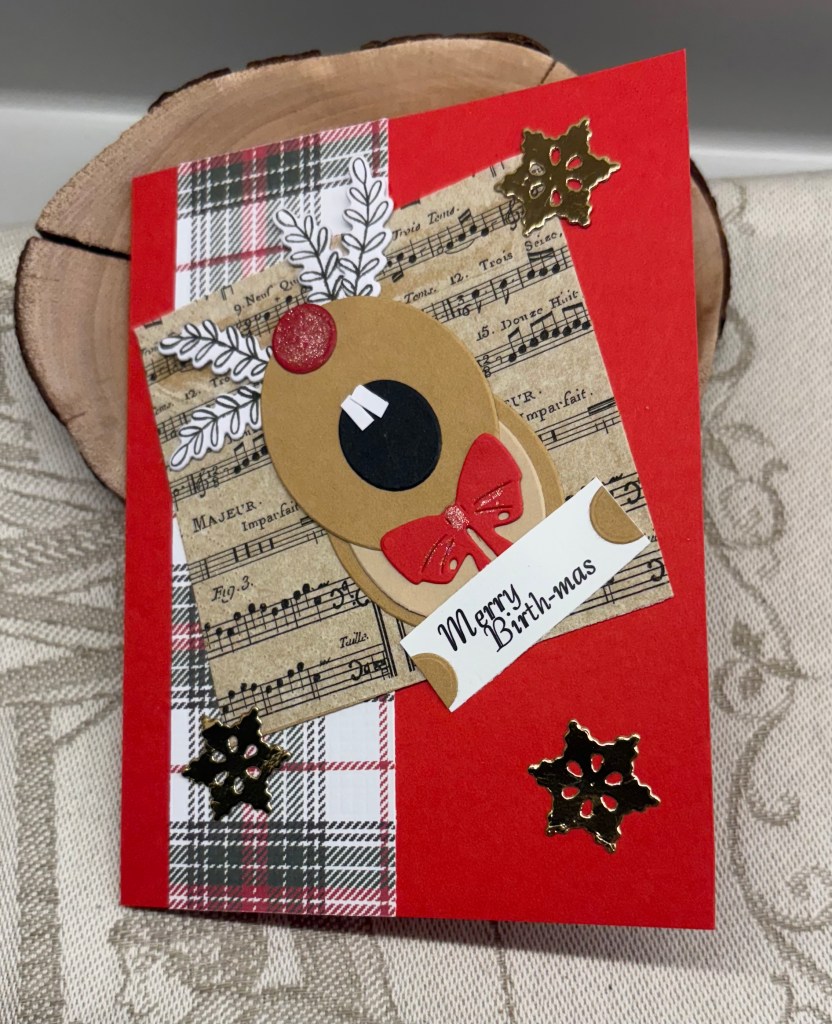
My last card as a guest designer at Seize the Birthday, and I’ve had such fun creating for each challenge. With this challenge asking us to use Christmas supplies and because I do have a male friend whose birthday is on Christmas day, I’ve decided this card is for him. This is always a birthday challenge but its asking us to use Christmas supplies to make it.

The strip of plaid CS used here is from a store bought card I received last year. The napkin music is the last piece of others I’ve used in the past. My Rudolph has been made by die cutting ovals and attaching them together. I cut a couple of small circles, one for his nose and another for his hands and I hand cut his teeth and then glued them as you see. Not my idea, but something I’ve seen on Pinterest and adapted for my own version. The bow is from an unbranded die set, the little stars are part of a die set by Marianne Designs and I used an MFT stamp and die set to create his antlers. A little bit of red sparkle on his nose and bow made him look more festive. The sentiment was created on my computer and is another thing I’d seen online. Initially I tried using stamps but couldn’t make it work nicely, so creating my own was the next option.

I’ve had a blast designing for Seize the Birthday and hope you have an equal fun time creating your own birthday cards with Christmas supplies. Thanks so much for stopping by, I appreciate you and your time.

tree delivery

Going to a craft store and sorting through their sale items is both a great and a bad idea. It didn’t take long to spend $100.00. The die set and the paper used on this card are all products from the sale. There are two different Santa’s in this set along with some other accessories and I created a second card along with this one.

Once I had cut all the pieces I slowly put them together, but first I added the colour and let them dry where necessary. For Santa I used alcohol markers and for the trees and truck I used water colour shimmer paint. The sentiment is from Woodware and the candy cane is ephemera from StampinUp. I used a glitter pen to add a bit of sparkle on the background, but it isn’t visible in the photo. My hubby felt this card was the cutest of the two.

Thanks for stopping by, I do appreciate you and your time.

This is to be a second entry into the Peace on Earth challenge #99.

hand painted baubles

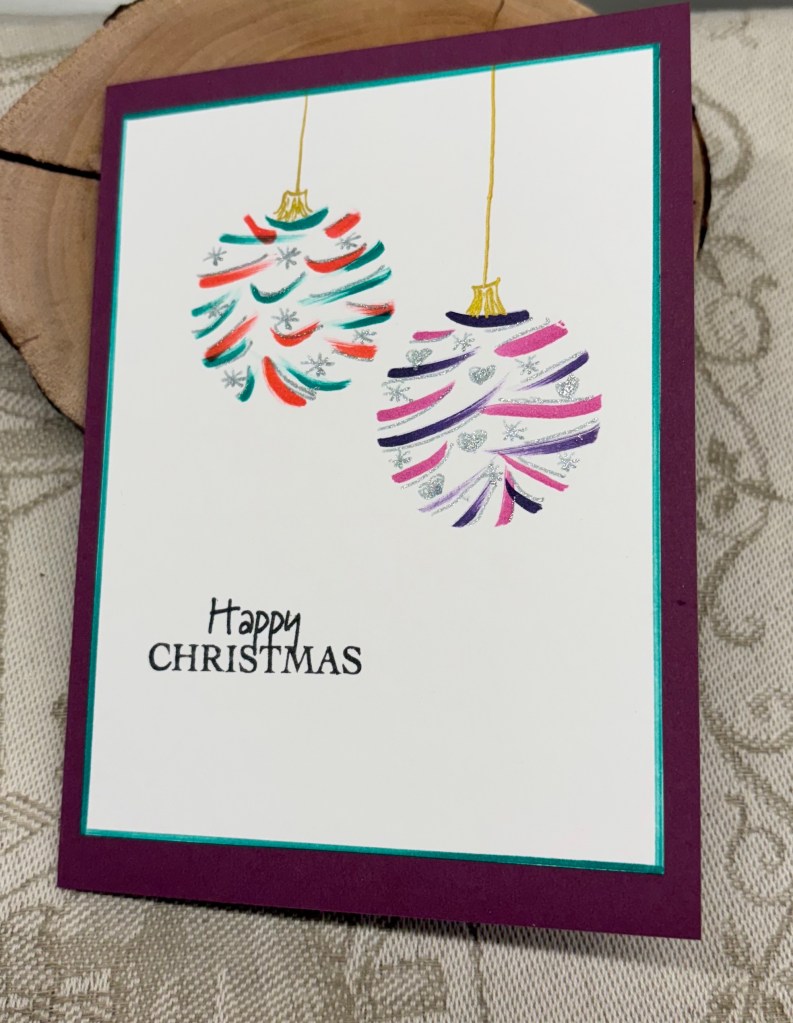
Having seen something similar to this on Pinterest, I wanted to try a version of my own, but I’m no painter. In the end I created a stencil, pulled out my trusty TomBow markers and came up with these. They were so easy to do that I made about five of them. I added some sparkle elements with a Sakura pen and filled in a few areas, then I took a gold pen and free handed the top of the ornament and the cord.

With another marker I went around the edge of the white CS before adding it to the card front. My sentiment is from a Woodware set. I never would have thought I’d be free handing this kind of thing, and I’m pleased with how they turned out. CAS and pretty at the same time.

I don’t believe I’ve entered into the Holly and Ivy Christmas challenge before, so this is being added to their current challenge.

dressed up wine

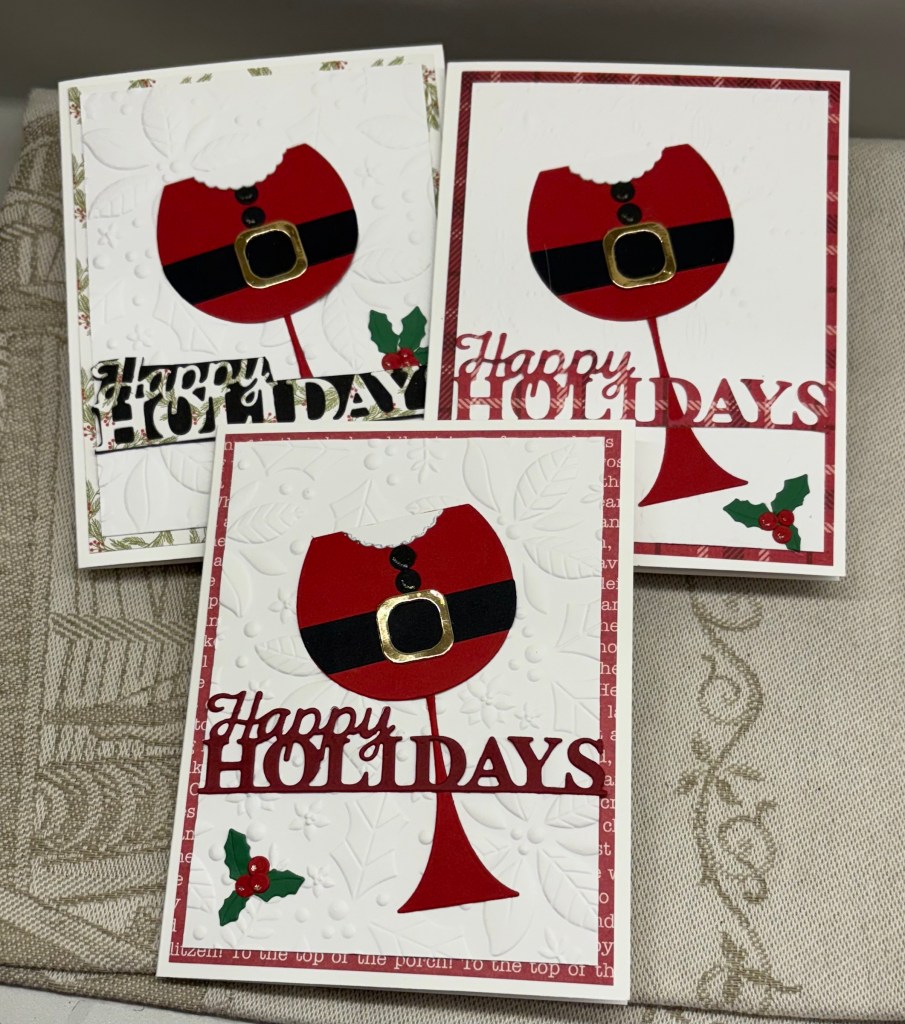
Using a Kokorosa die, I created a series of these cards, all similar but not exactly the same. They are intended for the ladies in my yoga group.

Using a SSS EF I dry embossed some white CS and backed it with some PP before adding it to the card base. Once I had the pieces in place on the wine glass I glued it all together and added it on top. The sentiment comes from a GKD set I think, but as it was stamped a long time ago and stored, I can’t quite remember which set. I added a tiny amount of sparkle on the buttons and some small red gems.

Once I had all the pieces cut, the series was pretty easy to put together, and I created 8 in total. On some I used different EF but all were 3D folders. I really wish companies would standardize their folders as it would make things a lot easier to work out which plates to use to get the look we need. Some of the 3D ones are really hard to get through the machine.

a few of the others.

Thanks for spending time with me today, I really appreciate you and your time.

My card is being entered into the challenge at November 2025 Peace On Earth Challenge #99 which is always an anything goes.

postcard christmas

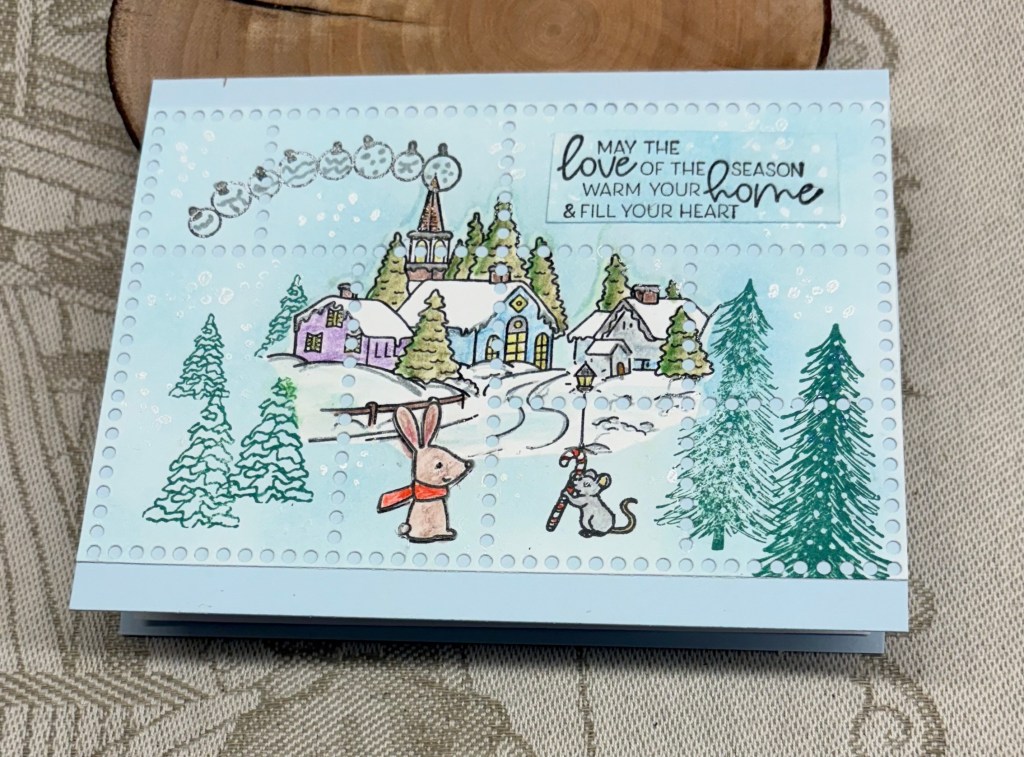
Although when I started this card I was thinking it may work for the next Peace on Earth Challenge #96, at the time I hadn’t seen their mood board or the DT designs. However, one example features a postcard and here is mine.

I was thinking about my Woodware postage frame die the other day and wondering how I might use it for a Christmas card? As it happens, I had already pulled out the MFT village stamp set I’ve used here, so I inked up some CS to give the blue background and stamped the scene in the middle. I used the accompanying stencil only to assess where to add other images. I added the trees, some from GKD, another MFT, the tiny mouse is Hero Arts and the sentiment is StampinUP. Everything was clear embossed as I worked and I coloured everything before I used the die to add the postage holes. I did trim down the edges to ensure it fit onto my card front which is from Spellbinders. At first I wasn’t sure if I liked it, but after my hubby and our artist friend were complimentary about it, I’m more comfortable with it myself.

I’m really trying to keep my cards as flat as possible for this season, as postage has become more expensive and the rules about some items keep changing.

Thanks for spending time with me today, I appreciate you and any comments you may leave.

wishes for Christmas

Challenge #259 at cardz4galz has been chosen by Lynda and she has chosen the theme of using dies and or punches. This gives you a lot of choice for your own ideas.

In my case I’ve used a die from Waffle Flower that is still fairly new and not fully used until now called Elegant Envelope. I die cut the base flap and bottom of the envelope in cream and then a decorative piece in gold. The embossed base uses a new folder from Taylored Expressions which I added to a darker matte gold card front. The flower piece is a stamp from GKD that I inked in Seedless Preserves ink and clear heat embossed along with the sentiment, which is from another GKD set. I used Inktense pencils to colour in my flowers after which I fussy cut them before adding them as you see in the photo. I also used a Sakura gelly roll pen to give colour to the stamens of the flowers. I’ve kept the card as flat as possible for mailing as I recently had to pay a large sum to mail something internationally, that was slightly too thick for the system. Its no surprise to me that Canada Post is having financial issues because people simply can’t pay the ridiculous stamp fees these days.

I enjoyed making this card and quite like the end result. We hope you have fun making your own designs and look forward to seeing them in our gallery.

Flipped over Christmas card

There is a sketch challenge at Sunday Stamps and this is my take on the challenge. It is the second one of two as I wasn’t 100% happy with my first try. I like this much better. I am adding the card at Peace on Earth as well.

I started with some silver metallic CS which I dry embossed with a SSS folder called Filigree snowflakes. To get the flip side I added a piece to the back and when properly attached scored the line for the fold. I wanted more depth, so I went over the piece with some ink and then heat set that with some WOW powder. It needed a bit more oomph, as my hubby would say, so I also spritzed some mica spray. I learned that mica sprayed embossed bits don’t stick well so it took some doing to get the fold to stick down. While waiting for it to dry I took an old GKD set and stamped the snow people using watercolour pencils and Stickles to colour them. After checking placement was what I wanted I glued them flat to the card front, after which I added the embossed panel. Using a die from GKD I cut two snowflakes in a blue CS, added some sparkle and attached them together before adding them to the folded corner. The sentiment is from a Divinity Designs set. A small blue gem completed the card.

Here is a photo of the first one, which is okay, but not quite what I envisioned.

Thanks for stopping by, I appreciate you and your time. Two more cards for my Christmas stash is nice to have. And I have a few other stamped images that I thought I might use for one of this style card so hopefully another couple will get done when I have time.

Happy Easter to all.

oh Christmas tree

SOS537 – My precious and Christmas Trees are the challenges chosen for this card. There are two items used here that I’ve been hoarding, one is the glitter paper border and the other is the pink thread. Although you can’t see it in to photo, the pink thread has something in it that is very sparkly and shiny. These items constitute my precious items for SOS and the tree obviously fits into the challenge at DD.

While cleaning up my craft room I found the pink thread in a drawer and pulled it out. I wondered if I could make it into a tree so I drew a triangle on some CS, added glue and then wound the thread across it in loops until it was mostly filled up. In retrospect I should have cut the triangle first, but experimentation means that we learn as we go. At first, although I liked it, I wasn’t sure how to use it but eventually decided on the gray background so I glued it down. Then it was a matter of deciding on how to finish the card. I remembered this glitter CS and pulled it out along with a frame die from Paper Rose. I liked how it looked cut so added a double layer of foam before adding it the edge of the gray. Then it was added to the silver metallic card front. The sentiment is from an old GKD set and I went over it with a glitter pen so it has a lot of sparkle in reality. The star was cut using an infinity die from Hero Arts.

Thanks for spending time with me today, I appreciate you all.

hexagon fun fold

card flat for mailing
upright showing the shape.

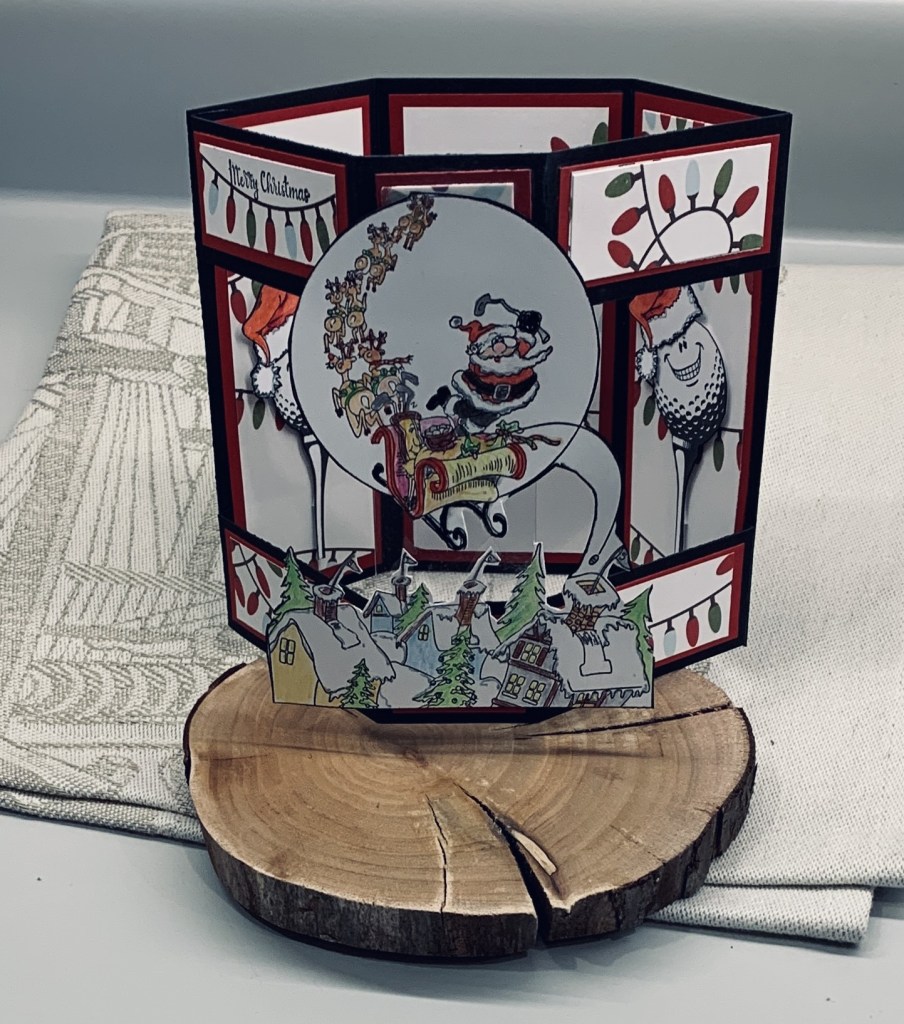
Another of my commissioned cards, this time with a golfing Christmas theme. I thought it would be a nice one for the challenge at Krafty Chicks challenge #746 – Christmas so am entering it there. I saw this fold on Pinterest and searched for a tutorial so I could make it my own version. I could have figured it out, but sometimes it is just easier to see how it is done and this tutorial was really easy to follow. The paper I used is from a paper pad from last year. My images are all from a stamping buddy who gifted me with an envelope full of golf related images and I am really grateful to her for them. She knows who she is. I fussy cut the Tee ball and the Santa hats using pencils to colour. Then I coloured the focal image using pencils and some glitter pens. Once it was coloured I fussy cut it strategically so it stayed together as one piece and I edged it with a black pen. Once I had the card base cut, scored and folded I added all the smaller panels and then taking the suggestion from the video I added a strip of plastic at the centre so the focal image has more stability. Except for the Tee balls everything is glued flat, although as this card is to be gifted personally not mailed, more dimension wouldn’t have been an issue.

I’m really pleased with how it turned out and I know my friend is going to be thrilled with it as will her father for whom it is intended.

I think I have two more Christmas cards to make and then I’m done for this year. I wasn’t going to bother with these two, but have learned that the mail strike may be over next week. The government stepped in and is forcing them to settle. Obviously there will be a backlog to clear, but at least people will receive the cards sometime in January, late but not so bad as to matter. I’ll confirm with my stamping buddies as soon as I am certain the strike it over.

Thanks for stopping by.