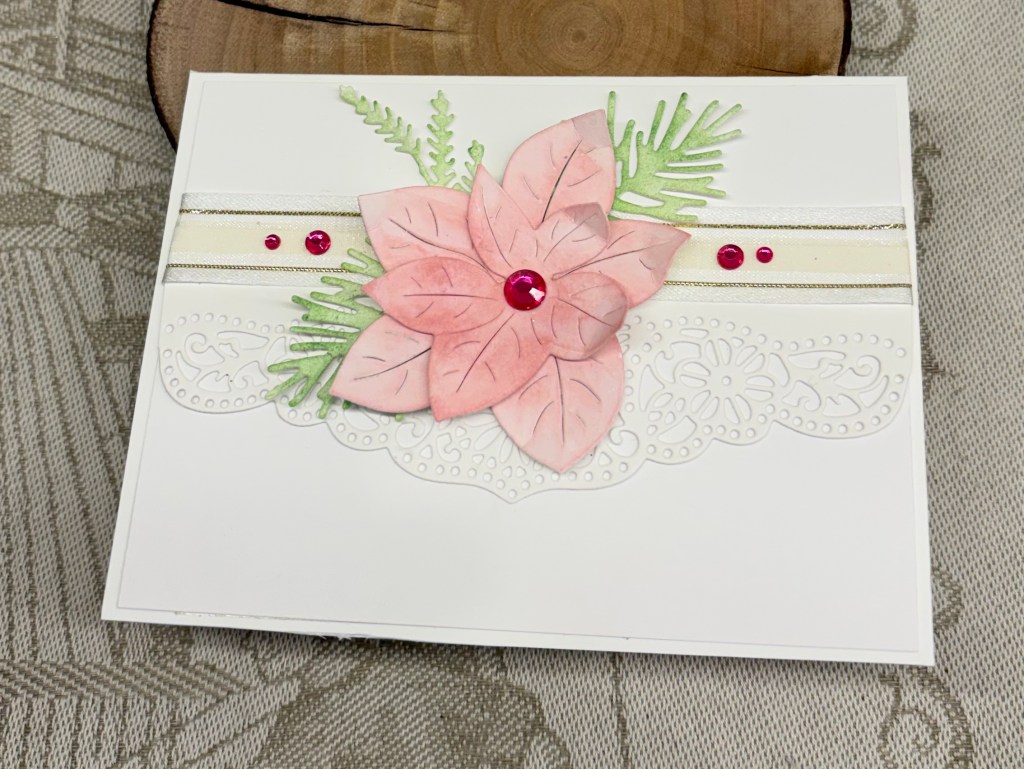
Welcome back to the second challenge of the new year, here at cardz4galz, which is to add pink flowers. Challenge #268 has been chosen by Billie A and she will also choose the winners.
I wanted to keep my card simple so I chose a lacy look border die by Crafters Companion and die cut it. After attaching it to another layer I added the GKD ribbon and then attached the layer to the card front. The flower and foliage are from a Waffle Flower set. I die cut the pieces and then inked them using Distress inks and a sponge. I put the flower together and using a soft pad and a flower shaper I added some dimension to it before gluing it on top of the foliage. A few pink embellishments finished the card nicely and I’m happy with how it looks.
Thanks for spending time with me today. We look forward to seeing your creations in our gallery and hope you have fun making them.
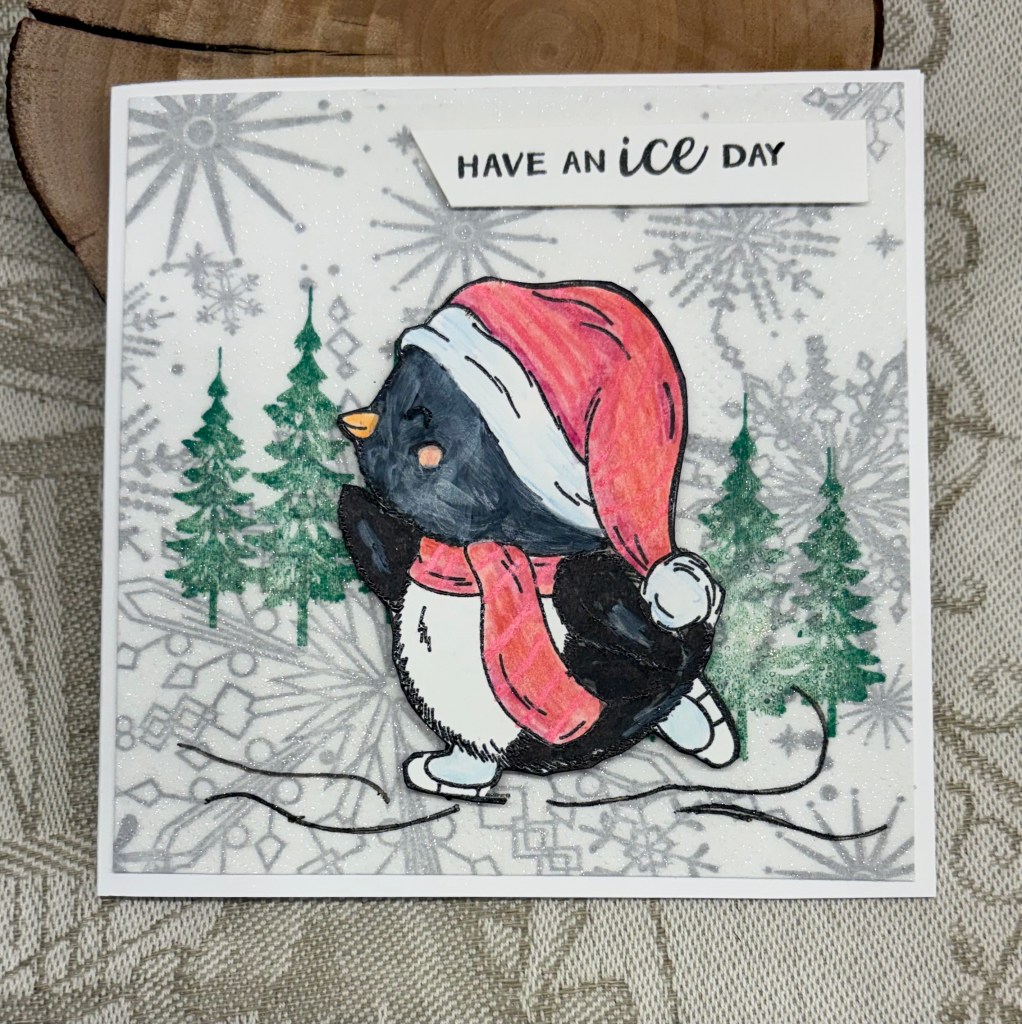
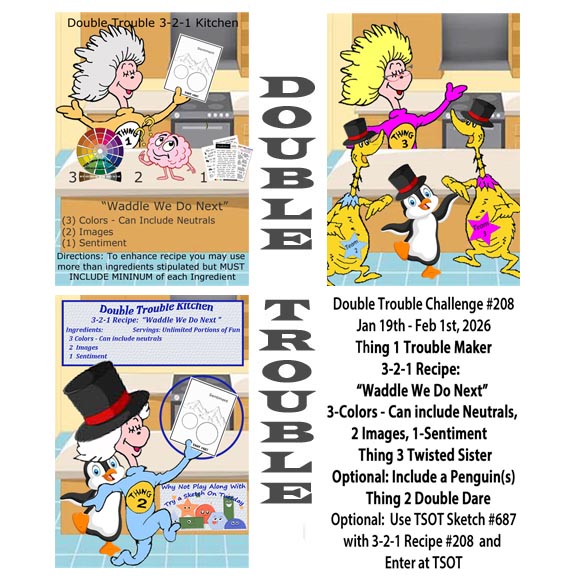
Welcome back to a new challenge here at Double Trouble. Our 3-2-1 recipe Waddle We Do Next, is asking for 3 colours, 2 images, 1 Sentiment, with a twisted sister dare of adding a Penguin. In addition you may enter your card into our sister challenge at TSOT, but ensure you don’t accidentally back link.
My two images are in fact the trees and the penguin who I felt needed his space to shine. My background uses part of a Christmas napkin that I added to card stock and spritzed with glitter spray. I stamped, (from GKD) the trees directly on top. The penguin is from a Crafters Companion set, as is the sentiment. When he was stamped I used clear heat embossing before proceeding to colour him. My colours are green, red, orange-his beak, pink for his cheek and pale blue for his ice boots and to add some shading to his hat. I used a copic marker on his body along with a Pitt pen here and there and I also added some stripes to his hat and scarf using a Posca pen. The background truly sparkles in reality but the photo doesn’t pick it up.
My card doesn’t follow the sketch exactly but is kind of close. It will be a good one for a winter birthday of which a few are coming up.
Thanks for stopping by to take a look. You and your comments are appreciated.
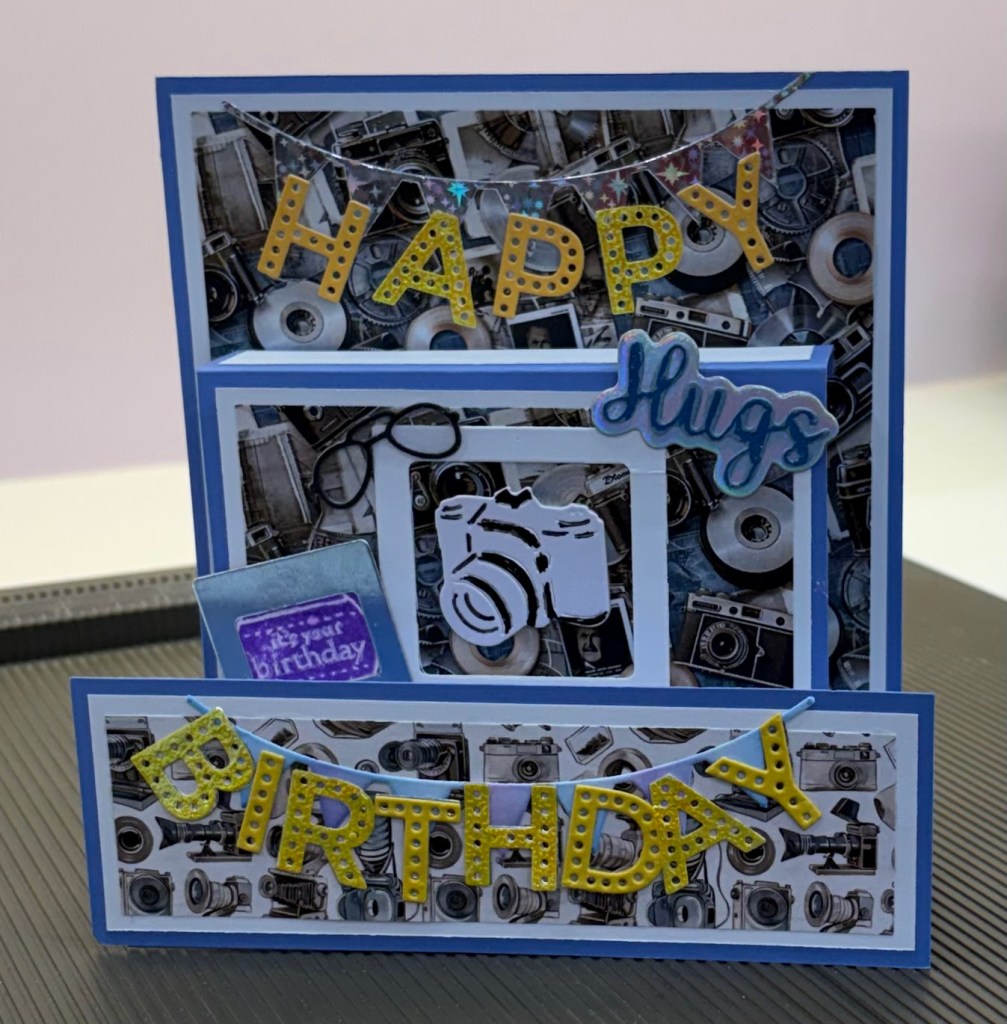
My hubby’s birthday is coming up soon and I’ve been working on this card for him. I can share it here, as he doesn’t go to my blog so won’t see it. Because it fits the current challenge at As You See It,Challenge #364 – Craft Room Additions I shall be entering it there.
My new additions are the patterned paper, the camera, and spectacle dies. This is an unbranded set that has other dies related to travel in it. I used two photo frame dies that have been in my stash forever and not used often, if at all. The banner die is from Scrapbook.com the alphabet dies are from First Edition craft and were cut from scrap card stock. The hugs die cut was a gift so I don’t know which brand and the its your birthday in the smaller frame is from CTMH and was a leftover piece in my stash.
The hardest part in making the card was figuring out what I wanted to use and then following along with the tutorial by Sam Calcutt at Mixed up craft. I like her tutorials and generally find them easy to follow, but for some reason, on this one, I couldn’t get the measurements right at first. I also didn’t have a heavy weight CS in the blue so getting mine to stand properly took a bit of finessing. I’m nothing if not persistent and usually find solutions or work arounds when I’m stuck. Because the paper is very busy, I kept the additional items to just a few things camera related. My personal message will be written on the back of the easel stand added behind the card.
I’m hoping to make his favourite chocolate cake but can’t find the chocolate that I normally use. When I asked at a local grocery store that has carried it in the past, I was told they aren’t stocking it due to the cost. They offered a chocolate flavoured slab, but I declined as it has to be quality and the real thing or nothing. I’m hoping when I’m in Nanaimo next week, a larger town not too far away, that I can find a gourmet store there that stocks it. The price of things lately is beyond ridiculous, but making a cake without the right ingredients is a complete waste of time in my opinion. Wish me luck.
Thanks for stopping by, I appreciate you and your time.
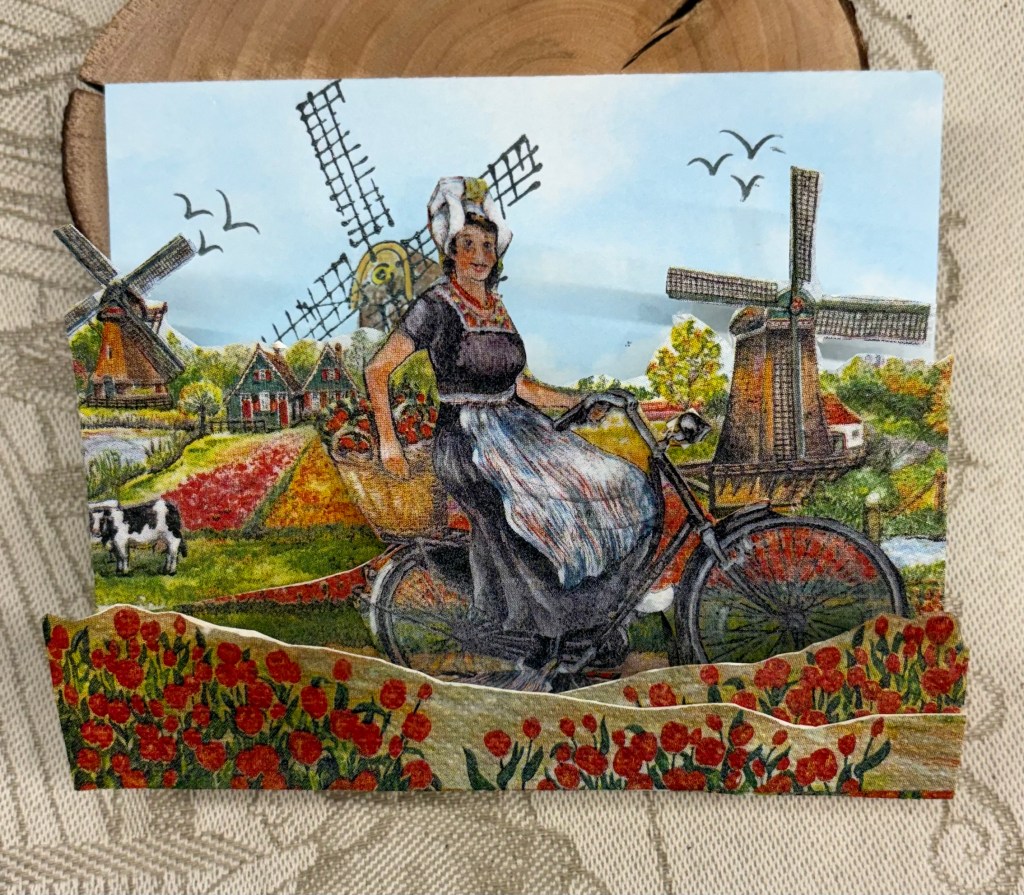
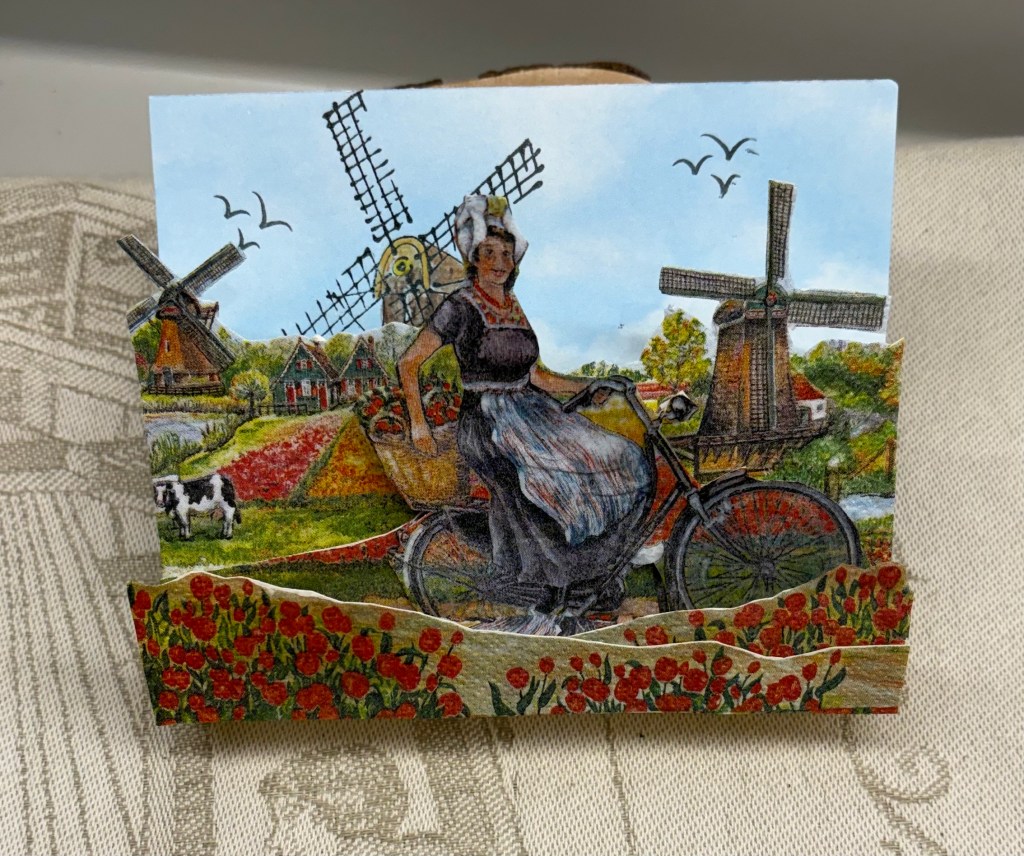
Having seen a card done in this style on YouTube, I wanted to try for myself. If you are interested in making one you can go here and see how. I followed the measurements but my card is using a napkin design that I had transferred to some thin card stock a while back. The only stamps I used are on the back piece and come from Marianne Designs and Kitchen Sink. I had to get a bit creative in laying mine out which took some fussy cutting but I’m pleased with the end result. The card stands beautifully, but folds flat for mailing and isn’t too bulky when folded. I’ve already got a smaller base ready for a second one and an image from a tissue box to use on a third.
Figuring out the fussy cutting took a bit of time, and I also did a bit of decoupage on the figure and bicycle. I used an old paper pad (when I say old, I mean really old) that is all sky and cut it to the size I required. After stamping the windmill I coloured it using Inktense pencils and a small amount of water. The ones I plan to do soon, will be much easier as I now have a good idea what they will look like when finished.
This was fun to make and my hubby was quite impressed with it. I am adding it to the challenge at Triple B January 2026 TB Challenge. Considering the weather and the dreary days, doing a card that denotes springtime was a nice project.
Thanks for stopping by, I appreciate you and any comments you may leave.
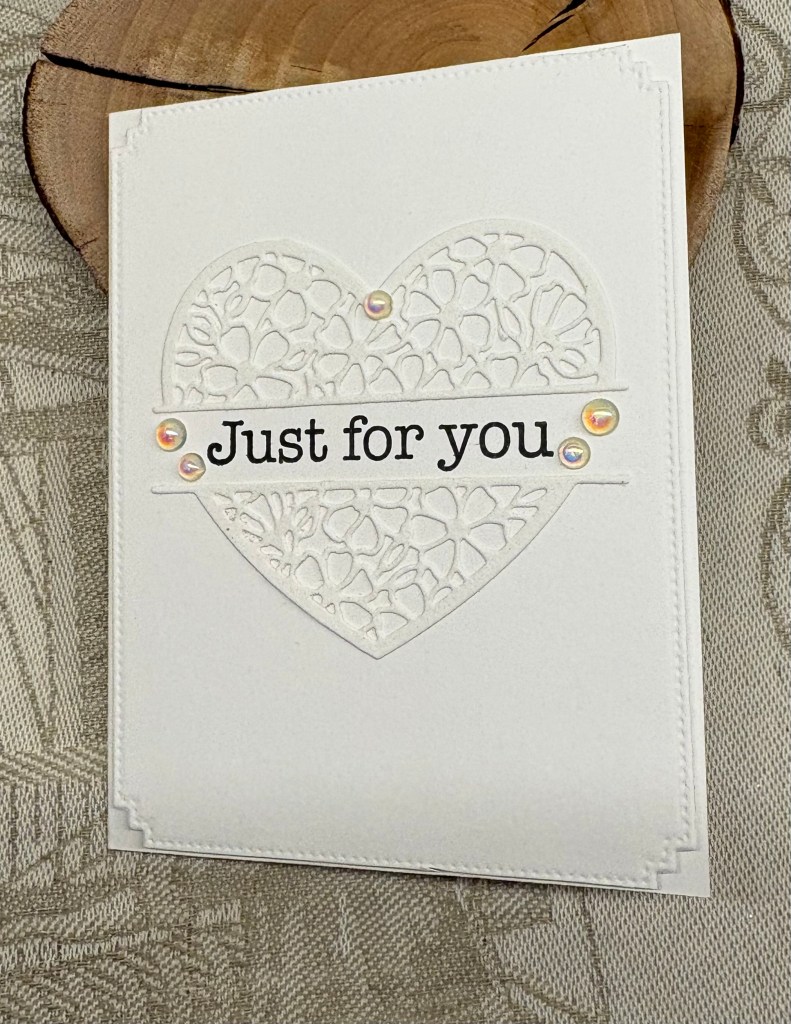
The die I’ve used is new and is from Crafters Companion. It comes in two halves with two stamps. I cut it using some scrap water colour CS. The popped up background piece was cut using an unbranded set, also fairly new to me. Using my smaller Misti I stamped the words and when the ink was dry I added the top and bottom parts of the heart. My embellishments are from Trinity Stamps and are clear, but they are designed to pick up colour from anywhere. In this case it is from the overhead light and on the photo they are reflecting the light and look more golden. In front of my computer screen it is all white so they look shiny white.
I guess now I’ve actually used this new die, I can put it away properly haha. As I have several new ones not even opened, I’m pretty sure I shall get sidetracked again. Hubby just came into my craft room, picked up the card and said how he liked it. Then he asked me if I could add the cuts to a coloured background, which was another idea I already had in my head.
I’m off to put away a bit more stuff before I stop for the day. I did all my embossing folders yesterday. They are now all labeled and numbered so I can find them more easily.
Thanks for stopping by, I appreciate you, your time and any comments you may leave.
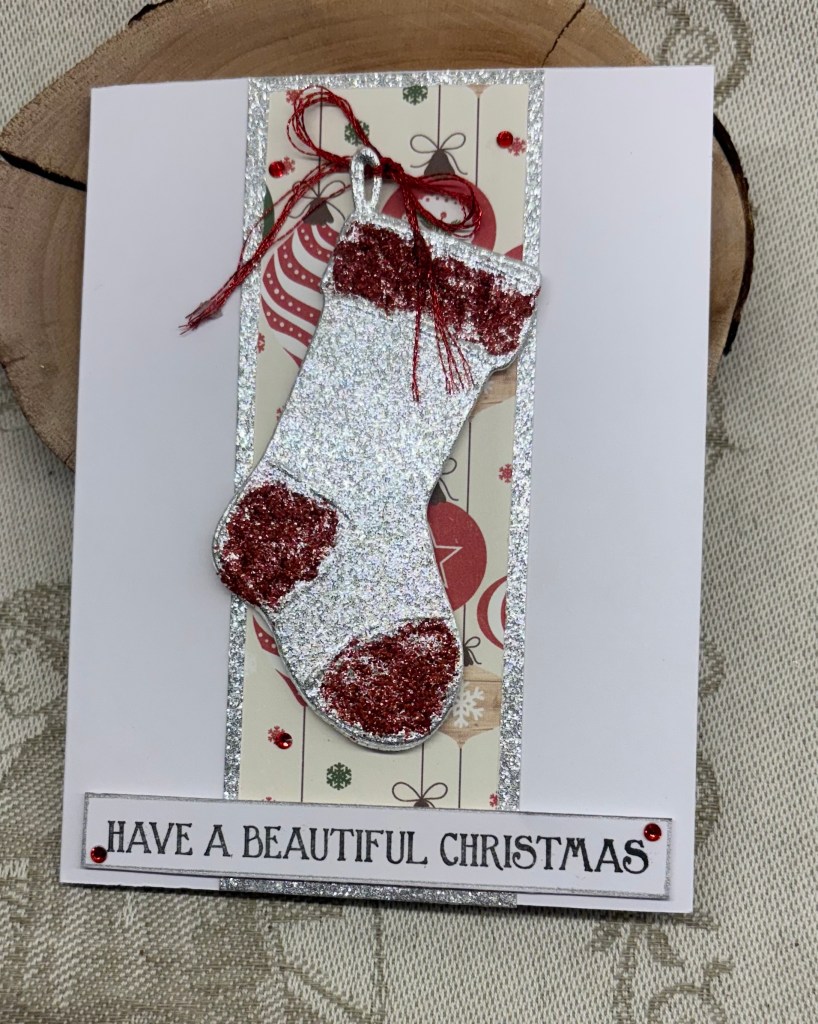
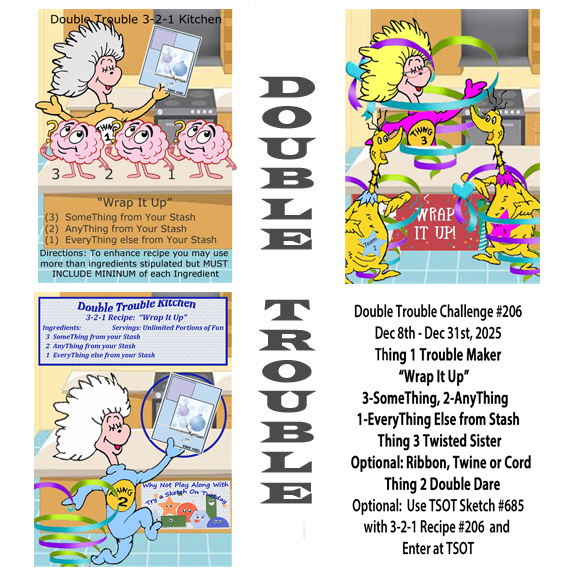
Well here we are with the last challenge of the season for Double Trouble and the recipe this time is: 3 -Something from your stash, 2 – Anything from your stash and 1 – everything from your stash. Twisted Sister says add a ribbon, twine or cord to your project but it is optional and Thing 2 says follow the TSOT #685 sketch and get additional entries to win. However you do need to be careful not to backlink when you join the challenge.
My card has 3 layers including the stocking but not including the actual note card, 2 tiny gems on the sentiment although there are more on the PP and my one is the sentiment, but could also be the stocking. I did add a twine bow to my stocking. I didn’t really interpret the sketch in my opinion, but others may think differently.
The stocking die comes from The Netherlands and is by Marianne Design. The twine is from my stash and is a challenge to use as the threads unravel too easily. The glitter CS and PP are from Michaels and I added Stickles to the stocking to define the toe, heal and top a bit more. Sentiment is from an MFT set and I used another one on the inside from the same set. While making this card I also made another stocking which is ready to use on another project.
Thanks for stopping by, you are appreciated. We look forward to seeing your creations in our gallery and above all have fun in your craft room.
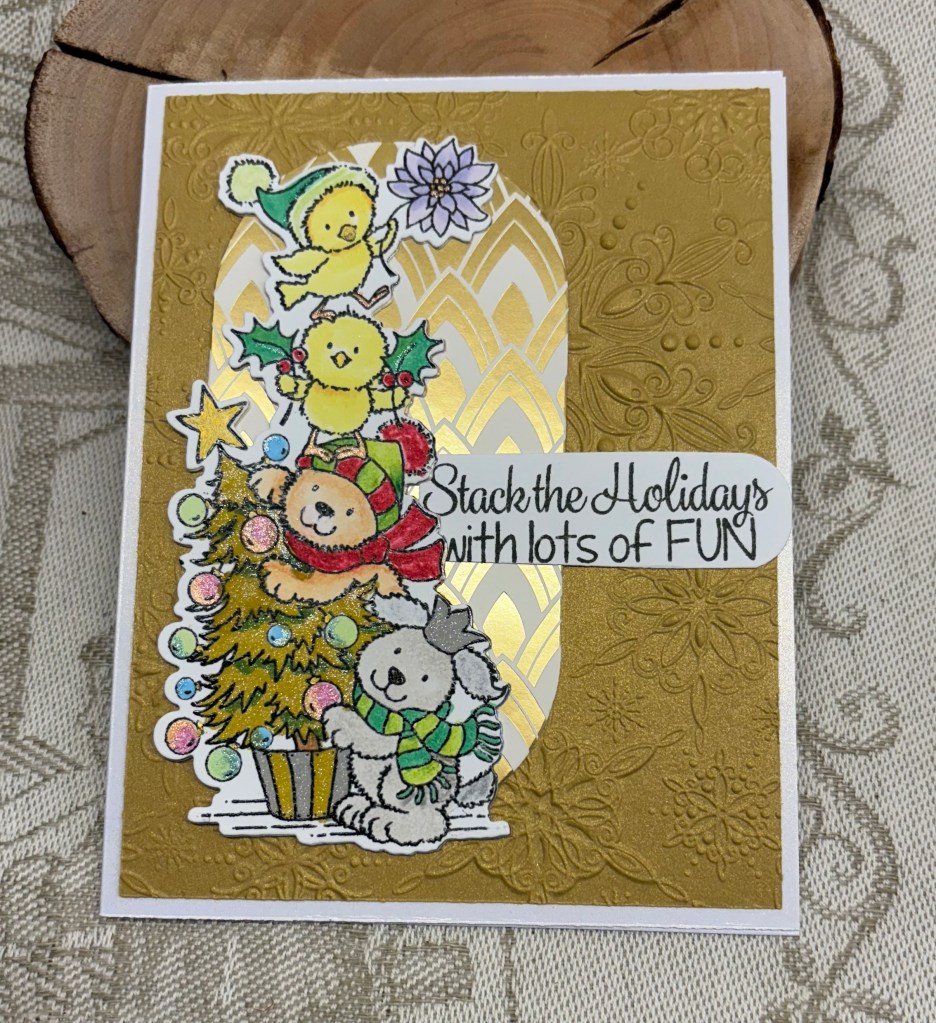
Sue J has chosen the theme, Cute Christmas for our new challenge at cardz4galz and this is my idea. Using some different coloured CS and a 3D EF from SSS, I created several background pieces so I could make more than one card using this YNS stamp and die set. I stamped the critters several times and coloured each one using combinations of alcohol pens, pencils and a little glitter here and there. After die cutting I set them aside to begin the assembly of each card. For this one I took scrap DPS and using a die set called Essential Modern Ovals I cut one and using different PP I did enough to use on the 4 cards. The sentiment was stamped and cut using one of these ovals as well. Except for the texture this card is basically flat so should go through the post without issues. At the moment Canada Post is back on strike, so if I manage to actually mail Christmas cards this year, it will be a miracle. That said I’m hopeful and preparing them just in case.
It is hard to believe we are close the end of another year and trust that you’ve all had some good times through 2025. We look forward to seeing your creations in our gallery, and above all, we want you to have fun.
Our 3-2-1 recipe for the current challenge is to use 3 colours, 2 layers and 1 image. The optional twist is to add ribbon, twine or cord and the double dare is to use the sketch #684 at TSOT. You may add more layers etc., but keep in mind the basic requirements. As well be careful not to backlink when entering into the TSOT challenge.
My card has 3 layers and 2 images. The stamp sets used are from GKD and MFT, the border die is from Crafters Companion Gemini and I used bright yellow, an orangey red along with some blue and a brown for my tree branch. My ribbon is also from GKD. Starting with a layer of 5X5″ CS I added colour by sponging and then sprayed it with a sparkle shimmer spray. While this was drying, I cut two border pieces using the border die. After stamping my bird I fussy cut it out and then coloured it adding a touch of sparkle along the feather edges with a pen. He was popped up on foam tape. I played with placement before stamping my tree branch and the sentiment. Then I added the ribbon which is see through so everything is still visible although softened. Last was to add my little bird. This panel was then added to the silver glitter piece giving me a pretty border and in turn this was added to a 5 1/4 by 5 1/4 note card.
I’m quite pleased with the end result and had fun putting it together. We look forward to seeing your creations in our gallery soon.
Thanks for joining me today, I appreciate you, your time and any comments you may leave.
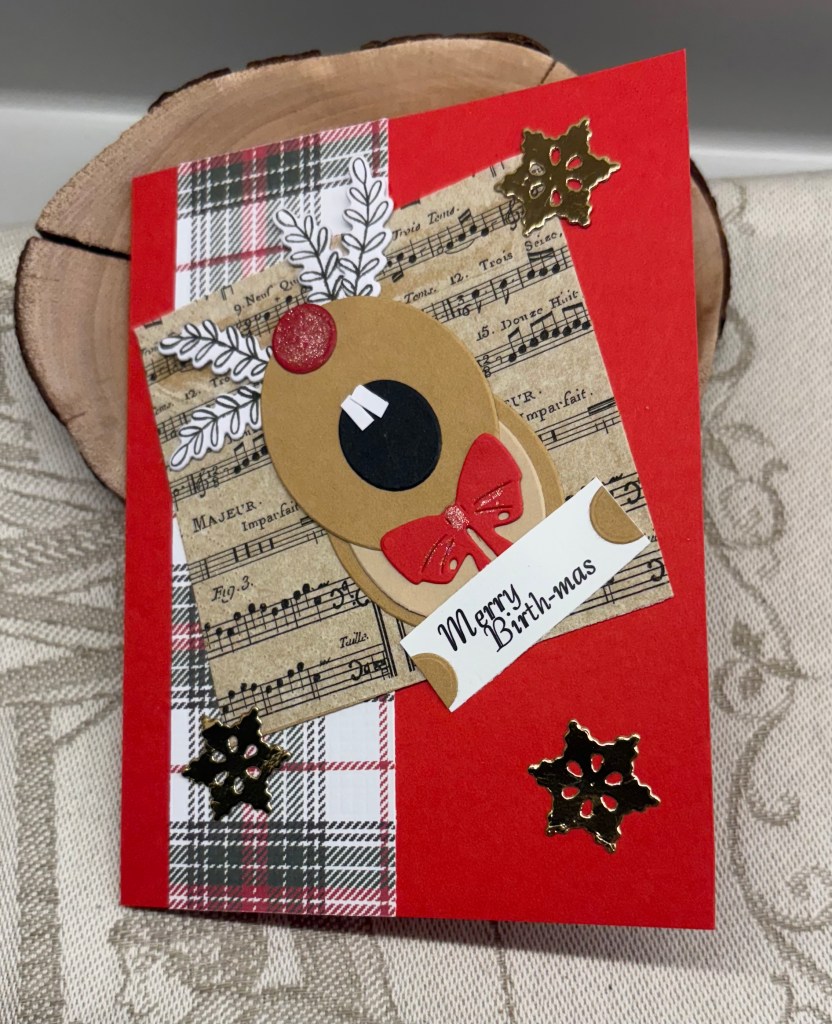
My last card as a guest designer at Seize the Birthday, and I’ve had such fun creating for each challenge. With this challenge asking us to use Christmas supplies and because I do have a male friend whose birthday is on Christmas day, I’ve decided this card is for him. This is always a birthday challenge but its asking us to use Christmas supplies to make it.
The strip of plaid CS used here is from a store bought card I received last year. The napkin music is the last piece of others I’ve used in the past. My Rudolph has been made by die cutting ovals and attaching them together. I cut a couple of small circles, one for his nose and another for his hands and I hand cut his teeth and then glued them as you see. Not my idea, but something I’ve seen on Pinterest and adapted for my own version. The bow is from an unbranded die set, the little stars are part of a die set by Marianne Designs and I used an MFT stamp and die set to create his antlers. A little bit of red sparkle on his nose and bow made him look more festive. The sentiment was created on my computer and is another thing I’d seen online. Initially I tried using stamps but couldn’t make it work nicely, so creating my own was the next option.
I’ve had a blast designing for Seize the Birthday and hope you have an equal fun time creating your own birthday cards with Christmas supplies. Thanks so much for stopping by, I appreciate you and your time.
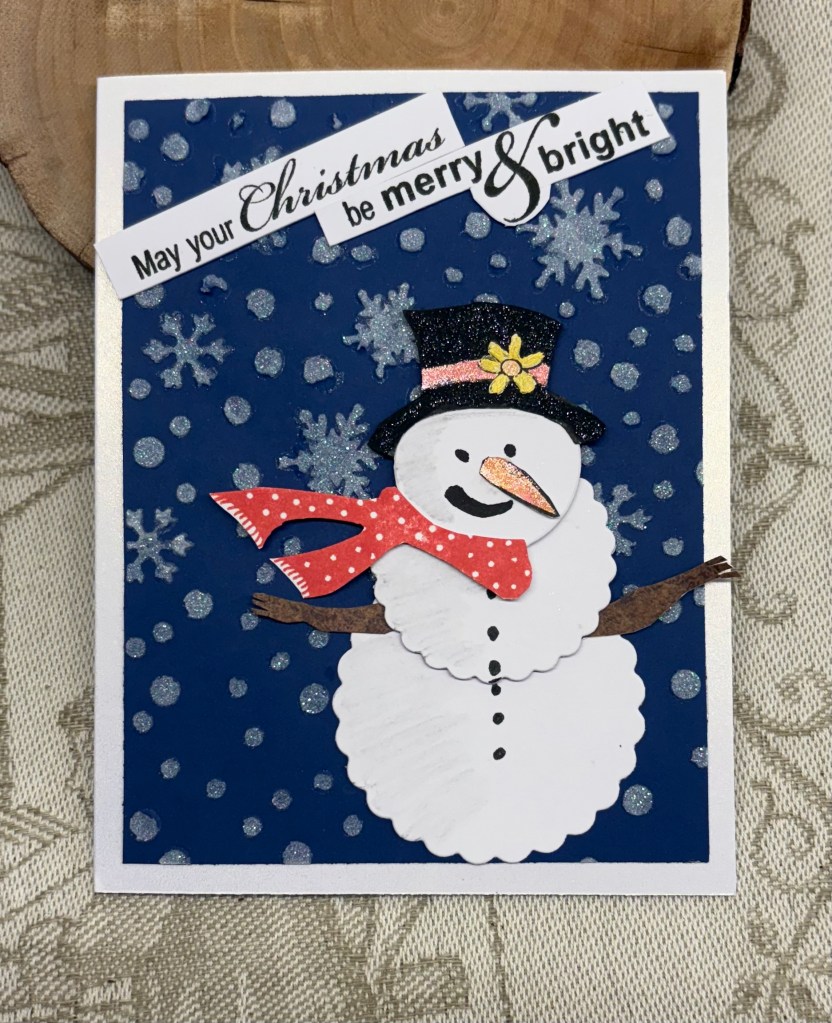
Welcome to our latest challenge here at cardz4galz, chosen and hosted by Caz. She wants us to build a snowman and I took the build part very literally and actually built my snowman.
Using a die set from Sizzix, I die cut two sizes of scalloped circles and then one smaller regular circle from Spellbinders. An old stamp set from Dare 2B Artzy was used as a template for his hat which I stamped separately and then fussy cut to adhere on top of the circle and I used the nose and scarf from this set as well. The twig arms I did by cutting from a scrap piece and I added the eyes, mouth and buttons by hand. A black Spectrum Noir sparkle pen was used on his hat along with some Sakura glitter pens for his hat band, flower and nose. And I added some shading using a gray pencil on his body. I assembled the snowman and set him aside.
Using a navy blue piece of card stock, a stencil called WarmWishes along with some sparkle stencil butter from TCW, I made the background. When dry I cut it to size attached it to the card front and then added my snowman. The sentiment is from the same stamp set as the other bits, but I cut it into two pieces so I could make it fit where I wanted it to go.
We look forward to seeing your snow people in our gallery soon. Thanks for joining me today, I appreciate you and any comments you may leave.