Rainbow Daisy

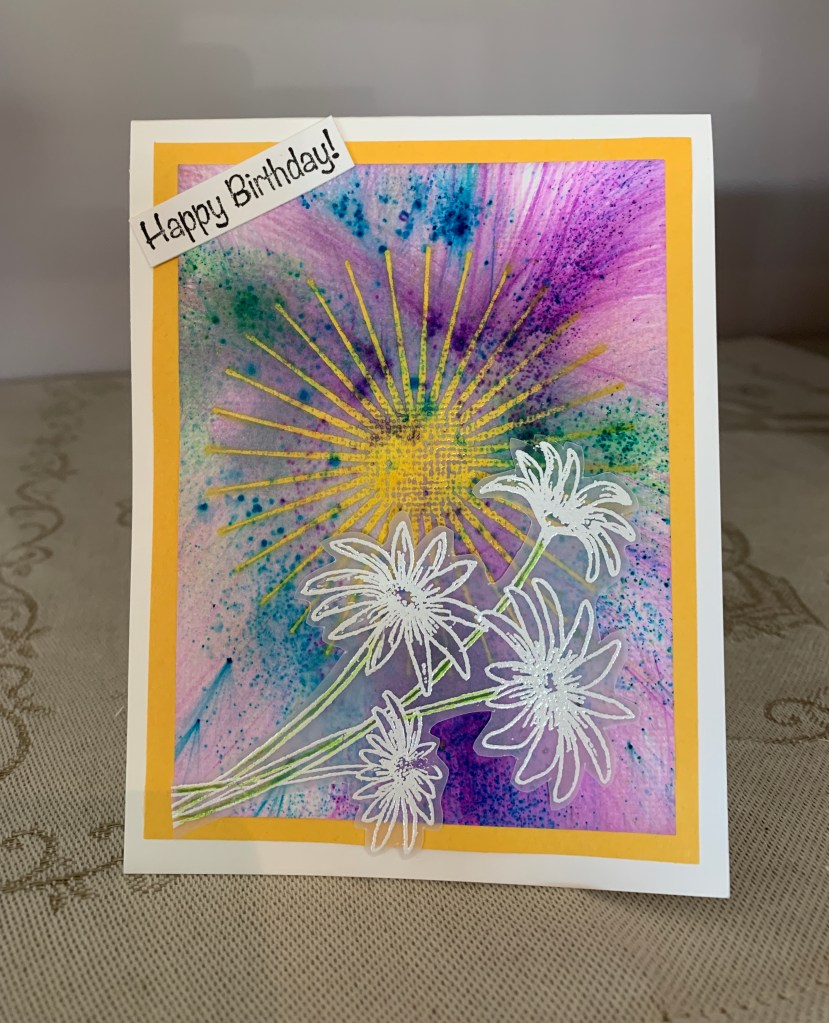
Theme week rainbow challenge sounded like a fun one so here is my effort.

Challenge #223 – Somewhere Over the Rainbow

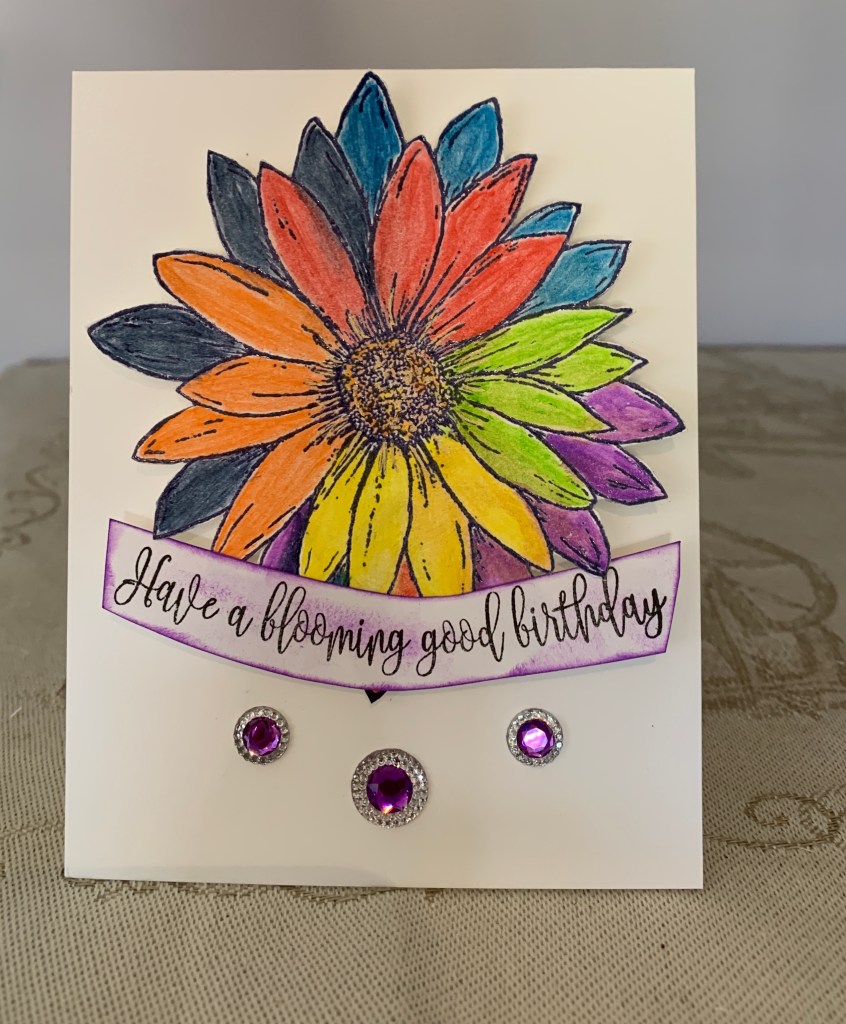
The Daisy stamp set from GKD was still on my desk from yesterday and as I was about to put it away I had this thought about using the big daisy and making it into a rainbow. After stamping and clear heat embossing the edges I used my pencils for the colours then fussy cut the flower out. Popped it onto the card front and then looked for the right sentiment. This one is from another incentive set by GKD and I curved it slightly before stamping then cut it as you see here. Added a bit of ink so it wasn’t stark white and some bling underneath. It has such a striking effect it is almost shocking.

Take Flight

I made this card with this challenge in mind and had to do it twice because I managed to smudge ink onto the first one. Redeemed it with some bling here and there but still needed one for the challenge …

CAS Game #163 – Sketch + optional twist It Flies

I used a CTMH set that was still on my desk for the plane and the cloud but the sentiment is from an incentive set by GKD. After stamping and then masking the plane I added the cloud behind it. When ink was dry I used a silver pen around the edges and because it dripped slightly I ended up adding a few dots of silver here and there too. Coloured the plane with my Inktense pencils. I do like these pencils as I seem to have more control than with Copics or other similar markers. Added the sentiment and figured I met the challenge requirements.

Fireworks?

This card was an accident. I had an idea in my head when I stamped and heat embossed the rays, but when I tried to sponge some colour it all went pear shaped.

Mood Board

I set it aside for a while and went on to play with some colorburst powders and having some left over on the mat decided I had nothing to lose by dabbing this piece into the colour. Kind of liked it so I added some green and some purple to my mat and dabbed the piece into those as well. In polishing off the excess from the rays I accidentally picked up a damp cloth and without thinking used it. When I saw what happened I continued to use the damp cloth as it spread the colour in streaks and I liked how it looked. When dry I mounted it onto the yellow layer and then onto card front. Decided it needed something but had to be simple so I used the daisy stamp from a GKD set on some vellum, heat embossed it white and then fussy cut . Added a bit of green to the stems and then glued over the top of the layers. Am I learning from Bonnie or what? Added the sentiment to the top corner and declared it complete.

Sunshine & Cloud Smiles

Another one for this challenge but one I selectively edited as I went along.

CASE = Copy And Selectively Edit

I suppose it was the yellow and the sponged background that inspired this card. I put color burst powder onto my glass mat and spritzed it with water and then put the card front down on top. The colour was more intense than I expected but I decided I could use it nevertheless. Mopped up the left over colour onto 2 other scrap pieces for use in other projects. I had seen a card on a blog using a cloud with a face and I had received something from my stamping buddy Kathy that was also a cloud shape making it an idea for me to create my own version. Using a CTMH set I stamped the clouds in gray and the heat embossed with some white over the top. The white softened the edges to what I imagined. I fussy cut them out and taking a couple of stamps from an old SSS set I stamped the face onto the biggest cloud. Using the same set I also stamped the sun (face already on this one) and fussy cut that too. And I stamped the sentiments from this set at the bottom. I popped up the biggest cloud and added the others around it then I double foam taped the sun on top of those. Sponged a tiny bit of gray to the clouds for more definition. Figured sending smiles to someone right now was a good idea.

Kindness

For this challenge I took a part of the shape and also one of the colours.

CASE = Copy And Selectively Edit

Using a StampinUp set called Kinda Electic I stamped the rays in mustard Seed Distress Oxide. Clear embossed it to heat set the colour. Then using a scrap piece that I had used colour burst on, I cut the partial shape. From same stamp set I stamped the leaves and the butterflies then added it to card front. Stamped the sentiment and added a few gems. I like the simplicity of this design.

Butterfly Frame

My last card for these two challenges. Basically using the leftover frames from previous post.

Just Us Girls #531 – Trend Week
PP486

When I put these two leftover frames on my desk they ended up one on top of the other and I liked how they looked. After playing with them a bit I decided to add one square with the other on top like a diamond. Glued them to the gray Lawn Fawn cs which was cut at 5 1/2 X 5 1/2″. Decided that butterflies would look good with this and used two different sets (GKD & CTMH) plus a die to create them. It proved difficult to get the right shade of blue for the corner butterflies but I tried. I also had these silk flowers so I added them to the blue corners. One flower was too pale a yellow so I coloured it with a copic marker to make it darker. Think it is a bit too dark now, but don’t have any others to replace it. Added the die cut butterfly to the center. Don’t want to add a sentiment at the moment, but most likely it will become a birthday card.

Inchies Squared

A second card for JUGs and a first one for this weeks Paper Players challenge. One idea often leads to another and that is how this card came about. Actually have another on the go using left over pieces but probably won’t have it finished until tomorrow.

Just Us Girls #531 – Trend Week
http://thepaperplayers.blogspot.com/2020/04/pp486-color-challenge-from-jaydee.html

Using some window dies I die cut the Yellow and blue squares saving the outer frames for a different project. The gray layer was cut using a punch. It is gray but looks almost beige in the photo. I glued the yellow and gray layers first and using the frame as a guide added them to the square card front. Using the frame meant I got nice uniform placement. After searching through my stamps I found a couple of sets that have very tiny images with a vacation or boating theme that fit well onto the small squares. I stamped them and then used a Sakura Jelly roll pen in blue to add the edges to each one. Did the same thing to the gray layer only using a gold pen. Once I decided on placement of the blue layer I glued them down. Added a touch of glitter here and there as well as a few strategically placed gems in blue and yellow. Found some blue ribbon and made the small bow for the center square. It looks better in R.L. than it does on the photo.

Squared

The card for this challenge is a design I’ve wanted to try for a while but never got around to. I guess the challenge ensured that I did …

#531 – Trend Week

I started by cutting the 2 frames and wove them together. Then taking the stitched piece I added a few washi tape pieces from a different project. After stamping and colouring the rose I fussy cut the image gluing it to the side of the diamond shapes. The rose is from a SSS set and Inktense pencils were used for colouring. I cut the card base to the correct size and also cut strips from the left over washi tape to make a frame for the rest. Glued the layers to the center but decided against a sentiment for now. I shall add one when I figure out recipient and occasion.

Lovely Friend

Found another challenge blog and decided to enter it for fun.

Fab Friday 187

I liked the sketch and this is my take on it. The die I used is from a Spellbinders label set to which I added some dry embossing once it was cut. Folder used is from Craft Concepts titled In Bloom. PP is from my stash by GKD and I cut the layer and added it to a dark green layer to match the greens in the pp. The stamped image and sentiments are from my current favourite set by SSS called Be Kind and I heat embossed the leaf image with silver. Used Distress Oxides Blueprint Sketch and Mowed Lawn to colour. I die cut several more to glue together for stability and dimension. It was bigger than the card front so once glued to front I cut off the edges. After I had positioned the label I added the die cut leaves on top and then added the sentiment. I had stamped these 2 words together, but didn’t like the width of the white scrap so I ended up fussy cutting until I liked how it looked. I often do this with a sentiment if I am not happy with size. This is a somewhat busy looking card, but somehow it works and I quite like the result.

Die Cut Word

Challenge #500

I’ve been playing quite a bit with a SSS stamp set that is fairly new and a set of Sissix thinlets. This is the 3rd card and so far the only one I have uploaded. This came about because of the challenge although I already had the leaves done ready on my desk and was thinking about how I might use them. Did several of these leaves from the set and coloured them with Distress Oxides adding some perfect pearl powders over the top for some shimmer. I kept them very soft. Used a couple of die cuts to add to the back for dimension and strength. The coppery layer is actually washi tape on top of a piece of cs which I then ran through the die cut machine after which it was glued to card front. Added the leaves and die cut the word from same CS. I used versamark and clear powder to get the shine before gluing on top. Added some gems for interest. I got this word die in Homesense a long time ago and have no idea of brand. Although I do like this card I prefer the 1st one I did. Will get it uploaded at some point but am waiting to see if it will fit a challenge before I do.