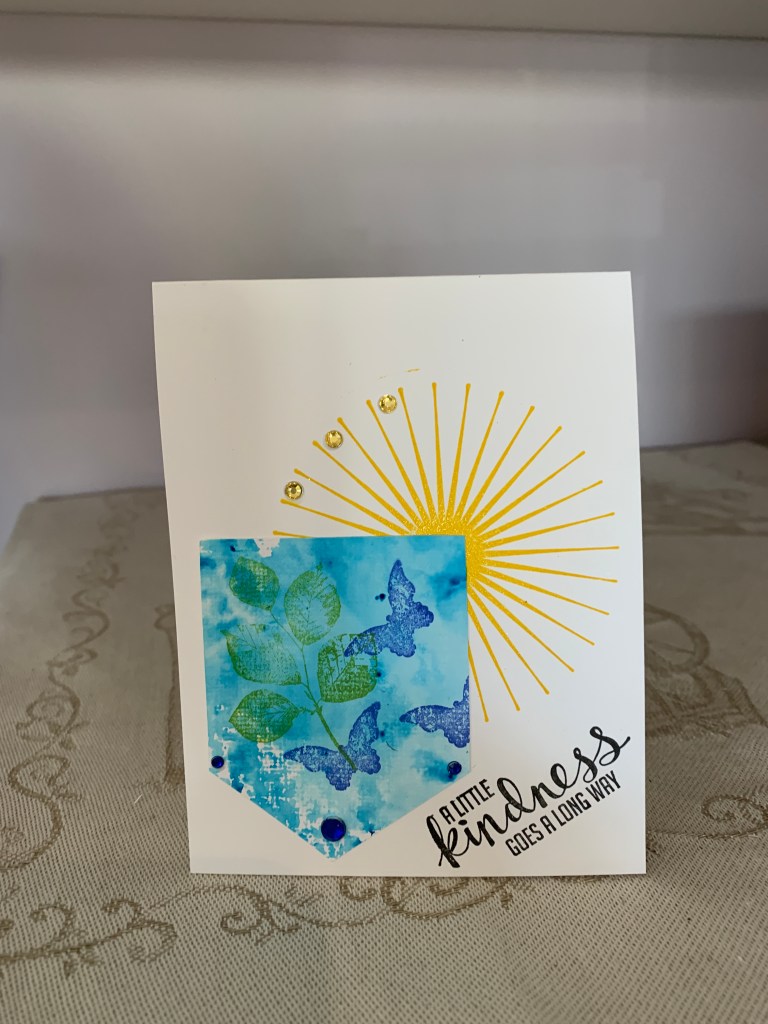
Using a StampinUp set called Kinda Electic I stamped the rays in mustard Seed Distress Oxide. Clear embossed it to heat set the colour. Then using a scrap piece that I had used colour burst on, I cut the partial shape. From same stamp set I stamped the leaves and the butterflies then added it to card front. Stamped the sentiment and added a few gems. I like the simplicity of this design.
When I put these two leftover frames on my desk they ended up one on top of the other and I liked how they looked. After playing with them a bit I decided to add one square with the other on top like a diamond. Glued them to the gray Lawn Fawn cs which was cut at 5 1/2 X 5 1/2″. Decided that butterflies would look good with this and used two different sets (GKD & CTMH) plus a die to create them. It proved difficult to get the right shade of blue for the corner butterflies but I tried. I also had these silk flowers so I added them to the blue corners. One flower was too pale a yellow so I coloured it with a copic marker to make it darker. Think it is a bit too dark now, but don’t have any others to replace it. Added the die cut butterfly to the center. Don’t want to add a sentiment at the moment, but most likely it will become a birthday card.
A second card for JUGs and a first one for this weeks Paper Players challenge. One idea often leads to another and that is how this card came about. Actually have another on the go using left over pieces but probably won’t have it finished until tomorrow.
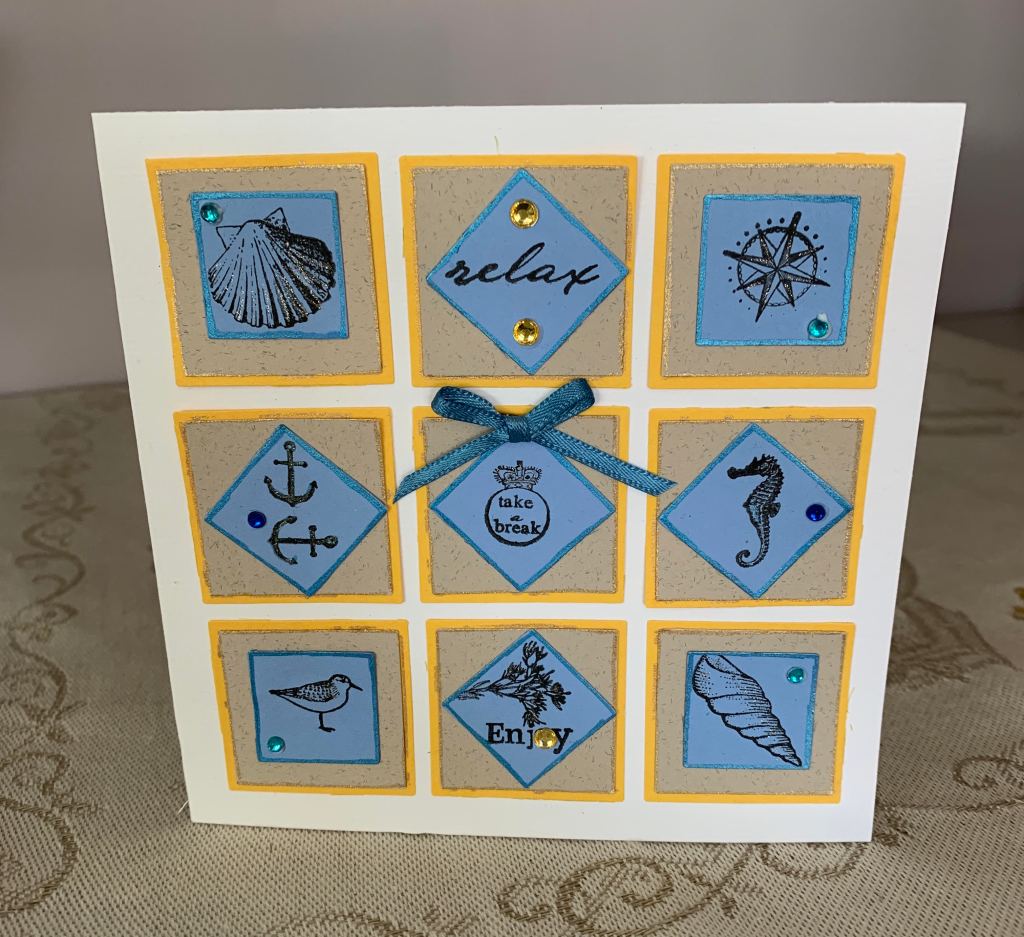
Using some window dies I die cut the Yellow and blue squares saving the outer frames for a different project. The gray layer was cut using a punch. It is gray but looks almost beige in the photo. I glued the yellow and gray layers first and using the frame as a guide added them to the square card front. Using the frame meant I got nice uniform placement. After searching through my stamps I found a couple of sets that have very tiny images with a vacation or boating theme that fit well onto the small squares. I stamped them and then used a Sakura Jelly roll pen in blue to add the edges to each one. Did the same thing to the gray layer only using a gold pen. Once I decided on placement of the blue layer I glued them down. Added a touch of glitter here and there as well as a few strategically placed gems in blue and yellow. Found some blue ribbon and made the small bow for the center square. It looks better in R.L. than it does on the photo.
I started by cutting the 2 frames and wove them together. Then taking the stitched piece I added a few washi tape pieces from a different project. After stamping and colouring the rose I fussy cut the image gluing it to the side of the diamond shapes. The rose is from a SSS set and Inktense pencils were used for colouring. I cut the card base to the correct size and also cut strips from the left over washi tape to make a frame for the rest. Glued the layers to the center but decided against a sentiment for now. I shall add one when I figure out recipient and occasion.
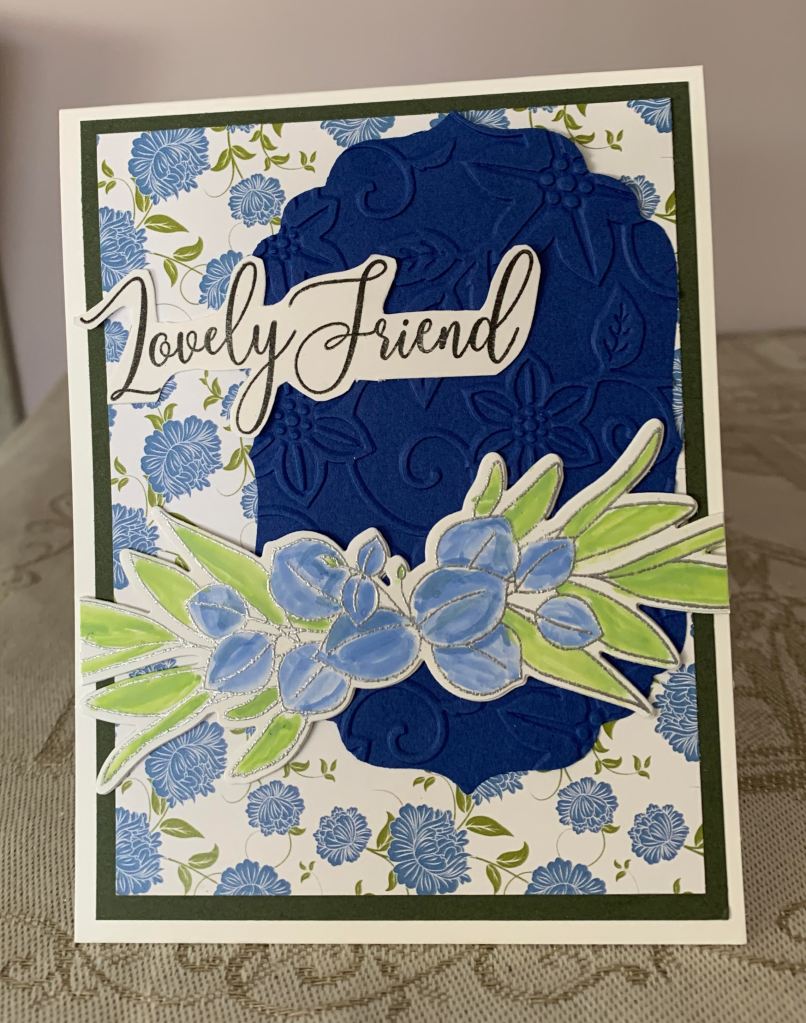
I liked the sketch and this is my take on it. The die I used is from a Spellbinders label set to which I added some dry embossing once it was cut. Folder used is from Craft Concepts titled In Bloom. PP is from my stash by GKD and I cut the layer and added it to a dark green layer to match the greens in the pp. The stamped image and sentiments are from my current favourite set by SSS called Be Kind and I heat embossed the leaf image with silver. Used Distress Oxides Blueprint Sketch and Mowed Lawn to colour. I die cut several more to glue together for stability and dimension. It was bigger than the card front so once glued to front I cut off the edges. After I had positioned the label I added the die cut leaves on top and then added the sentiment. I had stamped these 2 words together, but didn’t like the width of the white scrap so I ended up fussy cutting until I liked how it looked. I often do this with a sentiment if I am not happy with size. This is a somewhat busy looking card, but somehow it works and I quite like the result.
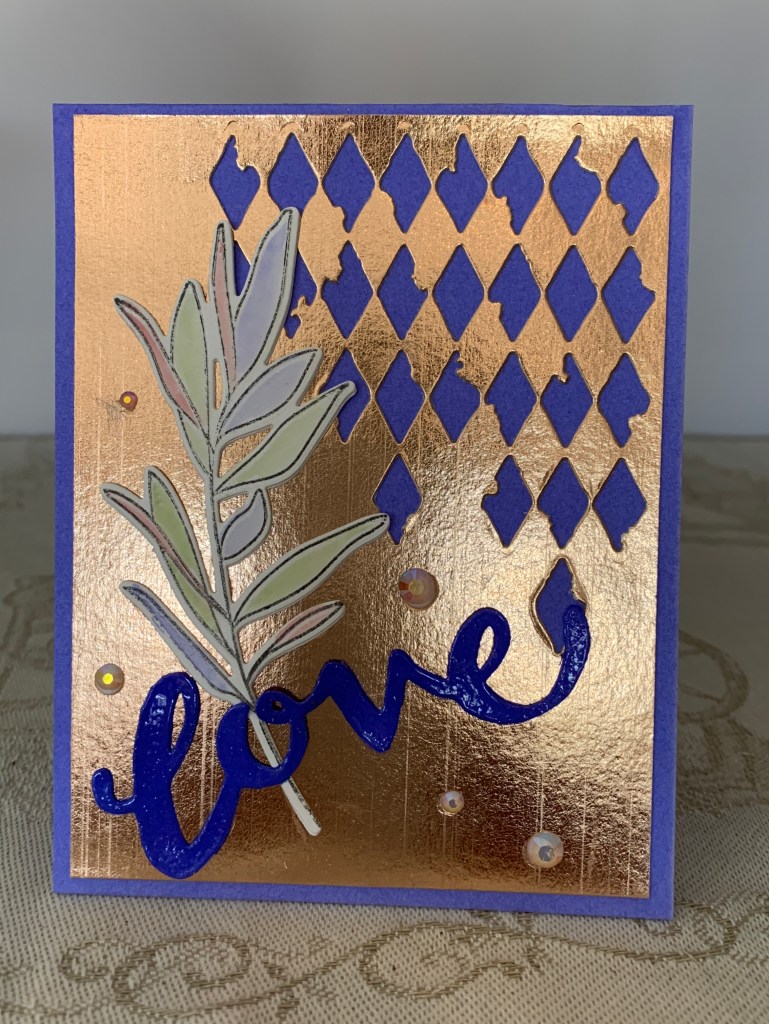
I’ve been playing quite a bit with a SSS stamp set that is fairly new and a set of Sissix thinlets. This is the 3rd card and so far the only one I have uploaded. This came about because of the challenge although I already had the leaves done ready on my desk and was thinking about how I might use them. Did several of these leaves from the set and coloured them with Distress Oxides adding some perfect pearl powders over the top for some shimmer. I kept them very soft. Used a couple of die cuts to add to the back for dimension and strength. The coppery layer is actually washi tape on top of a piece of cs which I then ran through the die cut machine after which it was glued to card front. Added the leaves and die cut the word from same CS. I used versamark and clear powder to get the shine before gluing on top. Added some gems for interest. I got this word die in Homesense a long time ago and have no idea of brand. Although I do like this card I prefer the 1st one I did. Will get it uploaded at some point but am waiting to see if it will fit a challenge before I do.
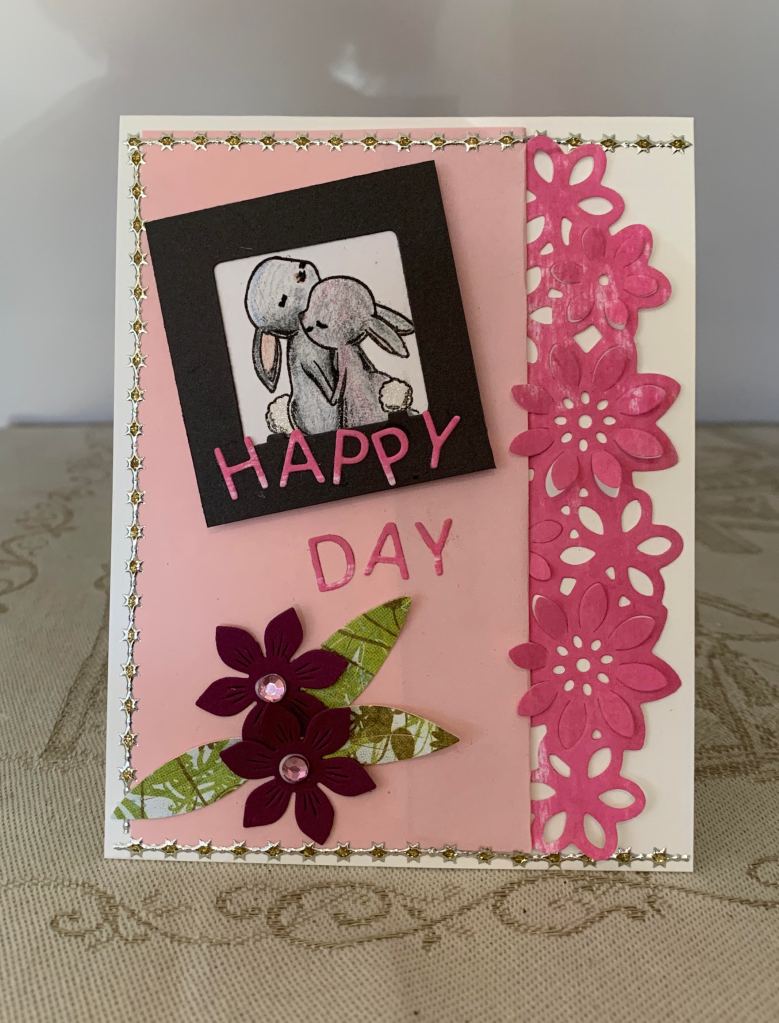
Another new challenge for me and this is the card I came up with. I already had the photo frame negative space and decided that the bunny’s inside a frame would look good. Using a Divinity Designs stamp set, I stamped the bunnies, coloured them and added them into the frame. The bunny tails are glittered. Using a flower border die (don’t know brand or name) and a scrap piece of swiped inked cs I cut the border and glued it behind a pale pink piece of paper, which I then added to card front. I added the bunny frame on an angle and die cut the letters for the words from another Divinity Designs set. Glued the words and decided it needed something else so I die cut the flowers and leaves using a GKD set. Added some pink gem centers to the flowers and a line of bling around 3 sides.
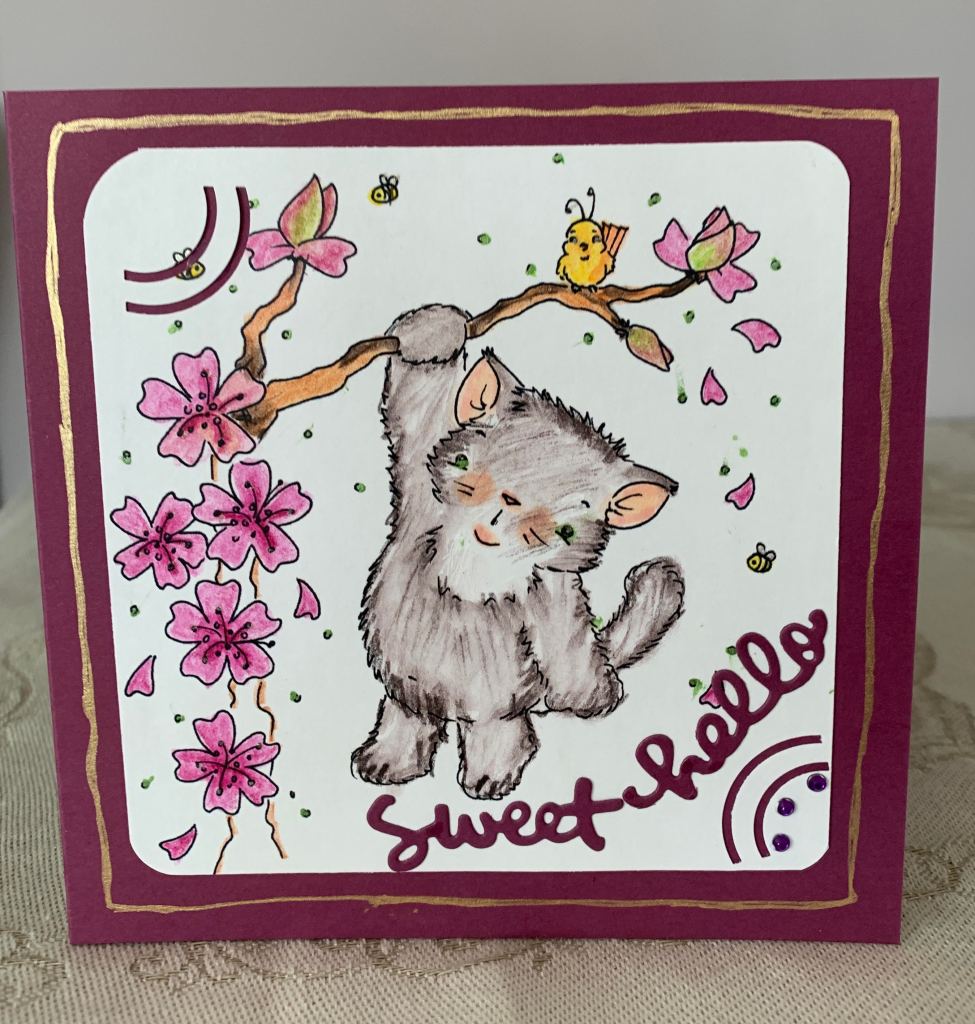
I had this little digi printed and set aside in an envelope ready for colouring. It came from a freebie found on Pinterest sometime ago. Using my Inktense pencils I spent some time colouring it. I added some highlights with Sakura jelly roll pens here and there. Used a corner punch for some additional interest and then adhered to the card front. Hand drew the gold border frame. Found the word dies I bought last year and cut two of them for the sweet hello. Added a few gems at bottom right corner. It is a vibrant looking card and I quite like it which is big bonus for me.
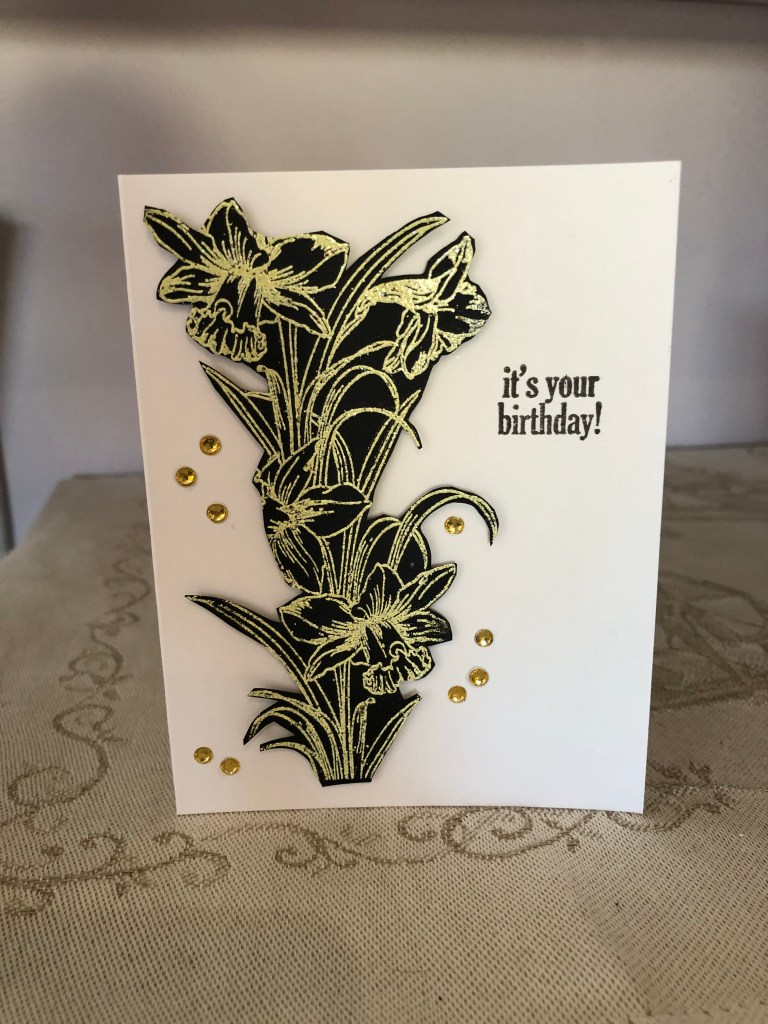
A while back I had made a card for a different challenge and messed up the first stamping effort. I set that aside and made a 2nd one but I don’t like wasting anything so I wondered if I could salvage the poor effort. This is the result. I fussy cut the image out but avoided the messed up part of it. Stamp is from a GKD set and is one I love and have used quite often. I heat set the image with some sparkly lemon/gold powder. After adding some foam to the back it was glued to card front. Stamped the greeting and added some gems and really like the result. Even better it is nice to rescue a piece that was poorly done. I was waiting for the right challenge in which to enter before I posted it here.
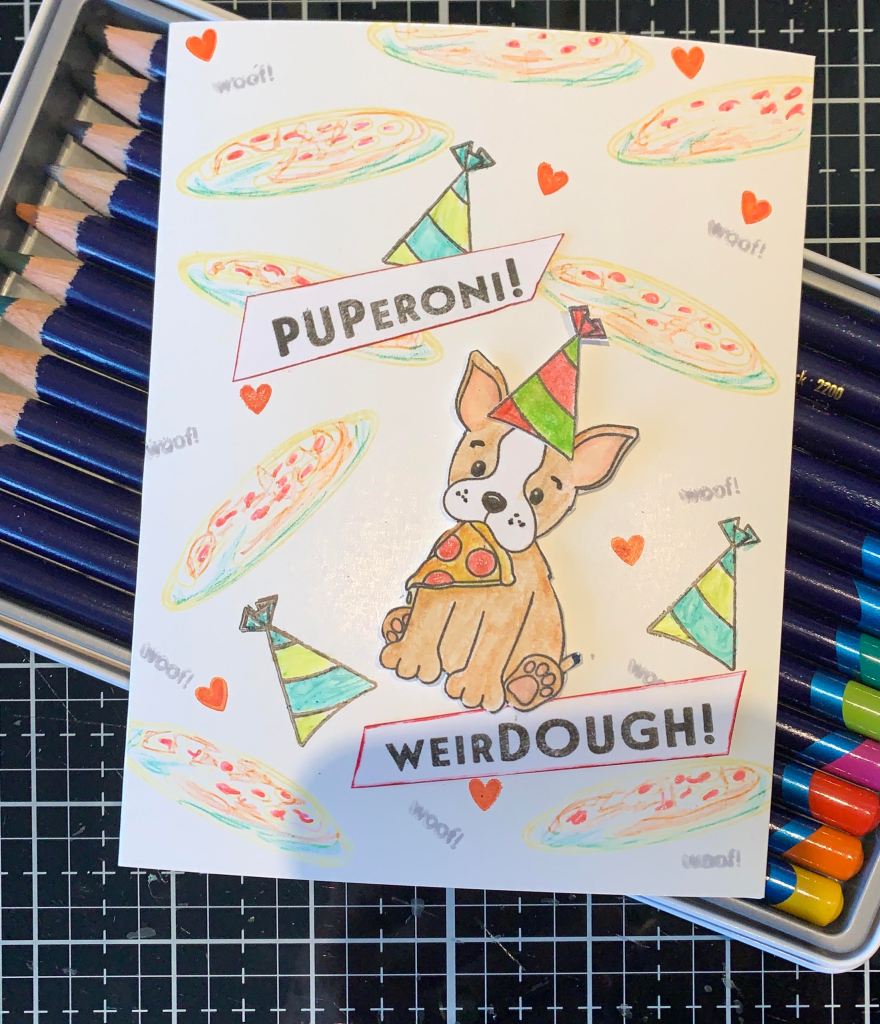
In general I don’t make cards for kids because I have none of my own and no nieces or nephews either. That said I do have a few adult friends who would chuckle at this card. The set is from SSS and was a gift that came with my order. This is the first time I’ve inked it even though I’ve had it for some time. Starting with the white card base I added the pizza image randomly along with the hats and words and coloured them a little. I did the pup separately and fussy cut. Also did the same thing with the party hat. Glued the two together and popped up onto card front. Stamped the two word stamps, cut into the shape you see and used a copic marker to ink the edges. Added a few random tiny hearts to finish. I quite like the result.