pretty pinks

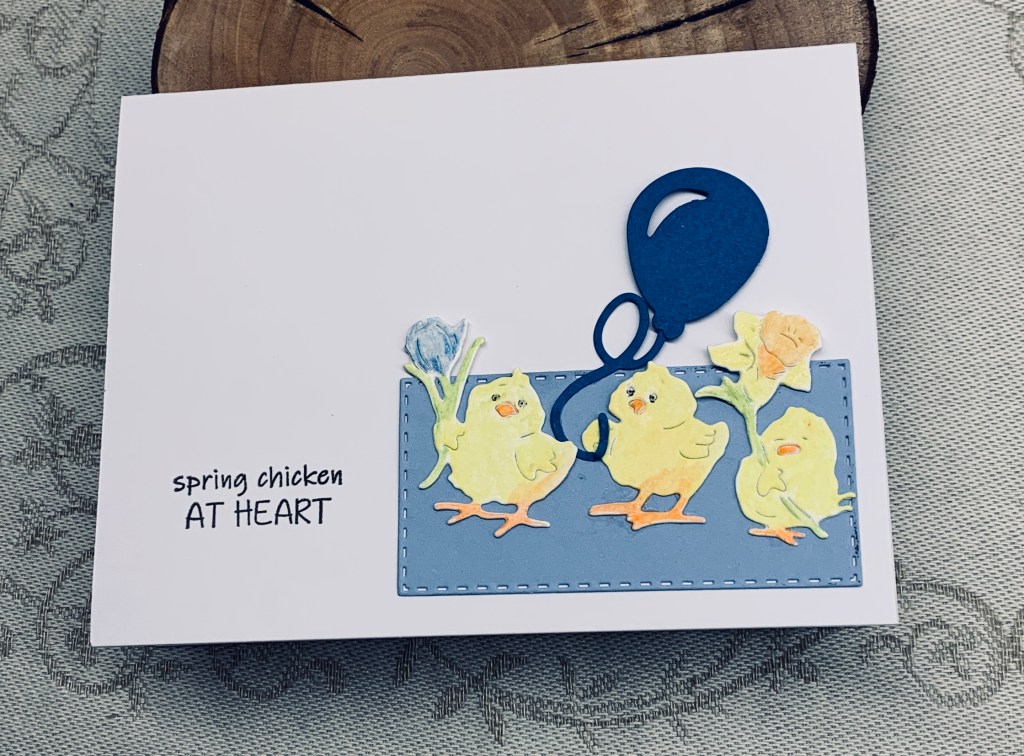
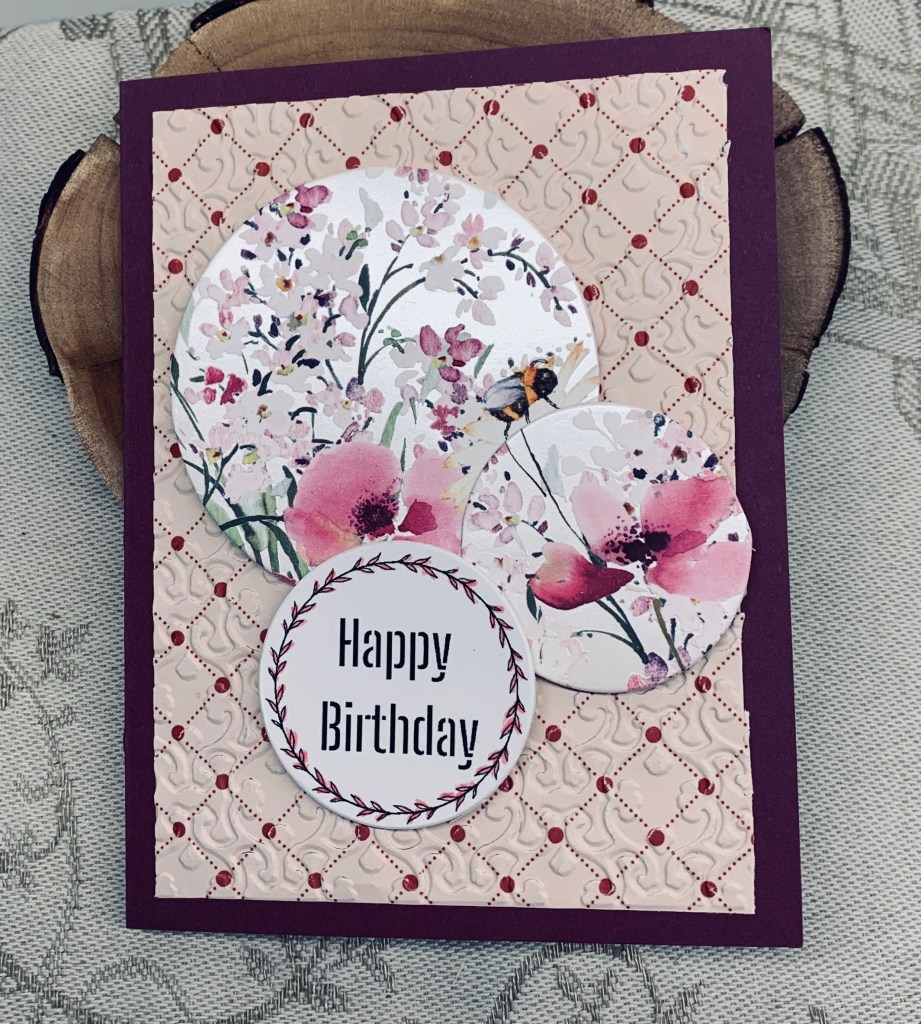
I received a very pretty store bought birthday card last year and I simply couldn’t throw it away. Instead I die cut various sections from it, some circles and some ovals. This card is the result using some of those die cuts. The background paper is from my stash and came as part of a magazine so I have a few pieces that are double sided. I had forgotten about them until my recent clean up. I dry embossed the background piece using a Craft Concepts folder before adding it to the card front. Then I added the circles using foam tape. The sentiment circle is a freebie from Natasha Foote and I used a pink pencil on the leaves before die cutting.

It was fun to use the card in this way and it certainly brings spring to mind.

This works for 2 challenges, links below.

April 2024 – Anything Goes SPRING Challenge

Anything Goes Embossing with a Twist of BIRDS – twist not taken.

Thanks for stopping by, it is appreciated.

Hope you have …

You would think that after cleaning up my work space I would be smart enough to put a stamp back after using it, but somehow I didn’t. Now I have to spend some time determining which stamp set it came from so I can put it away properly. Anyway because it was still in my Misti I used it as my sentiment for this challenge.

Mostly this is made up of the found scraps that came after my initial tidying up. I had already added the background butterfly section to the gold oval and after fussy cutting the little dragonfly was already there to0. I stamped the top part of the butterfly in Picked Raspberry and clear heat embossed before fussy cutting. I added it to the black piece but only attached it at the middle so the additional wings will float up if I bend them. The two strips underneath it all were also scraps from my desk and all I did was cut them down and attach them as you see. The sentiment was added but I have no idea which set at the moment so cannot attribute it. The butterfly is from an MFT set and the tiny dragonfly was found online.

I’m slowing using up all the bits and pieces I unearthed in my clean up, but my stamp/die organizing is an ongoing process. I’ve signed up for a free organization summit in late April and hope that it will help me figure a few things out.

We’ve enjoyed some lovely sunny weather since yesterday afternoon, so dog walking was really pleasant and after some exercise I won’t feel guilty eating supper. Thanks for stopping by, it is appreciated.

luck

In looking at the mood board at Double D, my card is obviously inspired by the greens, the heart, and the word Luck. It started with leftover pieces that were in my tidy up scraps. The larger heart die cut (Hero Arts Infinity dies) was swiped with Distress Oxide ink in Mowed Lawn and while still wet I heat embossed clear. The coverage was left spotty on purpose. The shamrock heart die cut is something that I’m pretty sure came off a damaged (I spilled something, if I remember correctly) card received from one of my stamping buddies. I’m pretty sure she won’t mind my repurposing it. The word was die cut using a Scrappers.com alphabet die and the smaller sentiment is from a very old Simon Says set. I’m confident I saw Jen McGuire demonstrating this set some years ago and consequently bought it. My background can be attributed to something I’ve recently seen Natasha Foote demonstrate. She was showing different ways to use an EF and the one I’ve used here is from Sizzix, Tim Holtz and is 3D. I first added some sponged colour to the CS not worrying about blending and then I ran it through the machine. Colours used were Twisted Citron and Lucky Clover. Using a dark ink – in this case Forest Moss – I swiped ink over the top it which gave the darker lines. I did two panels and used this one first. Using a Spectrum Noir pen I went around the edges of the two hearts and the embossed panel so they would stand out a bit more. After adding foam tape I glued the hearts to the panel. The die cut letters were placed in a line to which I added some tape to hold them in place. I then added ink and heat embossed the bottom half leaving the top half white. After adding it to a white note card, I declared it finished and I’m reasonably satisfied with the end result. If I were to change anything it would be using a different colour on the bottom part of the letters.

Thanks for stopping by, it is appreciated as are any comments you leave for me.

Here’s to you

It isn’t so often that I use my stencils and I really should use them more. My skill level would improve if I did. That said I used a Creative Expressions stencil to do this background last week. I set it aside, as at the time, I didn’t have an idea in my head. I’m adding it to the challenge although unless you count the colours it isn’t really a spring theme.

In the meantime, I spent some time searching for a pair of scissors and a tiny die that I seemed to have lost. This entailed actually cleaning my craft room properly instead of the usual lip service I’d been giving. Most of my weekend was spent doing this in between some gardening and grocery shopping. In the clean up process, I found both the scissors and die along with a lot of bits and pieces that needed to be used or thrown out. As sometimes occurs, the bottle, which was cut from a Tattered Lace die and the flower, unbranded, fell on top of this background. A card was born.

I edged the background piece with a Spectrum Noir glitter pen and added it to the card front. The bottle was popped up on foam tape with the sentiment across it and the flower was just added for embellishment as you see. The tiny bow was one I had tied a while back – on a good hand day – and was added to the neck of the bottle. I had the sentiment left from another project but now I can’t remember which stamp set it comes from.

I’m still working on my craft room in that I need to do something about all the paper scraps etc., but I took a break to get this card posted. It is nice to have a clean work surface although it won’t take long before its a mess again.

Thanks for stopping by, it is appreciated. I hope you all enjoyed a decent weekend. It was pretty wet here on Saturday but yesterday and today have been mostly dry.

going for a ride

The current challenge has been chosen by Dawn and the theme is transport. My original idea for this didn’t seem to be coming together so I decided to do this one instead. Perhaps the other idea will work later on? My PP is from a very old scrapbook pad that I had forgotten I had but seemed to be the right choice for my background. I added the black strip and then my little image as you see. The image is from Divinity Designs and was cut 3 times then glued them together. I coloured with Prisma pencils and a bit of silver ink on the wheels. The sentiment is from a GKD set and I added it to the die cut after going over it with a small amount of Vintage photo ink to cut the glare of the white. Gold piece was cut with dies from StampinUp.

We hope to see your creations using this theme in our gallery and that you have fun participating.

Thanks for stopping by it is appreciated.

Speed challenge

To start with, I gathered up the items I thought I would need including the Flower Field background stamp from MFT that I haven’t used in a long time. I used my larger platform for stamping and added several inks over the stamp, huffed on it to ensure it was still damp and then placed CS over the stamp and pressed down. Inks used were a little too light, but couldn’t fix it in the time limit. If there had been enough time I would have added more colour to the background flowers, but with the clock ticking it wasn’t possible. I cut the panel down to fit an A2 card front and added it. Then I stamped the bird directly over the top of the flowers. Stamped the sentiment on a separate piece and fussy cut to size. Prisma pencils were used to add come colour and definition to the bird. Like one of the DT members I don’t always plan my cards, but let them evolve so planning this one was a challenge all on its own. Add the clock and panic can set it if I let it. It was finished with 2 seconds to spare and my hands were shaking at the end.

I am aware that a speed challenge means that a card may be less than one’s usual standard so I’m not too disappointed with this one. It is clearly not one of my best efforts but I’ve made worse on occasion.

Thanks for stopping by, I do appreciate it as I also appreciate any comments you may leave for me.

Lattice floral

My talented friend Lynda, has chosen the theme of spring flowers with dies/punches for our current challenge here at Cardz4Galz and I decided to try my hand at making a Lattice card. I’ve seen various tutorials online but can’t attribute to one specific lesson.

First I die cut my flowers using various dies from Memory Box. I laid them out on a pad proceeding to add some inks to them. Once happy with colour I glued a few together for additional layers and dimension. Setting them aside I proceeded to create the lattice. Using a top folding card base, I scored at 5.1/2″ and cut off a portion of the front at 3.1/4″ and then cut the leftover piece into 1/2″ strips X 5 strips. The 6th one was cut into half and set to one side. Using a piece of washi tape I added it close to the middle of the front flap sticky side up. Starting at the bottom, I added one strip leaving a small gap between each one. The washi tape held it all together ready for gluing. Then taking the 2 pieces I had set aside, I added some glue and placed the strip down, doing the same on the other side. Carefully removing the washi tape I now had my lattice front. It seemed bit flimsy even though I was using a heavy weight CS so I repeated the process on the backside with additional pieces at the top, sides and bottom. This helped to make the card stronger so it would stand upright without bending in the middle. My sentiment is from a Hampton Arts set and I stamped before adding anything more so I could be sure it would fit once the flowers were added. Taking the flowers I played with placement until happy and then added them as you see. I decided to add some black gems to denote nails on the lattice and a couple of pretty gems for some flowers and as embellishment at the top of the card.

For once I am quite happy with the end result and my hubby really liked it too. Thanks for stopping by, it is appreciated. I hope to see your creations in our gallery soon.

shake a tail feather

The challenge at Color Hues is to use cream and blue and I came up with this card. I used a Kokorosa stamp and die set along with a banner die set from StampinUP. I stamped each banner with 2 stamps from the set, the blue banner with Antique Linen for the fence and the cream one with Faded Jeans off stamping each time so that it was truly faded. I made a small hole at the top and threaded through my twine and then added both pieces to the darker card front. I left the twine as threads at one end as it reminded me of the tail feathers. My card front is cut from a very old CTMH piece of CS that I liked when held underneath the other layers. My chicken was stamped onto cream CS, added some clear heat embossing and then coloured it with pencils and gamsol. I probably should have used a darker outline for the stamping, but obviously I didn’t . It still works but in retrospect it may have looked better with a darker outline. I had made another banner yet wasn’t happy with it but a piece of it worked for doing the sentiment and I added some Nuvo drops to this as well. Also, I stamped Birthday wishes on the inside of the card.

Thanks for stopping by, it is appreciated more than you know.

spring chicken

Inkspirational has a CAS challenge with a twist of using a balloon, and AAA is an anything goes with a twist of adding spring colours. Fortunately it wasn’t hard to make a card that fits both these challenges.

My stitched background is a die cut using an unbranded set and the little chicks are new dies just received from Kokorosa. The sentiment is also from Kokorosa but from a stamp and die set. I like these fonts and sentiments. My balloon is from a Spellbinders set that I’ve had for a long time. Once I had die cut the chicks from white CS I used Inktense pencils to colour them. I placed them on the rectangle and once satisfied with the look I adhered them. I added the balloon separately.

This was an easy card to make and quite fast too. Thanks for stopping by. I do hope you are beginning to see signs of spring. We’ve had some lovely sunshine and warm temperatures and a lot of my spring flowers are now out. Makes the garden look so pretty.

This was

3D foiling using a stencil

In my previous post I mentioned using a Crafter’s workshop stencil and 3D glue and this is the result of that project. It fits the choose two challenge at Just Add Ink as the background is circles and my sentiment is the second choice. The letters had been created last year but were too big for that particular design and have been sitting around ever since. As well the ink didn’t take well in a few places so I had to figure out how to cover up where it didn’t look great. These small enamel flowers from StampinUp did the trick. Because the background is so bold and shiny adding anything else would be too busy I only added the stamped word trimmed from a Hampton Arts sentiment.

It is interesting how the 3D glue gives a kind of distressed look to the foiled parts and as I am generally unsuccessful with any heat foiling I like that I can do it this way.

We’ve had a lovely spring day today and it isn’t cold outside at all. Maybe we are heading into some warmer temperatures more consistently now? Thanks for stopping by it is appreciated.