WeirDough!

Challenge #259 – Speed Humour

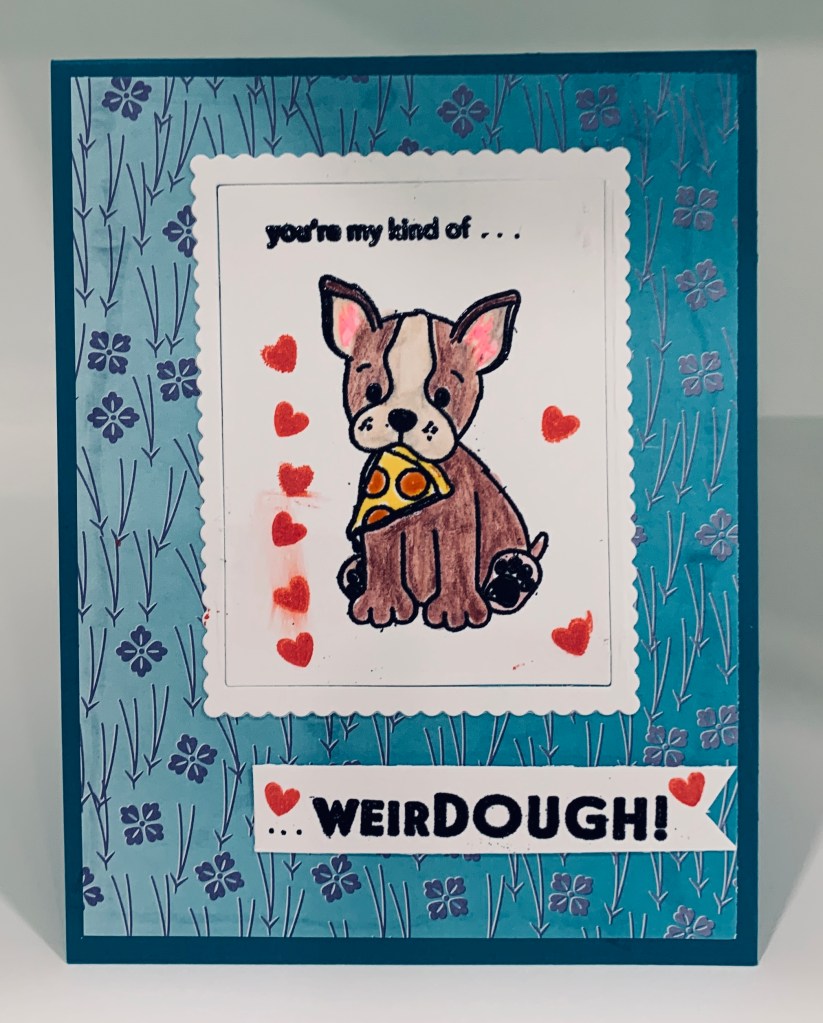
Well I know they said they weren’t expecting perfection, but I’m sure they would prefer a project that didn’t have ink smears all over it. LOL! After thinking about what to make and laying out the idea so I could see if it would work, I gathered all my supplies, set out the timer and began. First I cut the frame a mixed edge rectangle set by Essentials. Then I cut my PP (a 6×6″ origami paper) to the correct size and glued it to the card front. I then glued the frame leaving the center piece ready for stamping. The larger sentiment was stamped on a scrap piece, heat embossed then cut and added underneath. So far so good and I am way ahead of my time schedule. Easy peasie, Ha – famous last words actually. So I stamped and heat embossed my dog and the small sentiment even remembering to use my eb buddy which I, oh so often, forget to use. I still managed to get powder where I didn’t want it and no time to fix properly. Still ahead of schedule and thinking this is going well … I managed to colour in the little dog and pizza slice using pencils and Sakura Glaze and I’m well within the time frame. Here is where it went wrong – I stamped 3 tiny hearts on one side of the pup and 2 more on the other side. Completely forgot to dry the ink, turned it over to add glue started to add it inside the frame and OMG, horrified to see I had smudged the ink. 1 minute left to go and I can’t get rid of the smudges so I stamped a few more hearts to try to cover it up. I also added 2 hearts to the bottom sentiment. 43 seconds left on the clock and I decided to leave well enough alone as, for sure, I would have ended up with rubbish had I tried to erase any marks. If the card isn’t humorous my efforts certainly are!

CAS Thanks

PP559 – A Clean-and-Simple Challenge from Claire

For this card I went through a box of scraps and pulled out the 2 layer pieces. I cut them to the size I wanted and added to the card front. Using a skeleton leaf set by GKD and another scrap piece, I stamped the 2 biggest leaves with rusty hinge and scattered straw, mixing them together as I inked the stamps. After clear heat embossing, I fussy cut them out and added to the card front. I then stamped two sentiments together in vintage photo and fussy cut that before adding in the middle. It is a struggle for me to not add more, but I am resisting the temptation. A really quick card to pull together.

Joyful in non Traditional Christmas Colours

Color Hues #26-Purple and Pink

With purple being one of my favorite colours you would think doing a card would be easy, but it wasn’t. And try as I might I could not get a nice photo of this card either. I think that there is so much going on in the house all the time that I am not truly settled into creativity, but I’m getting there slowly.

I had the dry embossed piece on my desk and decided on a small slimline for it. I cut the pink CS and added the panel. Using a stencil I added the hearts down the side along with the small gems. Now what? Originally I thought of die cutting several hearts in different shades of the purple and pink and adding those, but I couldn’t find the dies. While looking for them I found the poinsettia Editions by Creative Expressions and thought okay, a Christmas card it will be. Took forever to get a good die cut of the top section of the flower and I had to try 3 times before it cut and came out of the die intact. I used a paper pad called floral fantasy for this and a scrap piece of the pinky purple solid die cut underneath. The PP had a silver stripe in it which I thought added interest. As I also have a stamp and die set on my desk by Lawn Fawn I used the sentiment from this set. I heat embossed in black then used the matching die to cut it out. I do like the font of this word.

Gnome Friend

Colour Week

As I haven’t had that much opportunity to use some of my newer purchases, I am doing my best to try to get some of them inked before putting them away in their new home. This set is from MFT You Gnome Me and is cute too. I added the various smaller stamps to the background piece and added that to the card front. I hand drew the border around this piece, although in retrospect should have probably used a ruler. After stamping, colouring and die cutting the 2 gnomes I used a sentiment from the set to pull them together. Went over part of the sentiment in Sakura glaze as I forgot to heat emboss it before I glued it. Didn’t want to redo it as I would likely have spoiled the card front. Used some Sakura glaze and glitter pens to add interest to the gnomes.

Hoppy Day

CAS
(CUTE & Simple)

I had the SSS unfrogettable set on my desk along with a few paper scraps and decided to use them to create a cute and simple card. After all what is cuter than a frog sipping through a straw. After stamping him I carefully coloured him with InkTense pencils and some Sakura Glaze pens. I added the white background behind the leftover frame from a previous project and stamped some water, a lily pad and the butterflies. After fussy cutting the frog I popped him up on the corner added the pp strip across the bottom and stamped the sentiment above that. The challenge time was running out so I had to hurry and hope that I get it uploaded in time.

Friend

Make the Cards Challenge #33

Finally had a moment to create something and sat down to begin. Brain freeze – I couldn’t think of anything initially so I looked through the posts from the design team and remembered this new die that I’ve only used once since its purchase. Cut the red and another in black and offset them slightly. Decided on the Kraft CS but still had no firm plan in my head. Looked through all my scraps of paper to see what was there and decided on the green pp and a small piece of cs. Cut the banners using 2 sizes of die and added them together then cut the strips and added those before adding the banner on top. Decided I liked it so adhered it all but thought it needed a bit more so I used the bird stamp I’ve just gotten from The Cat’s Pajamas and stamped it on a small white scrap which I then fussy cut. Took the heart stamp from same set and randomly stamped it and added the small row of gems across the banner top. Sometimes a card evolves even when my brain isn’t fully engaged in the design and I quite like how this one looks.

Halloween Witch

HALLOWEEN

As most of my Stamp buddies know, Halloween isn’t my thing, but once in a while I do make one of two. I started this card before my craft room install and before my guests arrived, but didn’t have time to finish it so it has been sitting on my desk for about 8 days. I originally intended it for the 6 item challenge over at JUGs, as well as for this challenge, but missed the deadline, so instead of adding 6 bats I decided to do a witch and a couple of bats. Stamp set is from GKD called Wicked. I stamped the railings first and heat embossed then sponged, brushed in the background colours after masking off the moon. Added the colour to that after the rest was finished and dry. The witch was stamped on a scrap piece, heat embossed then fussy cut. I popped her up on top of the moon, added the bats and then the sentiment which I cut into 2 pieces. Considering my lack of interest in Halloween I’m happy with how this one turned out. I don’t have anything skeleton related so a witch is the best I could do.

Hibiscus Greetings

Pick 3

It is an honour to win a challenge, but even more of one to be able to add a card to the design team list. With this weeks theme being a Tic-Tac-Toe I chose the top line of the choices given.

The products used are as follows: Itty Bitty Basics from MFT, Gina K Designs Peach Bellini CS, PP from StampinUp, Harmonius Hibicus background stamp from MFT, A single flower Hibiscus rubber stamp from Card Craft Stamps #48452, Embellishments from my stash, white and gold heat embossing powders with Distress Oxide inks – abandoned coral, scattered straw and twisted citron, perfect pearl powder and a shimmer water colour from ColourArt called Moonbeam.

After using my Misti to stamp and heat emboss the background, I then added the inks blending the coral and scattered straw together. Twisted Citron was used for the stems and leaves. Once the inks were dry I proceeded to add the blue watercolour to the background keeping it as soft as possible. I left the panel to dry before cutting it down to add to the CS. I heat embossed the single flower in gold and then added inks in the same colours as the rest but keeping the flower center a bit stronger in colour. I fussy cut this flower added some foam tape so it could be popped up onto the PP belly band I had added to the background panel. I stamped, cut and added the sentiment pieces as shown and finished it off with some gems. I have a small strip left over from the background piece to make another card.

Chaos in Circles and Curves

Photo Week #599

Fortunately I managed to finish this late yesterday afternoon, because not long after we received word that the installation of my craft room is to begin today and in fact, as I type is in progress. I don’t expect to be crafting today at all and possibly not till next week unless I can get things put away properly and organized quickly. I’m so excited to know that my space will be functional very soon.

The photo inspiration made me head in a direction using dies and paper in some of the colours shown in the photo. I used a Memory Box die called Sketchy Rings, a Nestability type set (can’t remember which company) and 3 border dies that I think are by Spellbinders. I don’t have access to them at the moment and forgot to write down the products yesterday. The PP is from an old 6″ by 6″ paper pad and fit the colours so I used it. Card front is gray from GKD, but in the photo it looks bluish. After cutting the sketchy rings in yellow I cut the background piece in turquoise, which looks darker in the photo and then I added both to the card front. I cut a 2nd sketchy ring using the pp and paper pieced the inside main circle. Using the same pp I cut the borders and after some playing decided they looked best on an angle. I wanted it all to be about curves. When searching for the PP I found a Tim Holtz Idea-ology pad with the sentiment strips and decided on the one you see here. At first I thought I wasn’t going to like the card, but in fact I do and am happy with it. It is a bit chaotic but it works!

Salut!

Fruits and Vegetables

I had this frame leftover from a previous project which was part of the new die set by Recollections, and before it got lost in the mess of my desk I decided to use it. As well the stamp set is a new one that I hadn’t used yet, by Joy Clair Designs. It is one of the sets that was tied up in the border closure last year. This set seemed perfect for this challenge and I used the cherries and the lemon slice to meet the fruit requirement. I added some colour using InkTense pencils and then a Sakura glitter pen. Added the tiny gems but managed to keep it fairly CAS for a change.