Peacock

Anything Goes Challenge ~ A2220

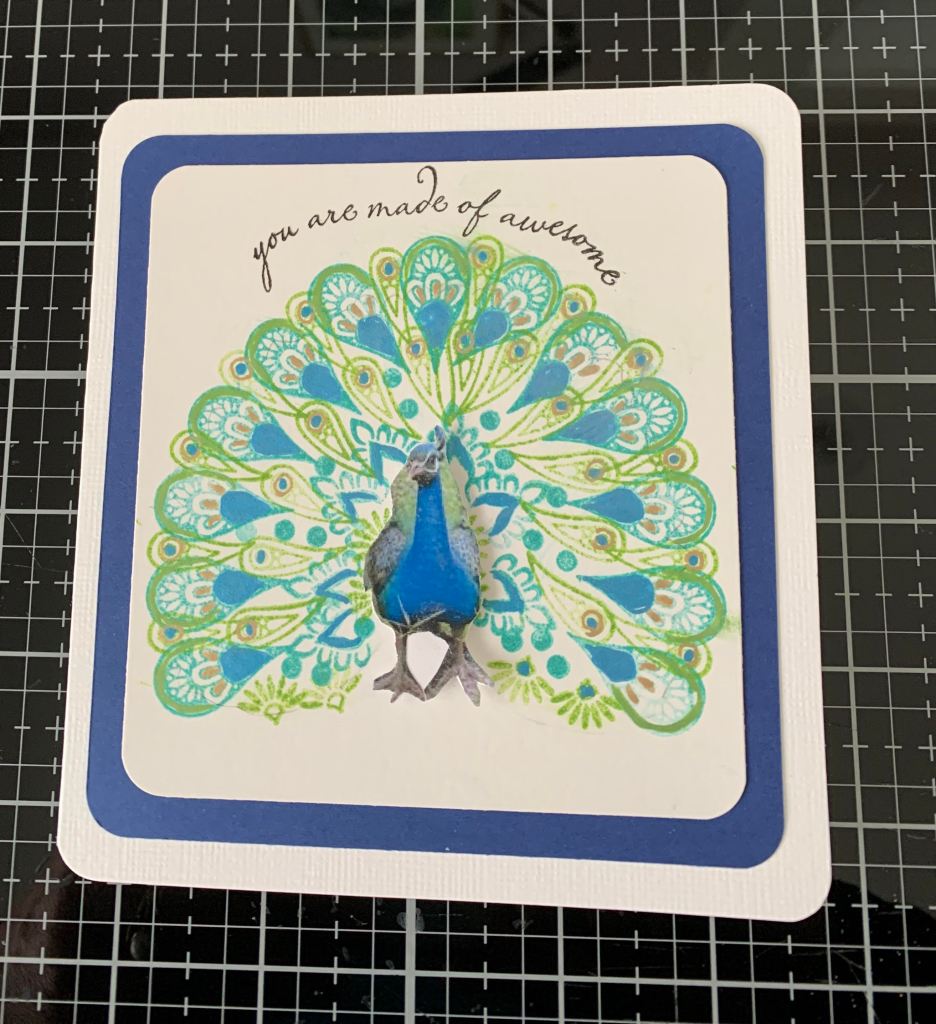
When I had my Mandala stamps out I looked at a couple of GKD tutorials to get some ideas. While watching Gina and daughter Rina stamp together one of them mentioned peacock feathers and how these stamps look like a peacock feather. My brain went ‘I wonder if…’ This is my take on the I wonder if. I borrowed an image from the internet (can’t draw for beans) and cut it out so I could trace around the tail section. I also cut out the birds body to be added afterwards. Taking several of the stamps and using Peacock feathers Distress Ink I stamped the larger part of the tail just following the faint pencil lines to get the shape. Then I began filling in the rest using various stamps from the set and added some mowed lawn green to the colour mix. When it was all stamped and dry I used a Sakura Gelly roll pen over some parts to give more shine and depth of colour. Did the same with a gold pen. I also dusted it with some perfect pearls to get a subtle shimmer to the tail feathers. Added the bird body popping it up on foam tape. The sentiment is from an Altenew set that I had forgotten I had. I curved it around the tail. Before adding it to a card front I curved the corners using a punch layered it onto some blue cs and curved those corners and then onto the card front also with curved corners. This worked so much better than I expected that I amazed myself – lol.

Thank You

Challenge #368 – Sketch

Last year I tried to create several square calenders but wasn’t successful in what I envisioned. I set the stamped images aside figuring they could be used in a different way and the little hedgehog and heart is one of those pieces. He was stamped using a Penny Black stamp and then pencil coloured. Following the sketch I added ribbon to the card front and then this little image on top towards the side. The die cut word was something else I hadn’t used after cutting it but it was totally the wrong colour. To fix it I added versamark ink then heat embossed gold and after gluing it I stamped the word you underneath. Added a few tiny gems as well.

Always Remembered

#505 Sketch

Using a scrap piece of heat embossed roses I die cut it with an unbranded scalloped rectangle set. This piece was originally stamped with a large GKD background stamp. With left over strips from various past projects I added them to the card front and over them I added the small panel. Decided to also use the left over frame from the die cut piece on top but at an angle. Added tiny bow at the corner and a stamped heat embossed sentiment from a SSS set. Based on what is happening currently, I know I shall be needed a sympathy card before summer so I thought I would get one ready in advance.

Silhouette Squared

http://justusgirlschallenge.blogspot.com/2020/04/just-us-girls-533-photo-week.html

After making a smaller stencil similar to this one – I then proceeded to make this bigger one. Using various pinks I sponged and blended until I got the look I was imagining. Sprayed this gently with some Perfect Pearl shimmer spray before removing the stencil. Left it overnight to dry, then cut it down to the size after which I added the silhouetted poppies. Added the sentiment to the right corner. Then I layered it onto some black paper and from there onto the card front. I’m really happy with how this turned out. The stamp is an old rubber stamp that I’ve rarely used and it was purchased at Michaels. Don’t remember the brand name though. Sentiment came from a CTMH set.

Make a Wish

GDP238

For the sketch challenge at Global Design I decided to go with an incentive stamp set from GKD called Tiny textures and another one called Make a Wish. After stamping the paint strip in different purples I die cut the panel using an unbranded scallop edge set. I mounted this panel onto the card front. Using some Mizuhiki cord I added it to the lower corner as shown. Then after stamping and fussy cutting out the cupcake I added it to the top. The sentiment is from the same set and I stamped it and then fussy cut it so it would fit where I wanted it to be. A quick and simple card.

Hero

Happy Birthday or Fun Fold or Both

Instead of a Birthday card for the current Sisterhood of crafters challenge, I decided to go with the fun fold to give to a nurse at the local hospital. I received four free digi stamps from MFT and used one of the images and a sentiment from the set. Decided to try the fun fold shown at Simply Simple Stamping as it is a very easy one to do and seemed to suit this image. I coloured the image with a combination of Inktense pencils and copics and then used a stitched rectangle (unbranded set) to cut the image and the center panel out. Used an Altenew stamp set to stamp the hearts to the card front. Sentiment says Nurse is another name for hero and that works very well in these troubled times.

Seahorse

PP488 – A Sketch Challenge

When playing yesterday I had another idea of how to use my homemade stencil. I taped it to a scrap piece of glossy photo paper and began sponging inks in varying degrees of greens and blues. Went over it all with a damp cloth as it blended beautifully doing that. Then I spritzed it with perfect pearls and left to dry. I just love the shimmer of this and the colour blending is the best I’ve ever achieved. Once it was dry I stamped the seahorse from a GKD set and tiny ones from another set, along with the anchor and the word relax. I mounted it onto some black paper and then onto the card front. Initially I was going to cut it down to a square but my hubby said to leave and add a sentiment underneath. I added that to the bottom – really like the font of this stamp – and today realized that the new weekly PP challenge was a sketch, and by luck, this card works for the sketch.

Trumpeted Wishes

Fabfri188

I had seen a card using an elephant to blow bubbles on Pinterest and the idea stayed with me enough to want to play with a version of my own. I matched the colours as close as possible bearing in mind that I don’t have any StampinUp inks. Thanks to a good friend I do have some of the card stock so was able to mat my effort with two of the colours accurately that way. My elephant is a free digi stamp that I resized, printed, hand coloured and fussy cut. I had made a stencil of the smallest window frame die I own and used that to create the background in the close matched colours. Then using a small alphabet stamp set from Hero Arts I stamped each letter to make the sentiment. I added a few pink hearts as well. In addition I stamped the word love at the bottom. Don’t know who made that small set, but think I got it at Michaels a long time ago.

Tropical Colours

SSC229 TROPICAL VIBES

When playing with the Madala card previously posted I realized that I could use these stamps for a 2nd entry for Sunday Stamps. I had also taken a look at a video at GKD on using this set, and I liked one of the cards Gina had posted. This is my CASE on her card with a little extra license. Instead of making it a square card I decided to keep it in my usual sizing. After figuring out which Distress Inks would work to get most of these colours I began stamping. I had some paper lace on my desk so I masked off that section before stamping the upper portion of the card. Then I stamped the circles leaving enough room for a fish as I thought the circles could be defined as bubbles. I stamped the fish from another GKD set and once all was dry (for once I was patient) I added some yellow to the fish. My brush still had a bit of the shimmery yellow on it so there is a slight shine to the fish that can’t be seen on a photo. Then I added the paper lace in two layers. Stamped the sentiment, layered it onto the yellow, then onto the blue card front and declared it finished.

Mandala

Project 237

The colour challenge at Global Design made me think about using the GKD Mandala set that I’ve had a while but never inked. I matched the colours as best as I can using Distress Oxides and proceeded to stamp using the smaller wreath builder template. I didn’t get my placement exactly right but decided not to begin again. I kind of like the fact that it isn’t perfectly stamped although subsequent ones will be better I’m sure. My hubby liked the design and stole the card so he could photograph it for his collection, which made me smile. After stamping the sentiment at the bottom, I matted the image piece with some navy cs and then put onto the card front.