Silhouette

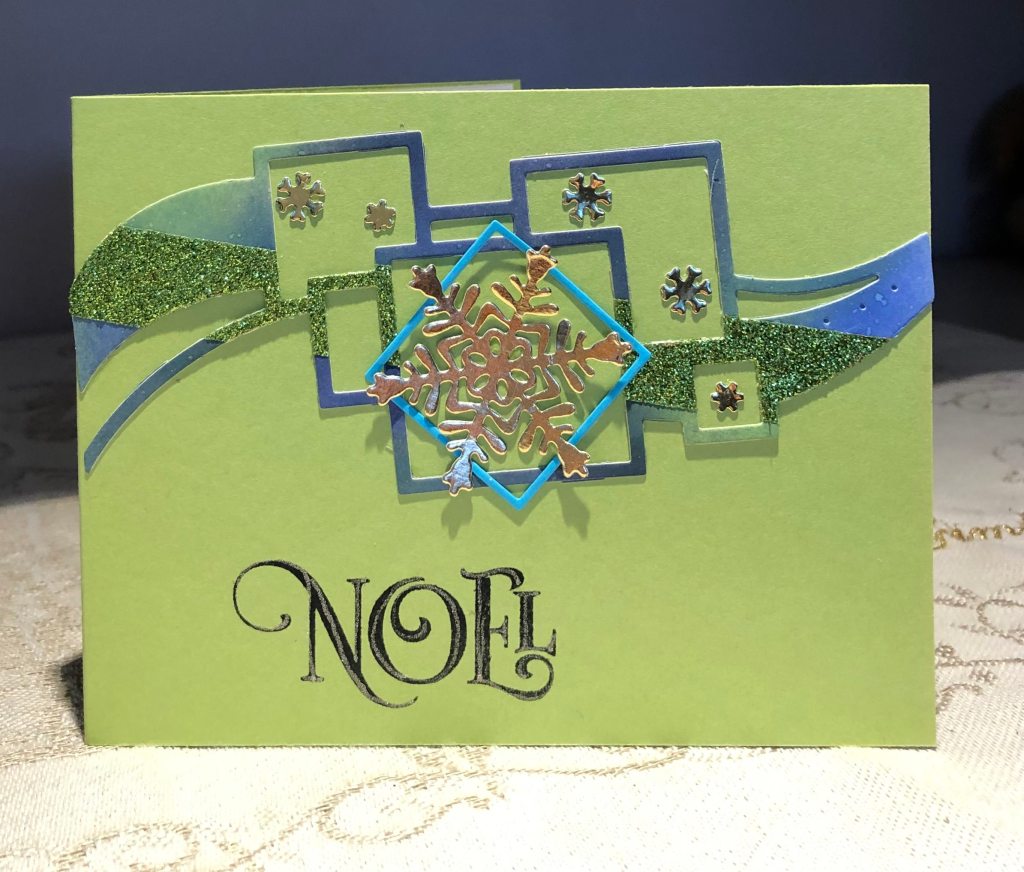
Made for the Double D challenge of using a silhouette this week. I decided to go very simple and just use a die and a stamped heat embossed sentiment.

http://daranddiane.blogspot.com/

I cut the shape from my new Tutti Designs winter forest scene from black paper. I made my card front using a silver heavy weight CS acquired several years ago and added a small panel of new (just received) pearlescent Vellum on top. Added the die cut to the front and added two of the black flower shapes that came out with the cut to the top corners. Heat embossed the sentiment in silver from a set by KaiserCraft received last year in a card making class. The vellum is really pretty but the photo doesn’t capture the subtleness of the sparkle unfortunately.

Feathers …

The Paper Players is a colour challenge this week. As most of my friends know I’m not really into Halloween so decided to something totally unrelated to any holiday including Fall.

http://thepaperplayers.blogspot.com/2019/10/pp463-color-challenge-from-laurie.html

After looking through some of my paper stash I found the orange background piece and I also found the patterned paper too. I used a card front in edible eggplant (the closest I could find to the colour at Paper Players). Then I adhered the orange paper to the front. I cut the PP using a border die that I can’t remember manufacturer of and this added the gray I wanted for the edge. Then I stamped the two feathers in versamark and heat embossed in black. Did the sentiment the same way. Stamps are from a GKD set called Snowbirds. I found the orange brads in my stash which I’d completely forgotten about and decided to use them at the corners. Then I added a few sequins for some bling. I kind of like it, but am not sure.

Happy Ever After

Global Design have a wedding/anniversary challenge on this week and this is the card I came up with.

http://www.global-design-project.com/2019/10/global-design-project-211-theme.html

Basically I CASED an image found on Pinterest made by Connie Stewart with my own take on her idea. I masked off a portion of the kraft cs and using versamark stamped the flower from a set called Sunlit Flowers by Altenew, rotating the stamp a little each time. Added fine gold embossing powder and heat set. I also added a single leaf to fill in a bit more space. I added a strip of gold Washi tape down the edge and using that same tape die cut a heart from Stitched heart set by Memory Box. Using a smaller one from same set and cut out of the same kraft cs I stamped the sentiment in versamark. Heat set this and then did the same thing a second time to get a thicker impression. Added a bit of ribbon and a charm for the finishing touch. I really like how this turned out.

Thanks with Trees

http://www.asyouseeitchallenge.com/2019/10/challenge-211-theme-as-lovely-as-tree.html

This challenge calls for using trees so I decided to use my new Lawn Fawn flippin awesome die to make a flip card.

Front
first flip
Second flip

Initially I followed along with a video as this is the first time I’ve used the die. It isn’t hard but I wanted to be sure I had it right. I cut all the pieces out and made the flip part ensuring it was working properly before I adhered it to the card front. Then I started to decorate the panels. Cut out the trees and all the other bits and slowly added them to each panel. Used Bonnies idea of gilding flakes for the maple leaf – worked like a charm. Added a white panel on the last flip (not shown) and stamped the word friend from one of GKD sets. Also used the sentiment for the bottom of the card from the same set. Added a tiny bow and it was finished. Hubby most impressed. One small detail was that my slide kept getting stuck as I used a thick CS for cutting out the shape. Used a trick from a DT and added a bit of acetate so now it slides perfectly.

Itsy Bitsty …

Halloween isn’t something I enjoy or celebrate and because there are no longer many young kids living on our street, we often disappear that evening and avoid the fuss. That said one of my neighbors now has a young daughter, so I usually make her a card and add a few dollars inside.

I have one set of Halloween stamps, unfortunately of very poor quality, as they are very soft and two of them have torn in half. Using the spider web stamp and iced spruce distress ink I stamped it over the white cs. I then added the strip of ribbon I had left over from something else. Taking a small strip of white cs I stamped the stars and then the spider sentiment. Using an orange pen I filled in the colour on the words and a sakura jelly roll pen to add some glitter to the stars. I then adhered this to the spider web card. This set included the word Halloween which I stamped in Carved Pumpkin and cut to size. A few gems to fill in some spaces were required to give this card a bit more impact. Inside I have used a new Lawn Fawn die that allows me to make a pocket for a gift card or in my case some dollars.

Grateful Thanks

Here is the second card from my initial attempt at one in orange and white. It fits another challenge so am entering it for fun.

http://thepaperplayers.blogspot.com/2019/10/pp462-theme-challenge-from-joanne.html

Using the skeleton leaf set from GKD I stamped two of the larger leaves in Ripe Persimmon. I also stamped the word grateful in Spice Marmalade. Using the same inks I placed some on my craft mat and sprayed it with water so I could get it onto a wet brush and gently sprinkle over the top. When dry I added the paper pieced thanks to the bottom. The die is from a Concord and 9th turnabout set I purchased.

Thanks in Orange and White

Orange isn’t a colour that I normally uses for my cards but this challenge made me want to try it out. I am pleased that I did and feel the results are not bad …

http://daranddiane.blogspot.com/2019/10/orange-and-white-challenge.html http://thepaperplayers.blogspot.com/2019/10/pp462-theme-challenge-from-joanne.html

It actually fits two challenges and I also got two cards as I die cut the word several times, in both white and a lovely foil orange paper. I paper pieced the white letters into the negative of the orange piece and the orange letters into the negative of the white. I measured out how wide that piece was and placed my GKD stamps above and below it in my misti knowing that the sentiment part would cover up some of the stamped images. To do my stamping I used distress oxide ink in spiced marmalade and then I water coloured a little of the dried marigold in several places. It seemed a bit yellow so I added a small amount of rusty hinge to darken it. I added the white cs to the leftover foil piece to get a fine border edge and then adhered that to the card front.

Tall & Skinny Cheers

The Paper Players have a sketch challenge so although I often don’t do well with sketches, I decided to try my hand with one.

http://thepaperplayers.blogspot.com/2019/09/pp460-sketch-challenge-from-claire.html

Started out with some silver CS that I cut down to 6″ by 3″ when folded. I then added some washi tape down the (almost) middle and in the tiny gap between the two strips I added a StarForm glitter sticker. The die cut is from Tattered Lace and is one I haven’t really used very much, however it seemed to fit here so I cut it out in Mirri Card and then adhered it to the front. I added a tiny sentiment, from a GKD stamp set, to the bottle. It looks better in real life than on the photo.

Contemporary Squares

This is the second card and I like this one a lot too.

https://lavenderhousecreations203568248.wordpress.com/2019/09/21/poinsettia/

I had 2 pieces of the inked background left over, but on their own, too small to use this die so I had the bright idea of using the washi tape to hold them together. Then I die cut it out. It gives a good effect and meant I could use up the last bits of cs. With the punched out bits from another die I added them inside a couple of the shapes. Then I added another die cut frame from the Concord & 9th kit I have. In the middle of that I placed the die cut snowflake. Stamped the sentiment from a GKD set called Holly Jolly received as a gift from a stamping friend. I also went over the sentiment with a Sakura jelly roll pen to give it some sparkle.

Poinsettia

Decided to have a go at using inchies as per the challenge at CAS Mix up. In the end I made two cards and had fun creating them.

https://casmixup.blogspot.com/2019/09/cas-mix-up-september-challenge.html

For the frames I used a small die from a Concord & 9th kit purchased this year. I really like the turquoise blue on the bright Jelly Bean green card stock so I laid them out and glued them. I stamped the greeting in black beside the frames and when dry added a bit of sakura glitter from a pen to the word Merry. using up a scrap piece of white sparkly cardstock I die cut the poinsettia flowers from a Creative Expressions set. I added the centers and then a small piece of gold star/flower left over from the bits that came out of a previous die cut. To make the leaves I added a strip of sparkly washi tape to scrap cs and die cut them. Sparkle doesn’t really show here unfortunately.