Silent Night

https://caffeinatedchristmascardchallenge.blogspot.com

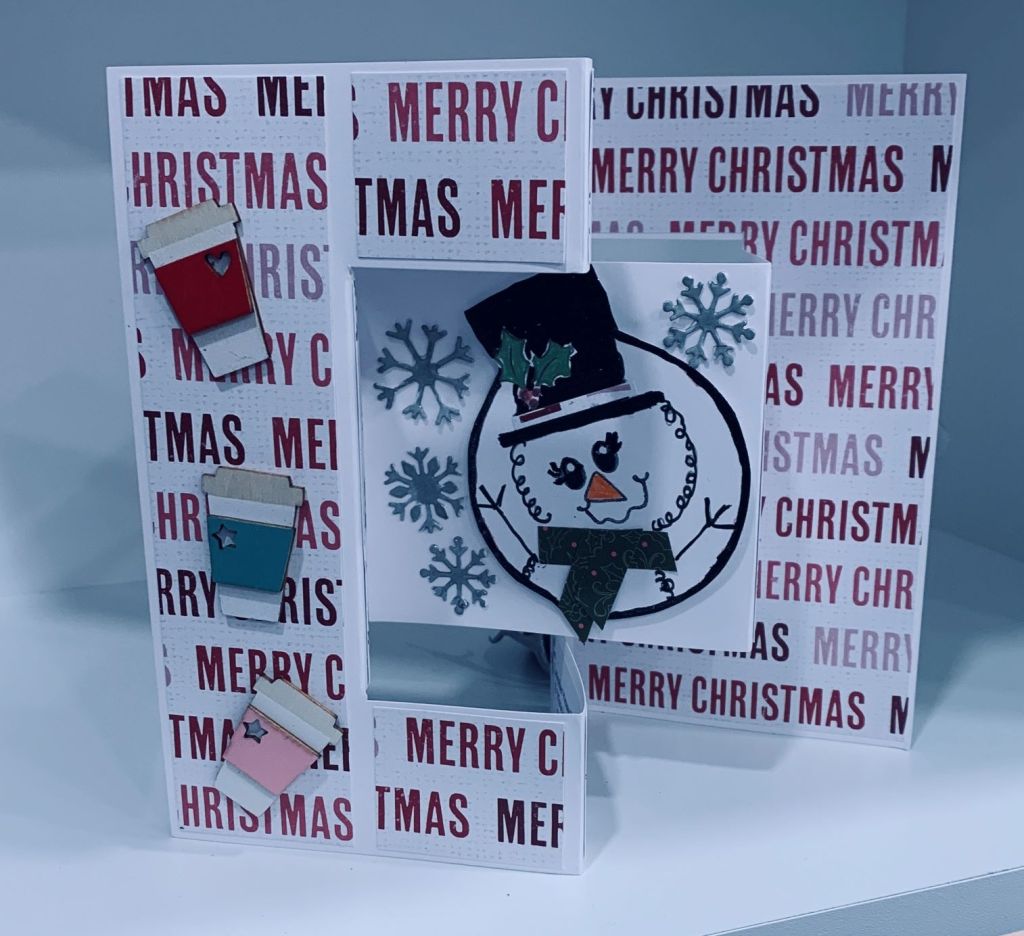
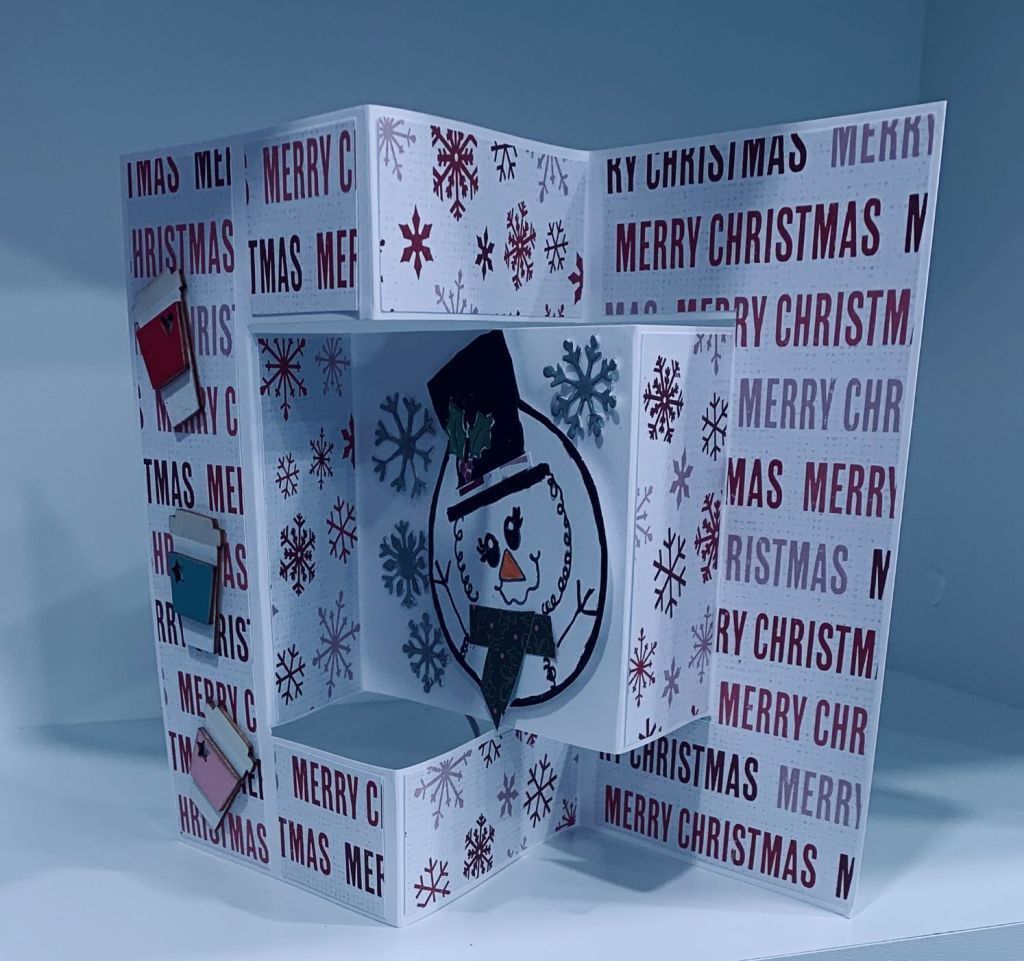
This is truly my last Christmas card and I figured I may as well make it fit a challenge before I go on to other things so I’m adding it to the Caffeinated Christmas challenge. I couldn’t resist this digi stamp by Sassy Stamps and have to say that the owner of this little store is wonderful to deal with. I had some downloading issues and she kindly resent them in a format that was less challenging for me to access.

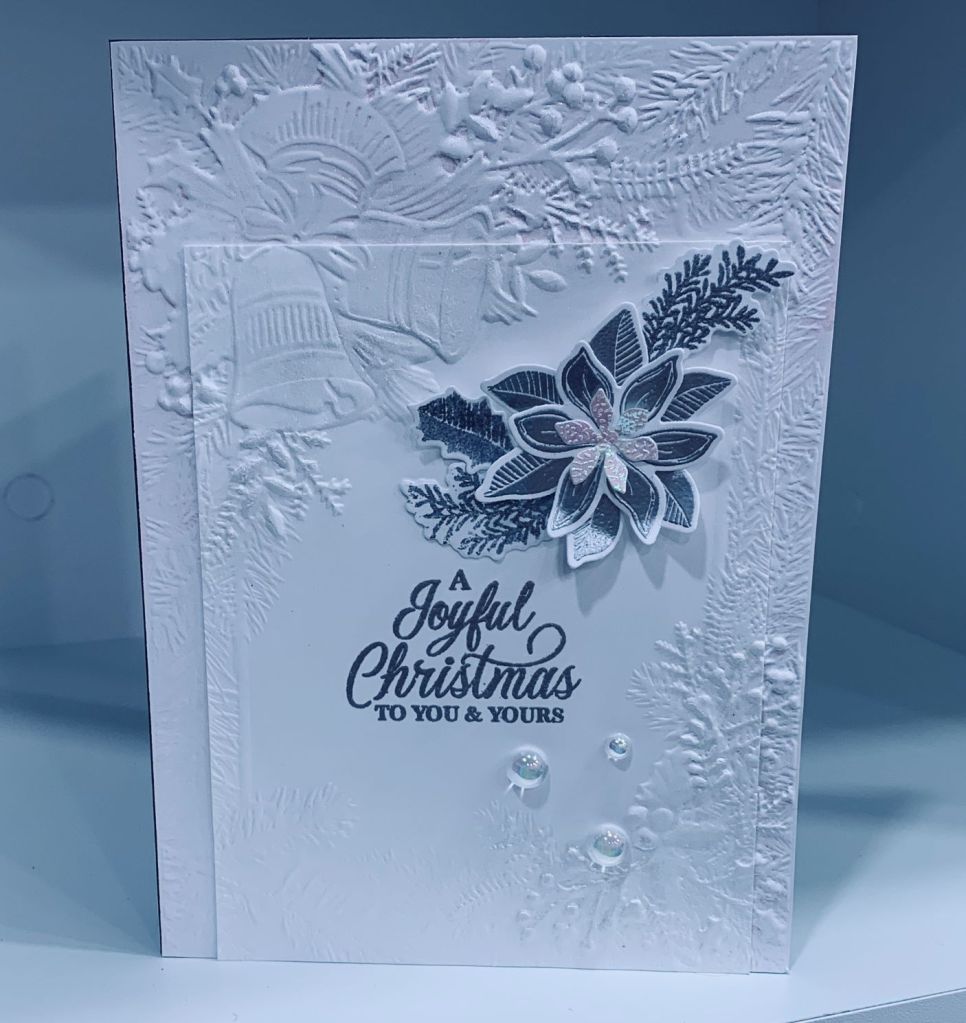
I resized the image using CorelDraw and then printed it ready for colouring. I used a combination of pencils and a bit of watercolour shimmer paint to add the colour. I also added a bit of glitter to the hat bell and the tiny heart underneath the sentiment, as well some Sakura glaze to the buttons and shoes. Sentiment came with the image. I used a leftover piece of frosty looking CS for underneath the focal image and chopped the corners using a small punch. Did the same to the focal panel and then added it all to the card front. A few dew drop gems and it was complete.

I hope you are all ready for Christmas and having fun in the preparation. I finished adding some greenery to our front porch and a couple of red bows and consider everything now set for the season. Thanks for taking a look.

Stuffed Stocking

Christmas Stockings Challenge & December Stencil Fun

I had been wondering which stencil I would use that would work for both these challenges and didn’t really have anything in my stash. Even my stamp sets are limited as to stocking choices. Then at the local dollar store I saw a couple of stencils that would work so I bought them. The image is quite large so my card is on the larger side, but as I’m hand delivering this last batch it doesn’t matter. I couldn’t find my scraper and what I ended up using wasn’t the best choice so my stencil butter did get slightly underneath in a couple of places. I decided to go with it anyway and the section where the top of the stocking and the bear meet got covered up with the sentiment so the worst of the problem was solved that way. I bent the sentiment strip slightly and added double tape in the middle so it stays curved. Stamp used is from StampinUp. Poinsettias are from Dees Distinctively and I cut several colours and then pieced them together. I added a few embellishments from my stash after I had added the layer to the card front. Except for a couple of cards for my neighbors I am done with Christmas cards for now.

Our good friends arrived from Vancouver for a couple of nights and they spent all of yesterday helping with our decor. Ron helped outside and Dale, who is a Christmas mall designer, did the inside. I had already done the tree, but she finessed it a little bit. Our home looks amazing and the best part is that everything is fixed in such a way that all I have to do is lift it, cover it and store it then next year do the reverse. When we had the unexpected early snow fall, we thought we wouldn’t get any outside decor sorted, but we had enough rain last week that the area where the bigger items have to go, was clear. It was really good of our friends to help us with this as it is quite a big job and my hubby is dealing with tennis elbow (very painful) so he was dreading doing it alone. Finally I feel in the Christmas spirit and we also feel very blessed to have friends such as these.

Double Embossed

https://cyhtp.blogspot.com/2022/12/anything-goes-embossing-with-twist-of.html & Peace On Earth Christmas Challenge #29

Having seen a very pretty embossed card recently I decided it was time I tried something along the same vein. Unfortunately my embossing initially was pretty bad with ink from the folder in the wrong places. The folder is from Crafters Companion. I had used a brayer to add some Spun Sugar ink to the folder but the faint pink doesn’t show up much on the photo. As well I am finding it a challenge to get the right sandwich for these 3D folders which didn’t help any. Rather than throw it away I lined up another piece of CS into the folder, but I cut it into a smaller section beforehand. It worked quite well and I now had something to cover up the smeared ink. Using Versamark I stamped the sentiment and heat embossed it and at the same time I did the flower the same way. I lined it up as well as I could over the bottom piece so that the design looks continuous and glued it. The stamp set is by StampinUp. As well I went over the entire two layers with some shimmer which doesn’t show on the photo but is quite pretty in my craft room. A few gems and I called it finished. Considering how bad it looked at first, I’m quite pleased with what I ended up with. My housekeeper will love it. Thanks for stopping by and have a great weekend everyone.

Warm as Toast Birdies

Peace On Earth Christmas Challenge #29

Not having made a Z-fold card in a while, when I saw a specific one on Pinterest I decided to try one of my own. I liked the idea of adding a 3D effect to the focal panel but didn’t have the right die so I used this border frame die from Papertrey. Unfortunately I had a bit of trouble die cutting it well and after 3 tries I decided to use the best of the 3 and hide the poorly cut section. The little birds are from a new set I’ve purchased from MFT’s recent sale. The foliage and PP are from StampinUp. I used watercolour pencils to colour the birds and die cut them once finished. The card was inspired by both the Pinterest version and the bottom right photo on the mood board. It is intended for some special friends who love birds and gardens as much as we do. And of course as is usual after I’ve completed a card, I now have an idea for using a different style frame and adding to it to give the 3D effect. Why these ideas always come to me after I’ve finished a project is beyond me, but that is what happens. Maybe I’ll make another before too long using the new idea.

The snow is sparkling outside as it is clear and sunny today. Don’t know how long it will stick around, but as it stands right now, we cannot get any outside decor done, because we can’t see where to put it due to the amount of snow. Now we understand why our neighbors had all their decor done by mid November. We live and we learn, haha.

Star Power

https://doubletroublechallenge.blogspot.com  & https://colorfuloptions.blogspot.com/

This predominantly white card has silver glitter stars with embellishments in green. As mentioned in a previous post I’ve been doing quite a few CAS style cards and this is one of them. The embossing folder is one I cut in half and is by CTMH. I used paper scraps and embossed 2 sections which I then glued to the square card front. The stars are from an Infinity Die set by Hero Arts and gems are from my stash. The banner die is unbranded and the sentiment is from Divinity Designs. Once all the elements were on the panel I glued it to a slightly larger card front. It fits the challenges as White with a pop of colour, Thing 3. I’ve taken several photos of this card and this one is the best of them. For some reason I am having issues getting the colour to show on some photos at the moment.

Thanks for taking a look. Have a great weekend everyone.

Snowman Cheer

Caffeinated Christmas Card Challenge #12 – Snowman & Hot Beverages

Second image shows the inside section of card.

In searching for some cream coloured CS I came across a package of pre-folded card blanks that I had forgotten about. Actually when I purchased them my skill set was not that great and I couldn’t figure out how to add the PP properly, so I just put them aside and didn’t use them. At the same time I also found the little coffee cups, another embellishment that got lost in a drawer. These cups are made of wood. The snowman is my take on a Woodware stamp I had seen but not purchased. I liked it so decided to have a go at drawing my own version. It is quite similar to the actual stamp but not an actual copy as that would be infringing on someone else’s art work. I did use some stamps as my drawing skills are limited. The face is from MayMay and is made up from several in a set. The holly on the hat is from a very old Dare to be Artsy set and I added a paper hat band and scarf. I also used a black Spectrum Noir glitter brush to give sparkle although the photo doesn’t show it. The little snowflakes are fall outs from a border frame die by Papertrey and I used silver glitter on these. Paper is from a Recollections pad. This card is definitely wintery but looks a lot warmer than our current outside conditions.

I am entering this card into two challenges this week, the first Caffeinated Christmas and the second Double D. Thanks for stopping by.

Joyous Dove

Color Hues #54 Navy and Cream

The challenge at Color Hues helped me to remember that I have this intricate Dove die, from Creative Expression and I thought it would be perfect to cut in cream and then add it to the Navy card base. I had seen a photograph of a black and white tile with a section of the tile in thin white stripes and that gave me the idea to cut some stripes from the cream CS and add them to the corner. The die cut word uses some old gold paper and a Spellbinders word and using the same gold and infinity dies from Hero Arts, I used the smallest star and cut 3 for added interest. I like the simplicity of this card and the cream CS is slightly embossed which gives a nice look to the bird and stripes but it only shows to the touch or with the naked eye.

Thanks for stopping by and I hope your different weather conditions don’t make life challenging. It is quite cold here at the moment and they are predicting a snow storm for tomorrow.

Hiding in the Tree

http://justusgirlschallenge.blogspot.com/

Amusing cards are not generally my forte, but I had seen an image with the tree looking like a person and it made me smile. Not having the right stamp meant I had some thinking to do to see if I could make something using the supplies I do have. This card is a mish mash of stamps from different sets. Two are from the Cats Pajamas, one is from Dylusions, another StampinUp as well as Hero Arts and MayMay Made it. The stars are from some stickers in my stash. Although the card is okay, I can see better ways to do it should I try another one. I stamped the legs first masking off a section as the stamp was quite long and I only needed a portion of it. Then I stamped the face, masked it to stamp the tree around it. Stamped the bow at the top, again using only part of a stamp, after which I fussy cut the entire piece out and added foam to the back. I coloured it using mostly pencils and Sakura gelly roll pens. The little package was done separately and also fussy cut once coloured. It too was popped up on tape. The card front was stamped with the dotted swirls to give a background to the focal image. I added the focal image, stamped the sentiment and fussy cut that before popping it on top. Although the inspiration image at JUG’s is more of a formal look, I decided to add this to the challenge as a fun card with a message that gives it a warm feel as in the photo. My goal this year has been to use as many of my stamps in creative ways as possible. I do believe I’ve achieved that goal with this card. I sure hope it makes you smile.

A Puppy for the Holiday

Just Us Girls Challenge #660 – Photo Week

This is a small card using a 4′ x 4′ card front and Hero Arts stamps. I stamped all the images masking off where necessary to get the right placement. The tree was heat embossed clear. Using mostly water colour pencils I coloured in the images enhancing some with Sakura gelly roll pens. I added some silver dots to the stair carpet to try to create a pattern but in retrospect I should have left it alone. The sentiment has sparkle added over the top of the stamping which has created a slight shadow to it. I can just imagine this little puppy waiting for his new owner to love him. I shall have to make an envelope for this one as I don’t have any the correct size. Happy Sunday to you all.

Using Ovals in Black, White and Silver

Anything Goes Embossing With a Twist of THANKS

Having seen a post on Pinterest featuring a card similar to this one, I was intrigued to see if I could make my own version. The challenge was in figuring out how it was done, because the post is not attributed to anything in particular so no instructions or guidance. I thought about it for a while and decided to try die cutting and layering. I used the die negative sections and layered from there. I tried paper piecing but couldn’t get the look I wanted that way. Anyway the card base is black and is a funny size because I did the layers first and then cut the card to fit the finished part. The final oval is one of the die cuts that I stamped in black and added a bit sparkle to using Sakura glitter pens. The embossed layer uses a new SSS snowflake folder that I really like. Before I embossed it I had die cut the center and I added this layer before adding the image oval. The poinsettias are stamped and heat embossed in silver then die cut and glued together with a sparkly silver center to each. I also curved some of the leaves a bit for a more realistic look. The leaves were stamped and fussy cut as there is no die for them in the set, which is a last year’s StampinUp Christmas set. I’m really pleased with how this turned out and it am entering it into the CYHTP challenge. I hope you’ve all recovered from your Thanksgiving festivities and that you are enjoying a nice weekend. Thanks for stopping by.