Stenciled Hugs

Color Hues #52- Turquoise and Mustard

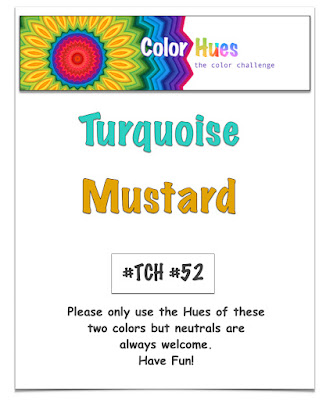
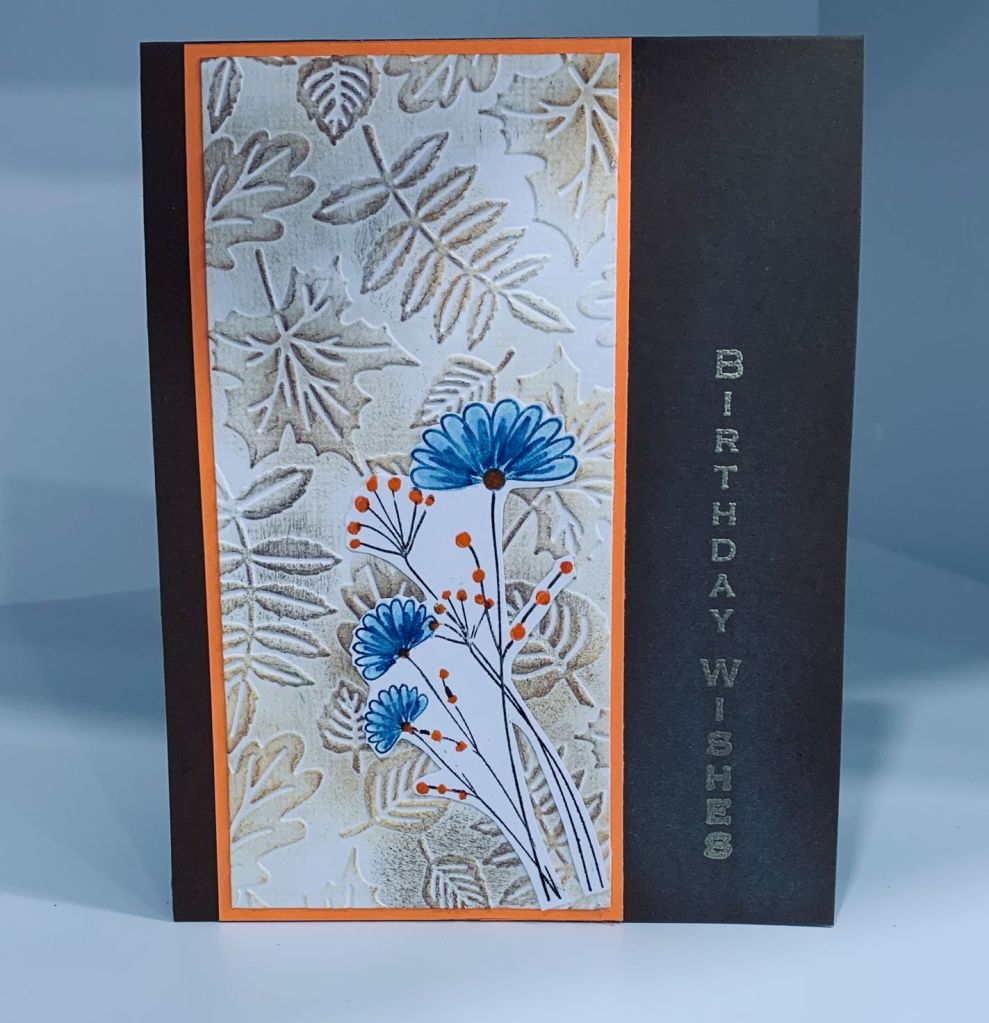
Color Hues uses Turquoise and Mustard for their challenge colours this week. I decided to try out a new Distress Mica Stain for the Turquoise so I reached for a stencil and sprayed through it. I wasn’t totally happy with the results as I got a few blobs in places so I cut it down and added the layer to black sparkle layer. I also added a bit more colour with a brush and used Distress Oxide Mustard Seed for the yellow flower centers. Using an MFT word die set I chose the Hugs and die cut it first in white, which I then sprayed with the mica stain and then again in Mustard using a paint swatch. It is actually more of a Mustard colour than the ink. Once the mica spray had dried I added the Turquoise layer to the Mustard layer offsetting slightly. Then I staggered the letters as you see in the photo. Added a few Turquoise embellishments here and there to finish the card. I like the Mica stain a lot and have two other colours I can try. One is red and the other green, however the green one will not spray so I have to find out how to get an exchange. Have a great day everyone and thanks for stopping by.

Burgundy Snow Flake Block Card

Beautiful Burgundy

I was beyond thrilled when this card worked out the way it did as it was something entirely new to my repertoire. I saw the technique HERE on Frenchie Stamps and really wanted to try it out. I’ve just gotten a new Christmas paper pack from Recollections and I chose one of the papers from this pad. Instead of using the PP as an accent on top of the blocks I made my blocks from the PP. The PP is perfect for the challenge at Colorful Options so I’m entering it there. Once I had the blocks done and working properly I had to decide what else to add to the card. It took a bit of thinking, but I remembered this Lawn Fawn ‘Mice on Ice’ Set that I’ve had for a while and decided to work with it. I stamped the skating mice first and then coloured them before die cutting. To colour I used mostly Prisma pencils and Ohuhu pens and I used a blending pen on the penciled sections to blend. Using my Hero Arts star infinity dies I cut several stars and edged them with a silver pen. I added the mice and then glued them to the various blocks. The main image actually floats off the first block and the heart line holds the second mouse and small star suspended. As well I stamped a few tiny stars around the focal image mouse in gold ink. I didn’t use any foam so the card folds flat very easily. The little sentiment strip is something I took off a card I received last year. It was too nice to throw away and I knew I would find a use for it at some point. It is perfect for this design and colours. Although this card looks complicated to make, it is actually quite easy. The hardest part is the cutting and scoring of each block, but once that is done it goes together easily. I think I shall make a few more of these as I like how this one turned out. My hubby was quite impressed and I sure hope you all like it too. Have a great day everyone and thanks for looking.

A Gift For You

Peace on Earth Challenge #26

During a recent Spellbinders sale I purchased a stamp set and the small dies called Kaleidoscope Plaid. I couldn’t wait to try cutting out the plaid so chose some CS scraps and proceeded to cut a bunch. I put one set together making it into a gift package and then using one of the curved stamps and VersaMark I stamped the gifts across the white layer and heat embossed them with a cosmic shimmer powder. I also heat embossed the curved sentiment. Added a few embellishments underneath the sentiment, from my stash and the ribbon around the package is also from my stash. I added the white panel to the navy card front and called it finished. It could be a birthday card as well, but I decided on another Christmas card. I’m glad the challenge is anything goes because my colours aren’t the traditional ones. Have a fun day everyone.

Snow Love

Just Us Girls #655 – Photo Week & Peace on Earth Challenge #26

I’m sure it is the same for many of you, but for me, my best friend is my hubby first and foremost. Without him I’m not sure where I would be. Anyway the little snow people stamp I have from Stampendous seemed to be the best one for me to use for the challenge at JUG’s as the image reminds me of the hugs I get from my hubby everyday. The Peace on Earth challenge is an anything goes and I decided this card would also work for that challenge as well.

I fussy cut the image leaving only the couple and added foam tape so it could be popped up. The image was coloured with Prisma pencils and I discovered that the Spectrum Noir blending pen is great for blending the pencils, easier than Gamsol actually. The PP was cut 2″ for the bottom and 1″ at the top and adhered to the card front. PP is from a Recollections pad I got recently from Michaels. I used a glitter paper from Scrapbook.com and an unbranded die for the heart and word. I’m quite happy with how this card turned out and as I’m getting into Christmas creating this week its nice to have another one in my stash. Thanks for looking and have a great day.

Fireworks

Challenge #286 – Boo! & Anything Goes Embossing With A Twist of PUMPKINS
… is always FIREWORKS

As most of my friends know, Halloween isn’t my favourite season so this card isn’t about Halloween but is an anniversary card. Filling in the blank at the As You See It challenge is easy though, because filling in the blank for me would be fireworks. Yes they are pretty and if going off at a professional event I quite enjoy them, but the ones at local home parties scare the heck out of me. This year the fear is made worse by the fact that everything is so dry so a mistake has the potential to create disaster. As well, when still a teenager, local kids threw firecrackers at me and I guess I’ve never quite gotten over it. As this card is using embossing in the design I decided to add it to the challenge at CYHTH even though I didn’t add the optional twist of pumpkins. I may use the other half of the layer to add pumpkins as a second entry into that challenge.

My card has been created with fireworks in mind and I used a Gemini folder to emboss the design and then cut the piece in half. I used small sponges to add some colour and a gold glitter pen too. The sentiment is from an MFT Itty Bitty Basics set and I curved it on the block so it would follow the embossed curve. I thought fireworks were a nice way to celebrate an anniversary as well as any other celebration. Embellishments are from my stash. Thanks for spending some time with me and have a lovely Sunday!

Thank You

https://colorhuesthecolorchallenge.blogspot.com/

In my last post I mentioned an inked piece that I didn’t think I liked much, however, once it was dry I realized it wasn’t so bad. Stamp used is an MFT background stamp. Thinking that a 2nd post for the Color Hues challenge might be fun I cut the panel down a bit. In searching for something else I came across this acetate piece that had the fancy border with bright orange sparkle in places and out of curiosity I laid it over the top of my piece. I quite liked how it looked so I attached it by using glue underneath the sparkly bits and then adding the entire panel to a piece of black CS. The sentiment is also from MFT again backed with a piece of black. The inked flowers used Cracked Pistachio, Twisted Citron, carved pumpkin and spiced marmalade inks. I also added some Opal blaze to this piece as I did in the previous post but the shimmer isn’t visible in the photo. The acetate overlay border is done in several shades of green with a hint of orange which is why I used it even though it is busy looking card. I can’t remember when I bought these acetate overlays but as with many things, I do eventually use them. I even have a small strip left of the main image panel to use at a later date. Not bad for an initial ‘I don’t like it’ reaction. Have a great weekend everyone.

Floral for Friendship

Color Hues #51- Orange and Green & ORANGE and BLACK

With one challenge calling for Orange and green and another orange and black, I thought of trying to combine one card for both. I’m not sure it worked totally, but it doesn’t really matter in the whole scheme of things. I actually made two cards using this MFT background stamp. When I had finished the first panel and before it was fully dry I thought that I didn’t like it much so I took another piece of CS and this time smooched the paper through the inks drying in between. Distress inks used are Twisted Citron and Carved Pumpkin. When it was fully dry I added the stamped flowers using Forest Green. I quite liked the result but felt it needed some shimmer so I carefully added some Opal Blaze over the flowers and it shimmers quite nicely in reality. Then I used the sentiment stamp from a small gifted to me GKD stamp set and backed it with a bit of black CS before adding it to the layer. I also added few orange gems from my stash. Thanks for taking a look and I wish you a happy weekend.

Flowers

Just Us Girls #653 – Color Week

Late last week my Spellbinders order arrived and this EB folder was part of it. I had to test it out so I used it on a white piece of CS and then set it aside. Yesterday I took another look at it and decided to add a bit of colour using distress inks and a sponge. Initially it was more yellow with a hint of orange, but after seeing this challenge I went over it again using ground espresso so it has more brown on it. I cut it down to the panel used here and added it to an orange base and then onto the card front. Then I found this GKD incentive stamp that is one of the first I received from her and using Tombow markers and huffing I stamped each section of the flowers and stems in blue, orange and brown. I did each bit separately trying to keep the inks from mixing. Once ready I added more colour using the markers and the blending tool that comes with them and then I fussy cut and added it the embossed layer. I wanted to say Happy Birthday and remembered the vertical stamp set from GKD so I gold heat embossed the sentiment on the side. I wish I could have fussy cut more of the white area from the flowers but knew if I tried I would likely mess it up so left it alone. All in all I’m happy with the result and it wasn’t a difficult card to make.

Gnomie Fun!

Inkspirational Challenge #275 – Technique – Use Stencils

This stenciled background was leftover from a project I did the other day and I decided to use it for my vaulting gnome image. He is from an MFT set that I stamped, coloured and die cut and the little toad stool he is vaulting was left over from that project and I decided to use it here. That was coloured using Sakura glaze pens but the gnome is mostly done with Spectrum noir. I was going to use him on a different card design but I couldn’t get it right so gave up and did this one instead. The sentiment is from an older GKD Christmas set. The little star is a fallout from my previous card post and the balloon is from a SSS set. I’m feeling quite tired this afternoon so am pleased that I’ve managed to make a couple of cards at least. My creativity is waning so I shall go and do something else now. Thanks for looking.

Warm Thoughts

Caffeinated Christmas Card Challenge #10 – Gnomes & Challenge #285 – Aurora

As You See It has a colour challenge and Caffeinated Christmas needs gnomes so I combined the two challenges into one card. My gnome is from a SSS set, and the cup image is a stamp I’ve had for while, but the label has come off so I don’t know the manufacturer. I coloured my gnome using Prisma pencils and one or two Sakura glaze pens and then fussy cut him. The cup was done with Spectrum Noir pens and also fussy cut. Each image was popped up with foam tape. The oval PP is from StampinUp and the background piece is another company, however I’ve forgotten the name at the moment. The background was die cut with a rectangle stitched die also unbranded and the oval uses Infinity Dies from Hero Arts. The letters forming the word are from MFT, the same set I used the other day and as you can see the puffy look works on more than just the metallic paper I used on that project. This lime green paper is fairly thin but it still gives a slightly puffy look. Inside the card it reads Warm thoughts of you, all words that came with the cup stamp set. Thanks for taking a look and I hope your day is going well.