Framed Scene

This card is inspired by one of Barbara Campbell’s designs. I loved what she created and was determined to try something myself. My sky is nowhere near as good as hers but thats okay. Mainly created from scraps on my desk as I wanted to use them somehow.

http://daranddiane.blogspot.com/

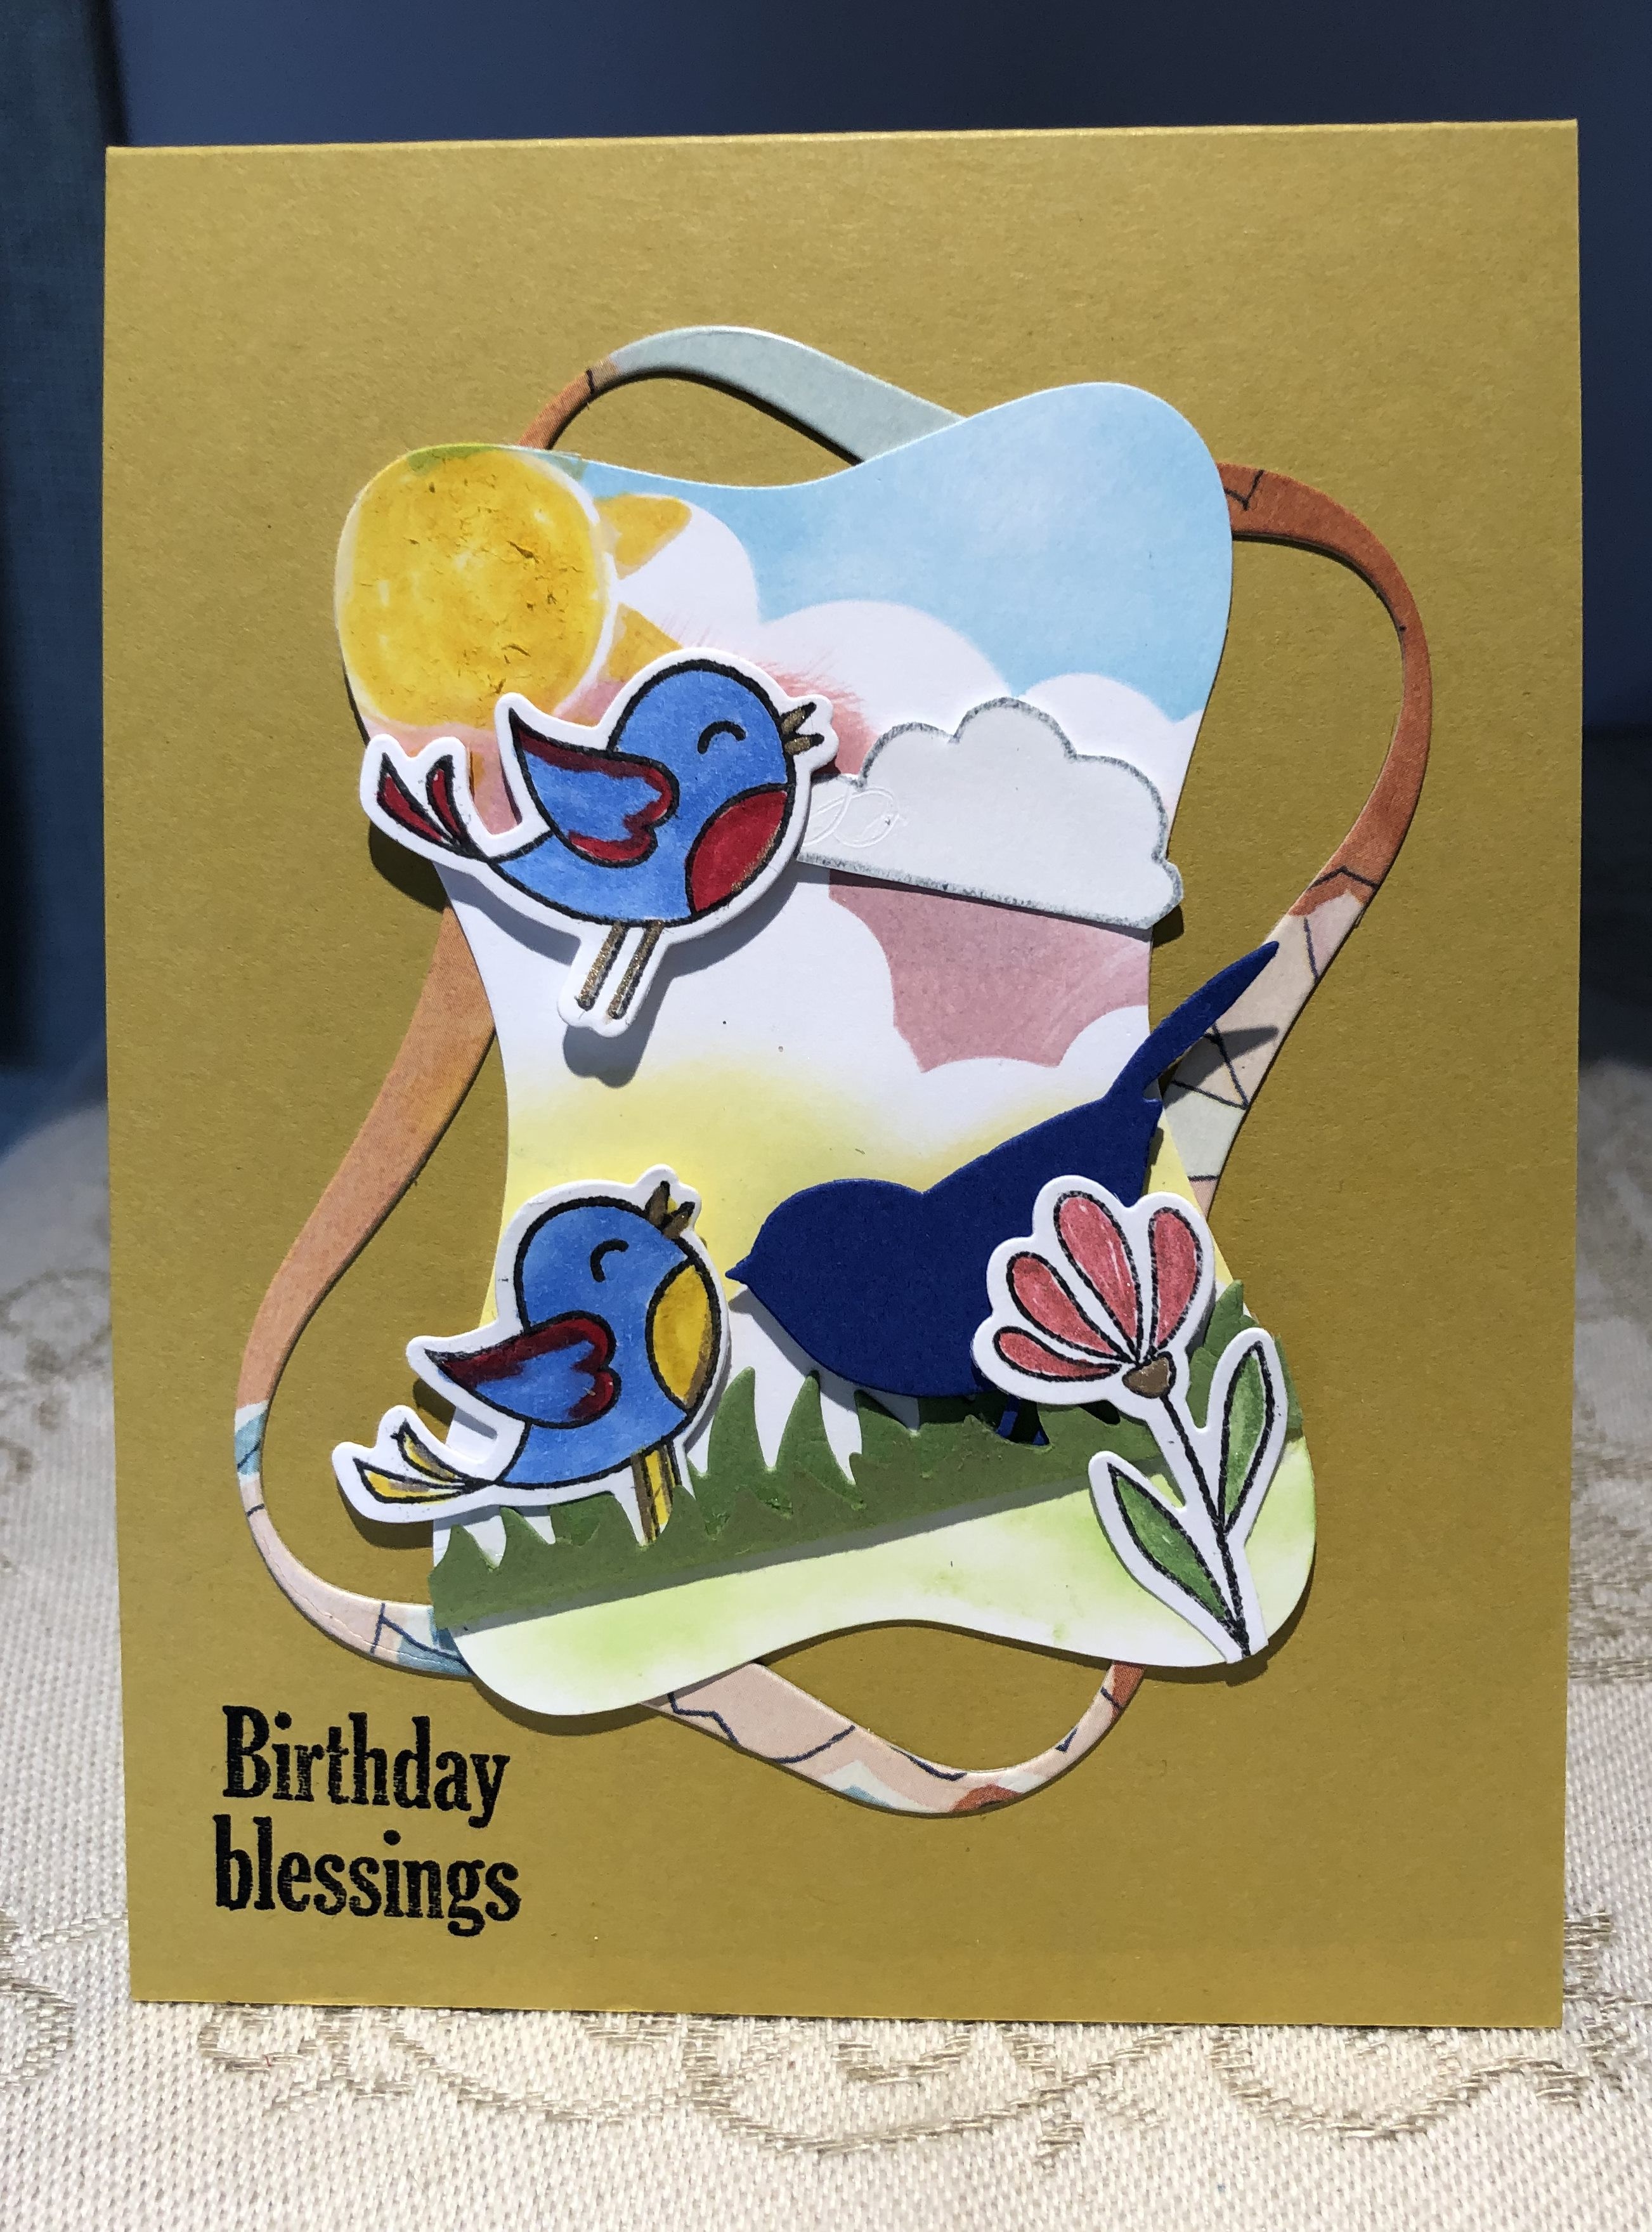
I used Penny Black’s ribbon stackers die set to cut out the frame and the panel, but I first tried my hand at sponging the background and then cut it out. The dark blue bird is a small die I’ve had for a long time, and the other images are from a set called Happy Spring by Gina K Designs. Used mostly copics to colour the images but the flower was done with glittery gel pens.

Using the negative

Created for the Double D challenge of using frames. I had several scrap pieces on my desk from other projects and decided the negative space from which I had cut flowers was something that could be used. I mounted it on the blue card and then mounted that onto the card front. I added the bling centers but it needed something more so I added blue perfect pearl powder to the flowers as well. It adds some nice shimmer but not showing well in a photo.

http://daranddiane.blogspot.com/

To give slightly more definition I also used a blue copic pen and added some shading to the petals. Stamped the sentiment from a Concord & 9th set in Blueprint Sketch distress ink. Added a bit more bling. On the photo it looks a bit dark but it is much prettier in RL. I hope it qualifies for the frame challenge. To me the negative space created the frame.

Love in a Jar

I’ve had this stamp set for ages and never really tried to use it until now, except for the XO stamp. Of course I managed to get ink where I didn’t want it – managed to get the edge of the block in the ink so it created a few unwanted lines before I realized.

I think I covered them up reasonably well using the XO stamp and some light gray ink. I have absolutely no idea how I acquired this stamp set or who made it but most likely purchased it in Homesense on sale.

Second Cute CAS

Using the same idea as previous card and the Simon Says Birthday celebration set I created another cute card. Well it’s cute to me anyway.

http://modsquadchallenge.com/one-layer-cas/

I’ve used this stamp set a few times and always enjoy colouring it. This time I used some gel pens to colour the hat and of course they are juicy enough to spatter a little. Hence all the little dots. It’s the only way I could think of to disguise an unintentional spot. I did wait until the hat was dry before continuing with the rest as I knew I would smudge the entire thing if I didn’t. Used my pencils but this time I blended with the special pencil that came with the set. Worked great. Added some nuvo crystal glace to the balloons for dimension/shine and a few small stars around the sentiment.

Cute CAS

After several times forgetting that the challenge requirement is a single layer CAS I have finally accomplished two. Both cute cards intended mainly for a child but some adults like cute too.

http://modsquadchallenge.com/one-layer-cas/

I got this stamp from Wild Rose studio after winning a challenge and I like it a lot. Had fun colouring with pencils and gamsol. Added the sentiment from a Simon Says set called Birthday celebration. In general I don’t do many CAS cards so this was a challenge for me and my brain.

One Sheet Wonder

I’ve never done any of the one sheet wonder cards one sees on various blogs and on Pinterest and decided to have a go. Using a template found here:
https://ellocindesigns.com I did my best to cut the chosen 6 X 6″ PP into pieces.

I wasn’t entirely successful in copying the template exactly but I had enough for 6 cards so here they are. I used scraps of other pieces for borders etc and added a few flowers and bling here and there. I also used some of Tim Holtz idea-ology small talk sayings. They are intended as a gift for a friend I am visiting soon in Montreal.

Feather Fun

This is also more CAS but again more than one layer. I first used a feather stencil and inked in the colour and I then used a distress spray on top before removing the stencil. The second stencil used was a wave stencil and I just sponged on some blue and a bit of green to soften it somewhat. Once dry I cleaned off the ink from the distressed resist part.

Thanks

Using some feather dies I cut out the feathers and sponged colour on with distress inks. I then added some perfect pearls for some shimmer. Any spots you see are from the perfect pearls. I adhered the feathers along the wave edge and added the sentiment from a Simon Says set. Added the entire piece to some darker blue card stock and then to the Ocean Mist card front.

Umbrella Fun

This has been made to go in with a series I am doing as a gift for a friend. I got the idea from a card seen on Pinterest.

I first die cut the umbrellas and then coloured them with pencils and gamsol. I hand drew the stitched line using a curve ruler as a guide. I curved the sentiment stamp from a Simon Says set and stamped it 3 times. Popped up the umbrellas and stamped the bow on the handles. I wanted to use it for the Modsquad challenge but the rules say one layer and obviously this isn’t a one layer although it is CAS so back to the drawing board.

Hands of Time

Using the second Sissix folder I embossed the white card stock and then went over it with some brushed on yellow ink. As well I added some brown ink to the clock faces and hand drew over the top of the clock hands to make them stand out. I also added some Inka gold paste to the clock faces for some shine. Added some ribbon in the center and adhered to card front.

After die cutting a circle and sponging the edge I stamped the truck from a GKin Hickory smoke and after masking it off stamped again faintly in the background. Masked it again and sponged a bit of yellow around the image.

After die cutting a circle and sponging the edge I stamped the truck from a GKD set in Hickory smoke and after masking it off stamped again faintly in the background. Masked it again and sponged a bit of yellow around the image. I did stamp a sentiment, curved over the truck, but after I had already taken the photo and I was too lazy to take it again.

Flight

Needed some masculine cards and I have 2 new Sissix embossing folders that were a set, so used both to make a couple. First one uses the background that reminds me of cogs and tools. I added some black ink prior to embossing and then added some swiped gold ink on top once embossed.

thoughts

I added a piece of ribbon part way down and then adhered to chocolate card front. Using a label die I cut the label and went round the border edge with a gold pen. I stamped the image using a CTMH stamp and also the sentiment from the same set. I coloured the plane with a mix of gel pens and copics. Added a few sequins and popped it on top. If I do another similar card I will add the ink to the other side of the folder so that the raised part will be coloured rather than the background.