All I’ve been doing lately is making Christmas cards. Only 50 more to go and I’m done, at least I hope I am. Saw something similar to this on Pinterest and decided to make my own version.
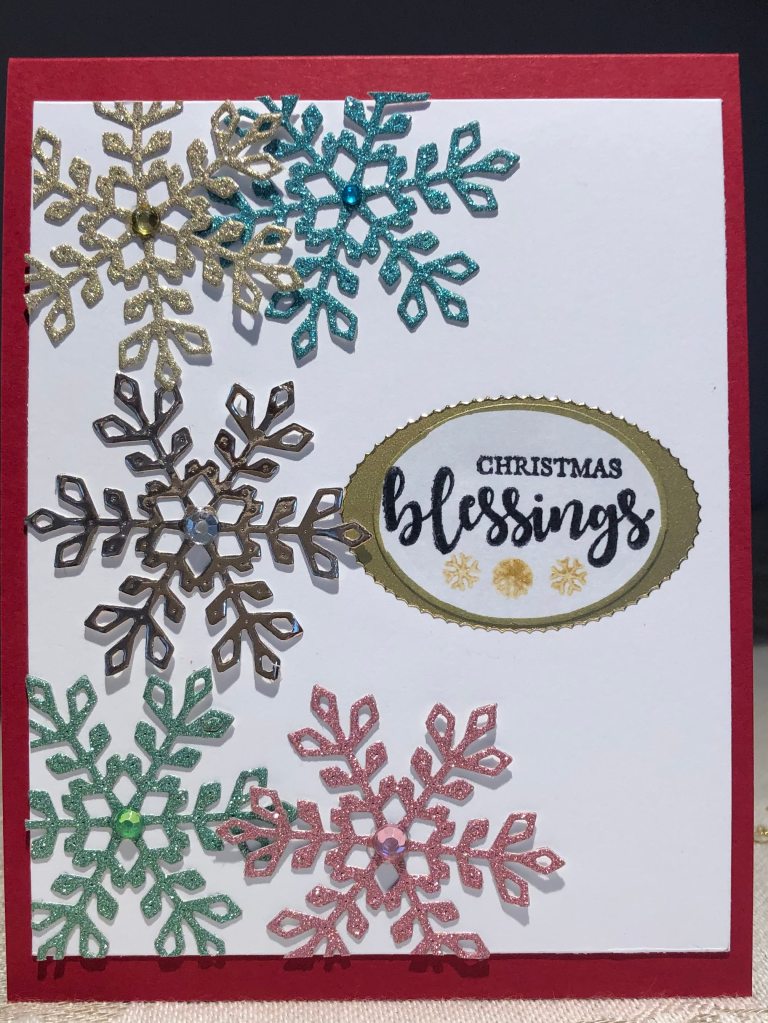
Using glitter scraps I die cut the snowflakes and arranged them as you see here. Glued them down and added some gems to centers. I liked the effect so I actually cut a bundle of snowflakes in different scrap pieces for use later. They take a while to separate from the die so doing a few saves me time later. I also had the sentiment already stamped but it didn’t work for the original card so used it here on top of a sticker oval I had left from something else. Adhered to red card front to give a festive look.
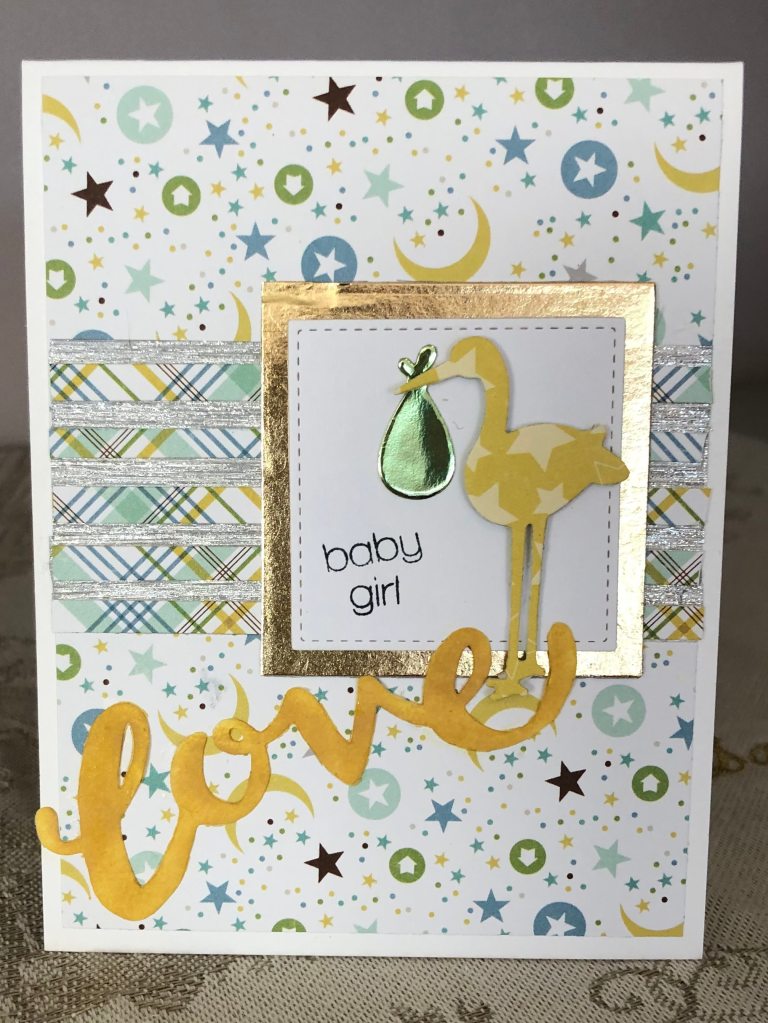
My step niece has just had her third child, this time a little girl so I needed a baby card for her. Paper Players has a sketch challenge happening so I used the sketch for the inspiration …
I didn’t want this to be too girly so used a paper pack with mainly these colours inside. Adhered the first piece to white GKD cs. Then I added several strips of silver washi tape on the front. I cut the plaid strips about 1/4″ thick and adhered them on top of the silver, creating a striped look. Using a scrap piece of metallic cs cut out a square and then another one with a stitched border in white. Adhered these together then added to card front. With another small piece of pp I cut out the stork and popped it up on top of the squares with the little sack under the beak. Stamped baby girl using a set from Simon Says and cut out the large word with a die I got in a closing out sale a long time ago. I used some distress inks to colour this piece in the right tone of yellow before gluing it on an angle. I’m pleased with the end result and hope you like it too.
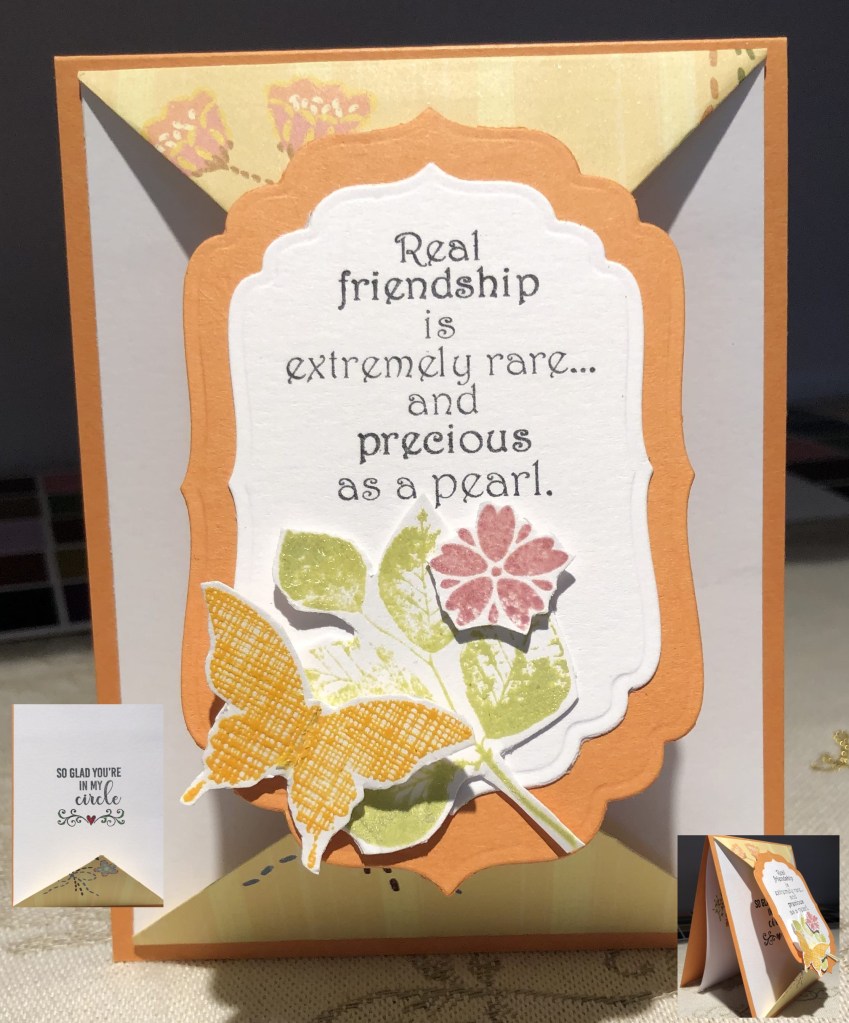
Created primarily for an upcoming close friends birthday I also decided to make it fit the Mod Squad challenge this week. I first saw a card similar to this on Pinterest and I decided to CASE it but with my own take …
It is called a double point card and basically you create 2 flaps (pp from my stash) and glue to the white cs and then fold the excess into the points you see here. I added a side view and a full view of the part under the flap (bottom of photo) so you can get the idea. I used several Gina K. Designs stamps sets, namely the wreath Builder, border bling and the Madala maker for the sentiments and the flowers. The other stamps come from a StampinUp set and I used distress oxide inks with some clear embossing on top then fussy cut them out to add to the flap. Die cut labels is from Spellbinders Nestabilities labels 6. Card stock is also GKD sweet mango. I like that this card has a few surprises for the recipient when they open both the flap and the inside.
Another card for the Global Design Project. Originally I had cut a star out of some pearlized vellum but then I added a sentiment and messed it up with the heat embossing. Didn’t want to waste it so it sat on my desk for a couple of days while I did other things.
In die cutting some snowflakes I had the bright idea of using one to cover up the middle that was damaged but it didn’t quite do the job. In the end after some thought I figured I could die cut more stars and put them together. I used the same vellum and another printed one I’ve had for a long time and glued them together. I then added the die cut snowflake to the middle. I cut some more of the purple patterned paper for the background layer and added the star on top. I silver heat embossed the sentiment at bottom of card front. Both CS and sentiment are GKD. I actually like how this turned out. From a mess to pretty is great in my book.
I die cut the wreath using some Mirri card stock that has a champagne tone to it. I also stamped the sentiment in versamark onto some red shimmer paper and heat set with my new cosmic shimmer powder. Sentiment is from GKD called Noel. I found the music paper in my stash and added it to a Kraft card front. Added the red piece next and then the wreath over that. It still needed something so I found a ribbon that works but was too wide. I painstakingly rolled the ribbon to make it smaller and adhered it at the side. Both the ribbon and the wreath pick up some of the embossing powder tones that aren’t so visible in the photo but in reality are gorgeous.
At Paper Players this week the challenge is to feature a large sentiment. On the weekend I purchased some new EB powder that is a bit different and I was dying to use it so here is the result.
Using two pieces of blue this became a tone on tone look for the rest. I embossed the darker piece and then ran a metallic gold ink over the top just to get a hint of gold. I stamped the sentiment from the Lettered and Lovely GKD set using Versamark ink and then heat set in the new powder from Cosmic Shimmer. I just love this look – it has texture and some other colour besides gold and it also adds shimmer to the CS. Using a stitched die from Gina K I cut the panel and adhered it to some foil for a border. Used some foam on the back to pop it up on the embossed piece. I added a few gems for some bling and a tiny wire bow in the corner.
It doesn’t seem to matter how careful I am to use an embossing buddy I always get some powder specks where I don’t want them – sigh. Anyway I stamped the envelope – from a set I won and don’t remember the brand of -around the edges of the card and then coloured them using challenge colours as close to a match using Prisma pencils. Using gamsol I blended each one. I then stamped the sentiment from the same set in the middle of the cs. I added a few nuvo dots here and there to jazz it up a bit.
The aim was to make a one corner CAS card with the optional twist of colour. I chose red and green for mine and created another Christmas card for my stash.
This is a stamp by Gina K Designs and was gifted to me by a stamping friend as she had two of them. Crafting people are so kind. There is a die set included so I used it for creating a mask of the flower prior to stamping the leaves. I stamped in black Amalgam ink but didn’t get a good impression and couldn’t overstamp without messing it up. (Next time the Misti will be used) I used a fine tip black pen to go around the image where it wasn’t properly stamped. I coloured it in using Prisma pencils and some gamsol. I also added some Nuvo red dots and some gold ones to the flower centers. CAS cards aren’t my forte although I admire many talented designers who make such beauty. That said I’m pleased with this one.
The Modsquad challenge simply wouldn’t let go and even kept me wakeful thinking about how to do another card. I guess that means that the challenge is a truly good one and one of my stamp buddies has also done more than one …
Starting out with a cream CS I cut the geometric shape and with other CS I die cut several more so that I would have different colours to paper piece with. I adhered the frame to Black CS and began to fill in the spaces with various shades of brown and cream leaving a few black spaces. Taking the small word dies, of which there are 10 in the set, I cut out them out in a dark cream. When I laid them on top I realized that the dark cream didn’t show up well on all the browns so I carefully spread versamark on a few and then heat embossed in black. I added some nuvo christel glaze to the dark cream ones. Worked a treat although time consuming to do even with a trick of using purple tape to hold them together. I adhered the words down and was about to post the card when I realized I had forgotten the tag. After die cutting the smallest one I stamped the word hello in black and added a couple of black fallout pieces from another project. Then I added the dark brown wool to the top and tied a small bow. Finally my brain can let go of this challenge – lol.
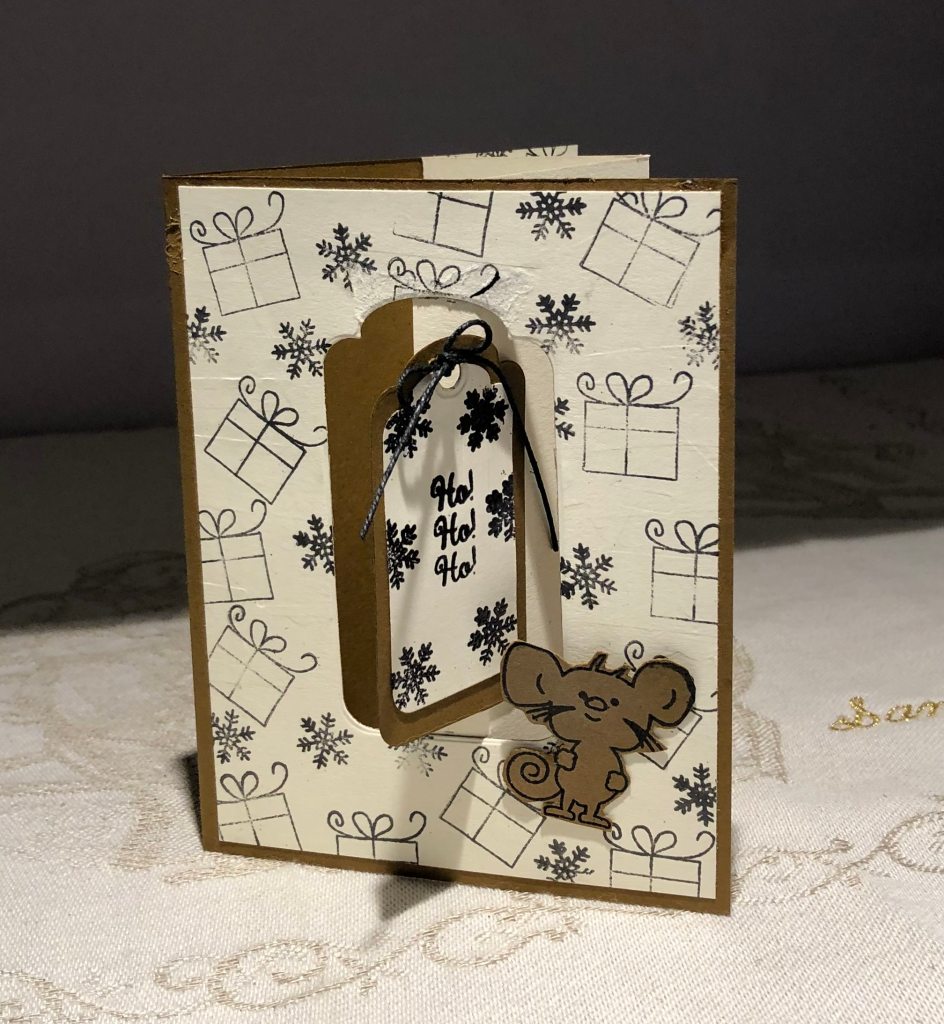
The Modsquad challenge this week is to use only 3 colours and I challenged myself to come up with a Christmas card using these colours. I personally think these are the most difficult colours to use without something else to brighten it so this was a real challenge for me. It also required a tag.
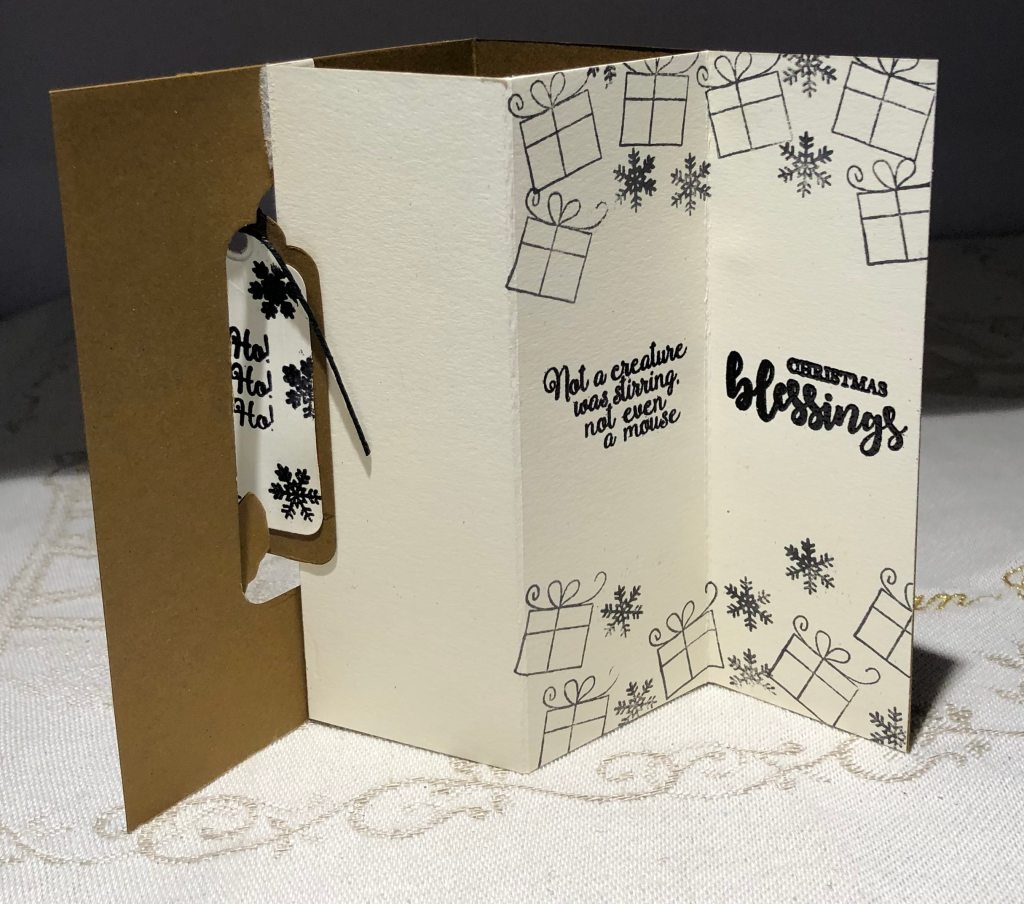
I found a fun fold card to try and this is the result. The one I saw used a circle die but I decided to use a tag die instead. I used warm Cocoa CS from Gina Kay Designs, and added the cream in a light weight CS. I can tell you that using a lightweight CS makes a huge difference to both the stamping and to the cutting. This one is by Recollections and I now know why I don’t use it much. When I placed my tag die onto the card front I needed to tape it in place and even though I was very careful and I used the purple tape the paper quality was such that the tape pulled some of it off. Sigh! I scored the inside cream piece as per instructions and then prior to folding I stamped the gift, snowflake and sentiments in both black and versamark ink. I heat set the sentiment with Black EB powder for additional dimension. Using the same stamps I stamped the cream front panel in the same way prior to cutting out the shape. After I got the folds right I adhered it inside and then added the separate tag so that it moves in the larger space created for it. I also added a small mouse for additional decoration. Before I send this to anyone I shall likely add a bit of colour and sparkle to it as I find it a bit drab, but for the challenge it is correct.