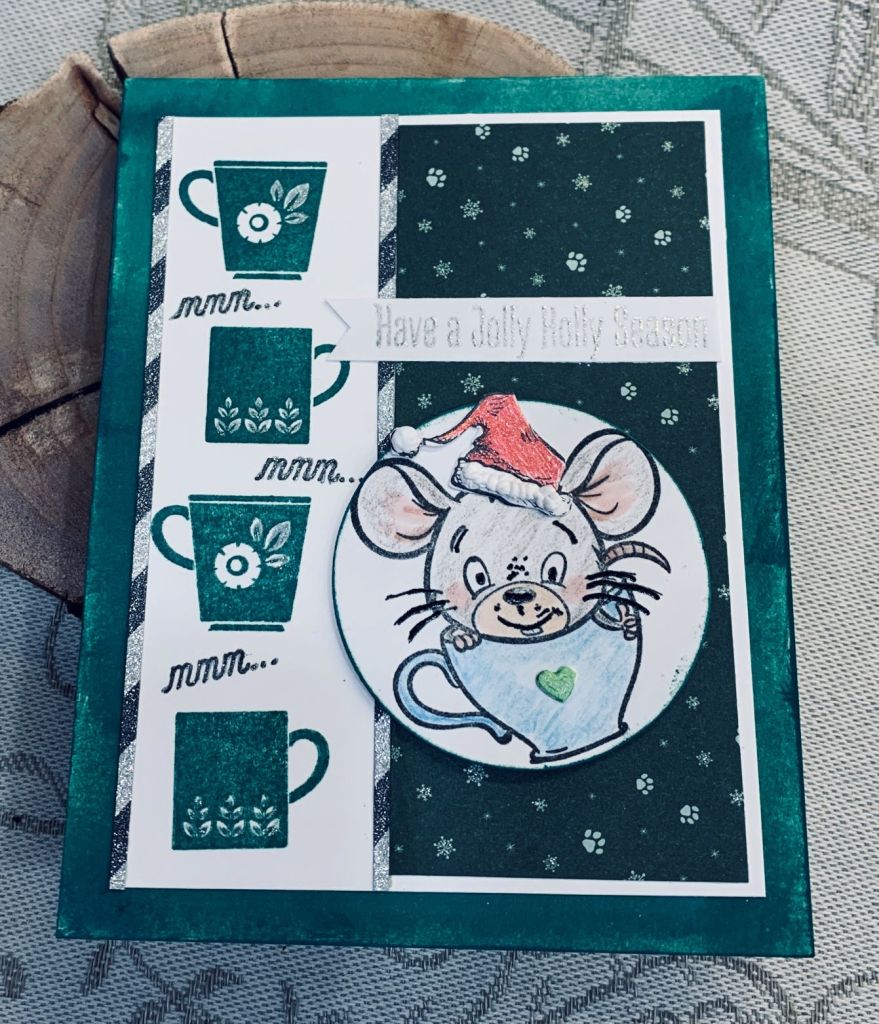
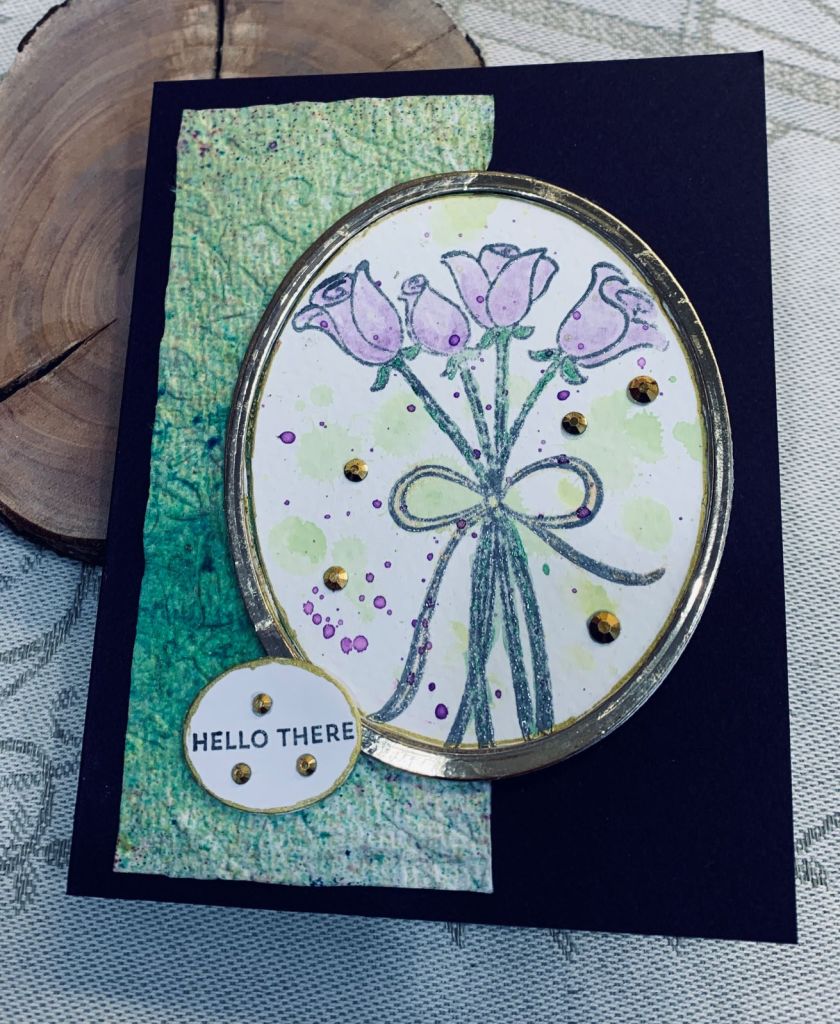
A Simple Happy Birthday

Just Us Girls Challenge #663 – Photo/Moodboard Week

It is fun using Moodboards for inspiration, as they allow for a fair amount of scope. Having been wanting to try using Simon Hurley’s stamping foam for a while this moodboard seemed the perfect occasion to try the technique. I used an older GKD stamp set called Daisy Delight and stamped the daisy image onto the foam. I tried a few times before I was happy with the impression. Then I swiped Distress Oxide over the foam using Hickory Smoke and Twisted Citron inks. I added a hint of yellow to the flower centers with a brush and then stamped the sentiment, from the same set, at the bottom. I didn’t get a good impression of the sentiment but saved it by using a Sakura Gel pen carefully over the top. Had I used my Misti this wouldn’t have been an issue. I also realized that I need to reink my pad before I use it again. All in all, I’m not unhappy with this card. I like the simplicity of it and the almost resist technique look of the daisies.

Winter Wishes

SNOW & January 2023 Anything Goes Winter Challenge

With two challenges featuring winter I made a card that works for them both. I kept the card fairly stark as that looks more wintery to my eyes and used a light gray base with a stencil purchased in an art store a few years ago. To get the definition over the light gray I used Hickory Smoke Distress Ink. Then I used a die from Taylored Expressions and cut the popped up layer, going over it with a bit of the ink as well. The deer is cut from another die that I’ve had for a long time but don’t know the brand. I added some shading with a pencil to give him some definition and used a Sakura Glaze pen for his hooves, eye and nose. I glued him mostly flat but popped up his head a little so his antlers weren’t stuck beneath the tree branch. Sentiment stamp is an old favourite from CTMH and is probably discontinued now. I added some sparkle with a pen. For the snow I used Cosmic Shimmer Fluffy Stuff.

I’m pleased with how this turned out and my hubby likes it too. Thanks for stopping by and I hope everyone has a great weekend.

Star Bright

Peace on Earth Christmas Challenge #32

One of my Dutch cousins sent me a card similar to this one and I wondered if I could do a design of my own. The one I received had a large cut out star and two smaller stars on either side that were printed but not cut. As well the design for the big star was on the inside back of the card so it remained visible and flat for mailing. I pulled out the Star infinity Hero Arts dies and chose the size I thought would work so after I had added a band of PP from an old pad, without thinking I cut all three apertures. Not quite what I was supposed to do, but you know me, I’m not going to waste the card so I changed my design plans a little and the result is as you see here.

At first I thought to do the stamping on the inside for all three stars, but wasn’t happy with how that worked so in the end I added a popped up panel behind and stamped on the die cut stars before gluing them to the popped up piece. The stars at the top were stenciled using a gifted hand made stencil and gold ink. I also added some glitter to them and strings to the stars using a gold pen. Stamps used are from various sets – the little bird is from CTMH, the holly is a very old stamp as is the swirls in the smaller hearts. I have no idea by whom as it was long before I started to keep this kind of info. And the sentiment is from a Kaiser set. I coloured the bird using pencils. The images needed something more so I cut the frames using some gold metallic CS from Recollections and popped them into the openings.

Changing the idea actually worked quite well and I like how it turned out. I think it is nicer than what I originally thought I would do. I am entering it into the Peace on Earth challenge and I appreciate your stopping by to take a look.

How Many Dots?

Color Hues #56- Pink and Red & Anything Goes With A Twist of Dots

As I was putting away some dies I found the one I’ve used above among the others. It is an unbranded die and was actually a disappointment, as it wasn’t what I expected when purchasing. As well it doesn’t cut perfectly but I decided to use it anyway. I guess you get what you pay for. Using a pink scrap piece I die cut the panel and as you can see some of the dots didn’t cut properly. Instead of trying to cut them out by hand I decided to use the panel with them there and added it to another scrap piece of darker pink. Using Hero Arts infinity heart dies I cut the frame of one heart along with another smaller full heart and then a smaller one still using a left over piece of dry embossed CS. I added them to the card front and added the sentiment which is from a Divinity Designs set. I stacked the stamp and curved the corners. I finished the card using some Pops of Color in a different pink. The embossed folder used on the small white scrap is a Gemini folder called Celebrate.

My back pain was not so bad this afternoon giving me the chance to create for a short time. I managed to finish a card for my hubby’s upcoming birthday as well as this one so not a complete waste of the day. Thanks for all the wishes and for stopping by.

Dancing Hearts

Just Us Girls #662 & Anything Goes With A Twist of Dots

This is my last post today, although I have several other cards on the go I think its time to take a mini break.

For this card I used a Crafters Companion cut and emboss folder that I haven’t used for a long time. Once it was cut and embossed I trimmed it smaller to allow a border when attached to the card front. The small fallout hearts were attached in the center space and I added some glossy accents to them. The main panel was popped up with foam tape and the sentiment strip was done using a stamp from Divinity Designs. I kept this simple as the embossing is busy. It was made with the Word Week challenge at JUG’s in mind but as it also works for the Anything goes challenge at CYHTP without the twist of dots I thought I’d add it as 2nd entry there.

My dog is sitting looking forlorn so I guess it is time to take her for another walk. We both can use the fresh air even though it is very gray and misty outside. Thanks for stopping by.

Lace and Dots

https://cyhtp.blogspot.com/

The challenge at CYHTP is an Anything Goes With A Twist of Dots and this is what I came up with. The die is from Spellbinders called Floral Hi and the EB folder is by Lifestyle crafts called Lace and dots. I started with the folder but the edges got cut in a few places so I decided to cut them all off to leave a border. I added this to the Ocean Mist card base and using a glitter Sakura pen went over all the dots. I cut several layers of the die and glued them together but only in the center not at the edges. The Hi is separate piece of the die and was cut using the same colour as card base as were the additional flowers and leaves. Attached everything and was about to add it to card front when I realized it needed a background. My original intention was to cut the sparkly background and offset it behind the rest, but I simply couldn’t get a clean cut and I tried 4 times. In frustration I decided to trace around the die and hand cut the shape. It worked but I would have preferred the original idea. That said I’m not unhappy with this card and it works for the challenge.

Have a great day and thanks for stopping by.

A Heart, a Stencil and Perfect Pearls

January Stencil Fun

Although this challenge at Crazy is our Fame – Stencils are our Game has an optional twist of winter, I wanted to try a particular technique and the stencil I tried is a heart. The stencil was a gift from someone who makes their own using a Silhouette and it seemed the best one to use for this technique. I followed a tutorial found HERE and went to work. I discovered that running the stencil and card stock through my Platinum machine, as suggested in the tutorial, helped to hold the whole thing in place making it easier to add the inks. Note: running it through added some lines I didn’t want as the heart was not covering the entire piece of CS and to hide the lines I did some debossed scoring top and bottom. I used Distress Oxides in Picked Raspberry, Worn Lipstick and Candied Apple. Then I added a pink powder over the top and set it with a bit of sprayed water. I overdid the water slightly and ended up with a couple of drops that spoiled the look so added some Pops of Color drops to cover it and then a few more so it would look balanced. The sentiment comes from a small die set from Divinity Designs which I’ve had for several years and never used until now. I die cut the words and cut off the last letter from Valentines as I didn’t want the S. This was cut twice in two colours and I offset them just a little before adding to the card front. The scored lines helped a lot with placement of the top words.

I enjoyed playing with this technique and already plan to do a few more in a similar fashion. I quite like the look and how this card turned out. I appreciate you stopping by.

Inspired by Pajamas

SOS487 – Pyjama Day

With stars on my old pajamas it was a foregone conclusion that the card would have stars as well. I used my Hero Arts infinity dies to cut the various stars from scraps of CS and then I added them to various lengths of gold strips. With a small piece of PP I cut the box shape and popped it up on the card front making sure I could add the strips behind it. It took a while to get placement right but I managed it. The little bow was something already made from before Christmas and I used the Itty Bitty Basics MFT stamp set for the sentiment. I added the layer to a small piece of the Burgundy CS to give a border. It isn’t quite how I envisioned it but its close enough. Next time I will cut the strips so they are thinner.

Thanks for spending some of your valuable time with me today.

New Home Congratulations

http://cardz4galz.blogspot.com/

As a brand new DT for Cardz4galz, and the challenge being for a CAS card I came up with a needed New Home Congrats card. Our neighbor finally finished building his house and moved in just prior to Christmas after living in his mother’s basement suite for quite some time.

I used a die set from MFT called Fox and Friends cutting out 4 houses out of scrap CS. I cut one in a silver mirror CS to denote his house and the rest plain white. After gluing them I added the following to the silver house, some gold sparkle in the windows and a blue door. The sentiment both on the front and inside (on your new home) came from an older Kitchen Sink set that I won. The striped border came from dollar store paper that I got just before Christmas. I heat embossed the sentiment and for once didn’t make a mess of the embossing.

Some other friends are also in the process of purchasing a home so I guess I’ll be making another of this type of card in the coming weeks.

I’m excited to be a DT and hope that I’ll do a good job of it. Thanks for stopping by everyone.

Happy Birthday Balloons

Happy Birthday Challenge

It has taken me a few days to get around to making a card for the challenge at Double D, but finally I have one ready. The background is on Yupo paper and was done with alcohol inks some time ago. The dies used are a set from Spellbinders called Layered Happy Birthday. I used a scrap piece of pink marbled PP from StampinUp for the 1st layer, popping it up on the background and then a scrap piece of Lavender CS for the next one, which I also carefully added foam tape to. The additional balloons are also part of the set and I die cut them from other scrap pieces, added a bit of Nuvo Crystal drops before popping them up on top. The card was inspired by the balloons and colours in the mood board. I just realized that there are 7 balloons so its very appropriate for a 7th birthday celebration.

Thanks for stopping by, it is appreciated more than you know.