Squared Away

Color Hues #49 Yellow and Brown

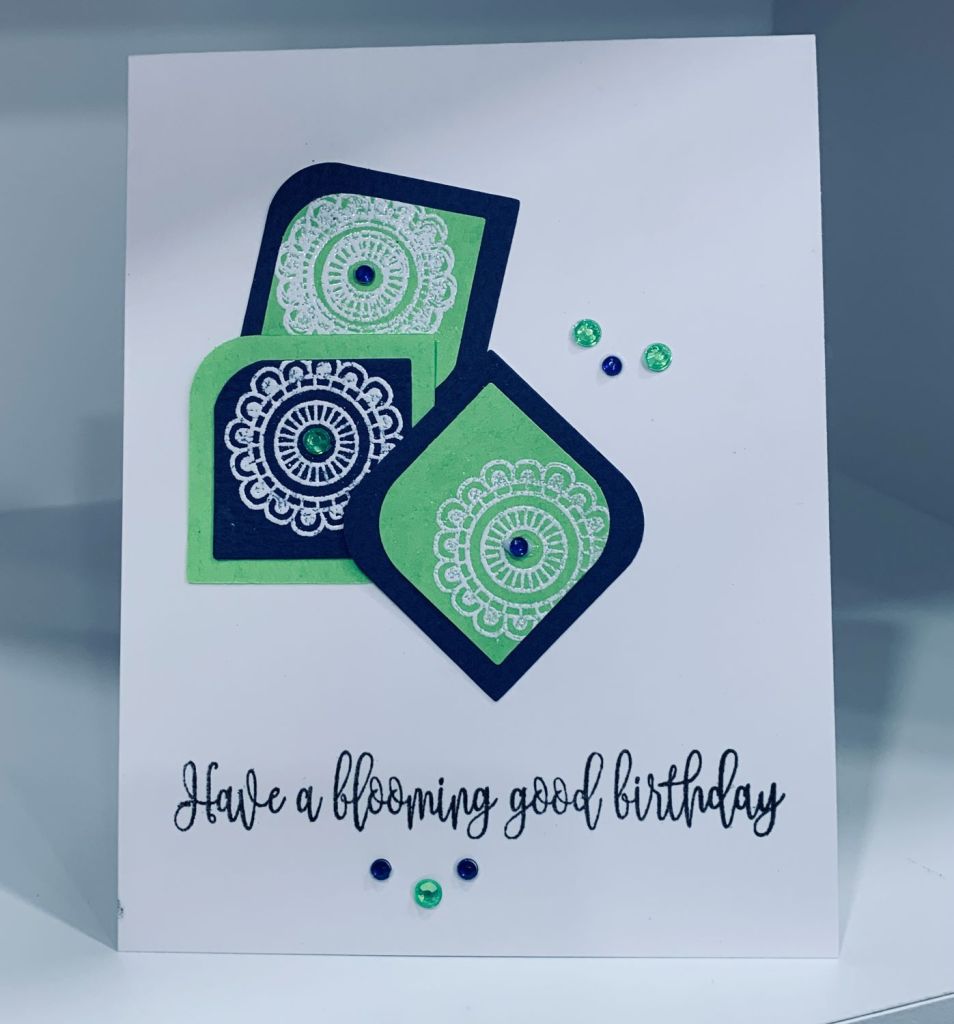
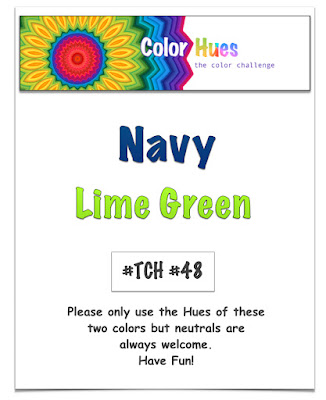
I’m not a big fan of brown as a design colour, but it is nice with yellow so I decided to make a card for the current ColorHues challenge. I had made a stencil using a die quite some time ago and thought it would be nice as the base for the rest of this card. I sponged through the stencil with yellow to get the background and then using another stencil I added a bit of texture in brown. Colours used are Distress Inks Mustard Seed and Gathered Twigs with Ground Expresso for the actual images. Stamp sets are from various GKD sets. Except for one stamp they are all silhouette images and I debated whether to colour the one that isn’t, but decided to leave it as is. I did add some tiny pops of colour to the flower centers but they are not as visible in the photo as in reality. I backed this layer to some bright yellow paper and in turn added it to the brown card base. Then I added the gems which are an almost orange yellow so that the card has some sparkle. At first I wasn’t sure if I liked it but as happens many times, leaving it overnight and then taking another look has helped me to see it properly and I quite like how it turned out. Hope you are enjoying the weekend. We have a sunny day with some wind so it is fall like but nice.

Sympathy

Game #223: NO Layers + Sympathy card

Sympathy cards are the hardest to create and a one layer sympathy was a challenge for me. I had an idea in mind and then realized that it wasn’t one layer so basically I took the idea and did it with stamps rather than the die cuts I had ready. Stamp sets used are one from Concord & 9th, 2 from GKD as well as the sentiment which is from Joy Clair. I stamped the square frame in Blueprint Sketch once normally and then a 2nd time on an angle. The sentiment fit nicely into the square. Then I stamped the dragonflies and coloured them with Prisma pencils. I love dragonflies and enjoy watching them fly around. We just learned that several of the species are under threat as are many other insects so it is nice to see them where we live. Although we don’t have water for them they do like to visit the wildflowers etc. Thanks for looking.

Funky and Fun Gossip Birds

Baa~Cluck~Moo~Neigh~Oink~Quack Challenge

As mentioned in my last post, when searching for an image for this challenge I actually found 2 and just had to do them both. This is my second card and I went all out to make the colours as vibrant and funky as I could. I didn’t worry about shading and light just went with as much colour as I could get using Sakura Glaze pens mostly, with a bit of Sakura glitter Gelly rolls as well. The die cut frame is an unbranded one that I thought would work well for this image and I used some Scrapbook.com glitter paper. I offset the frame slightly on the white base and then offset that just a little when adding it to the card front. For some added interest I used a brick stencil and a lighter shade of violet to sponge in the background. Before adding the main layer I stamped the sentiment at the bottom using a darker shade of violet. It wasn’t quite dark enough so I carefully went over it with a purple Sakara pen which worked well to get the look I wanted. I also added some pops of colour dots in pink, although they look white in the photo. The image was called gossip birds and although I am not a gossip person I couldn’t resist the image as it was such a fun one. I guess they will be clucking for a while.

Snow Geese … haha

http://Baa~Cluck~Moo~Neigh~Oink~Quack Challenge & Peace On Earth Christmas Challenge #23

For a short time I was completely stumped as to what I might do for the Double D challenge this week, as I don’t have many stamps that fit the idea. In the end I resorted to looking at free digi stamp images and found this cute geese one. I resized it in CorelDraw and printed it out onto some thin CS. Then I used Prisma pencils to add colour. I also added some glitter using Sakura Gelly roll pens as well as the glaze pens. To give some dimension to the geese I used a silver pencil in a few places. Once it was finished I decided on the book fold for the card front and chose some DSP that would work for a Christmas theme. At the same time I realized that this would work for the Peace on Earth challenge as well, which is why the card front is a red one and the image is cute that it could be inspired by the top left image on the mood board. I backed all the patterned papers with a silver sparkle border and the main image with an almost black sparkle paper. The greeting is from a StampinUp set I got in January and I backed that with the same almost black sparkle. It turned out better than I expected and I like the cuteness of it. I’ve also found another fun image to do a second card for DD and will upload it later today or tomorrow.

Dragonfly Hours

CHALLENGE #9 – TIME FLIES

When I purchased this Joy Clair stamp set all I really wanted was the clock stamp in the set and that I’ve used a few times. The rest of the set hasn’t really been inked until today. The Paper Dragonfly challenge is all about time and I realized that I could do something a bit different if I used the hourglass stamp so I set about crafting. Initially I planned to do the main image and sentiment on Vellum, but the sentiment came out blurred so instead I fussy cut the hour glass once the heat embossing had cooled. There was enough ink to be able to glue it without making a mess which is what I eventually did. Searching online I found the dragonfly background paper and this was printed onto some subtle shimmer paper and cut to the size I needed for the front. I re-stamped, and embossed the sentiment onto the same paper and added it as shown. Then the hourglass was added, note the vellum is a yellow gold colour which I thought added something a bit different. I have a lovely brass hourglass ornament and this stamped image reminds me of it. I fussy cut one of the smaller dragonflies and added some black sparkle to the wing edges and the body before gluing it using some tiny pop up bits to hold the wings in place. Although it isn’t what I originally thought it would be, I am pleased with the end result. Thanks for spending time with me today.

Repetition

Just Us Girls Challenge #649 – Trend Week

The other day I uploaded a card that fit a couple of challenges and turns out was also in line with the current challenge at JUG’s but sadly it is way too early for the challenge and back dating isn’t allowed. My original intention for that card was to use the paper pieced thanks that you see here but it just wasn’t working at the time. The wooden leaves used here were a win from a challenge a long time ago and I hadn’t used them yet. The oval piece was leftover from a previous project and the bow was made from ribbon that came in a recent mystery box. There are several things repeated on this card front. The metallic CS, the leaves and the dots on the ribbon as well as the script on the oval all repeat. The letters for the word were cut from a Concord & 9th die using a scrap piece of gilded paper made earlier this year. And the label behind the word is also from Concord & 9th. This card looks nicer in reality than in the photo, and I’m reasonably happy with the result.

Goodbye Summer


Anything Goes Embossing With A Twist of Fall

A while back I had painted the chipboard birdhouse, bird and branch then glued them together. At the time I was just fooling around with a few bits and pieces so they were set aside until I decided how I wished to use them. The challenge at CYHTP has a twist of fall to it and as the colours were kind of fall looking and it is the end of summer I decided that it would be a good image for the embossed background. Too me it looks as if the little bird is thinking of leaving hence the goodbye summer title. The embossing folder is a newer one by Tim Holtz called Foliage and I used a brush and 3 different inks on top to get the background. This folder is 3D and is so detailed that the CS used splits if one isn’t careful. The stamps are from GKD called Triple Play Holiday and I fussy cut the leaves and twine ribbon before adding them to the card front. The additional branch behind the birdhouse is another GKD set Birds & Blossoms 2 and I fussy cut this out too. Gems are from my stash and I also added a bit of gold to the leaves before calling the card finished. Thanks for looking and I hope your weekend is a good one.

Fall Thanks

Make the Cards Challenge #63 & Challenge #273 – Designer’s Choice – Repetition & SSC291 AUTUMN RAYS

Have you ever started a project with something in mind and find that it morphs into something quite different? This card is one of those and that it fits more than one challenge is a happy accident and not by design. I had seen something this morning (cannot remember where) that I thought was a great idea for a card. As I couldn’t find it again I realized my idea wasn’t going to work but I had already die cut and paper pieced the word thanks and decided to go ahead with another idea. After prepping the card front and background layer I took a piece of white CS and laid the paper pieced layer on top of it. That led me to die cut the letters of the word again and using a curved oval piece I laid them out above the other piece in a curve. Didn’t like it so I removed the original paper piece and set it aside. Then using the same die I cut several words in different scrap paper thinking to add them in the curve shape all over the white layer. After gluing the first word at the top I started on the next and it didn’t take long to realize that I wasn’t going to get it exactly where I wanted it. Went ahead anyway only this time with the intention of having each word slightly offset from the others. Once they were glued I stamped the leaves in fall colours using 2 different stamp sets from GKD. Then I added the gems before adding this layer onto the rest. I actually like the result although it is a far cry from what I originally envisioned. Before I started the post I went through a few challenge blogs just to see what was there and discovered that 2 additional challenges were also suitable for my post. My original paper pieced bit is laid out ready for another card that I have an idea for, so tomorrow if I have time I shall finish that one as well. Thanks for spending time with me today.

Warmer with You

Caffinated Christmas & Beautiful Brown

I decided to have a go with this challenge after Angie shared the link to it and this is what I came up with. As well I’m entering it into the Colorful Options challenge as the colours work for that too. Stamps used are mostly from GKD, but the snow baker is a free digi stamp found on Pinterest. There was one image I really wanted to try, but although Pinterest showed it, when I visited the website it wasn’t to be found so I gave up. Actually this card also came about because I needed to distract myself from pain today. My back decided to play up after we visited some friends on their sailboat yesterday as it was a challenging boat to get on and off from. It will settle but having a distraction helps me stop focusing on it.

The scoring part of the background was from an idea J. McGuire shared recently and I thought it would be fun to try myself. Using a scrap piece of kraft CS I scored the lines diagonally at each corner and then went over them with white ink and a brayer. Then I added a gold piece in the center and a white stamped piece on top of it. The gingerbread stamp worked well for this challenge. After I’d coloured the digi stamped image I fussy cut it and added as shown. I felt it needed more so used the coffee cups which were also fussy cut once stamped. There is a bit of shimmer here and there although photo doesn’t pick it up. Card front is a dark chocolate that the camera makes almost black in the photo. One more Christmas card for my stash so less work in November. I hope everyone is having a wonderful weekend and thanks for looking.

Good Birthday

Color Hues #48 and Our 2nd Birthday! & https://seizethebirthday.blogspot.com/

Navy and lime green go well together and I came up with this card. Happy birthday to the challenge blog. Adding it to the Seize the Birthday challenge as well. Inspiration came from a photo seen on Pinterest but mine is quite different to what I saw. Using up some scrap card stock I die cut some squares and then rounded the corners in two places. I did the same with the lime green paper. Stamps used are from GKD and were 2 different sets. Mandala shape was stamped onto the smaller pieces in white and then heat embossed with more white. I put the pieces together as shown and then added them to the card front. Sentiment was stamped at bottom of the card and then I added a few gems in the same colours. I like the simplicity of this card and the colours make it effective to my eyes. Hope you all have a great weekend. Ours is shaping up to be busy but fun.