Musical Notes

The object of this card was first to use a stencil and then to make it musical so it fits 2 challenges. Made for a personal challenge over at Stamp Buddies and also for the Double D Challenge Let’s make some music, http://daranddiane.blogspot.com/ Obviously I started with the stencil piece first and in an experiment I used Gesso and mixed in a small amount of blue alcohol ink and some blue glitter I had left over and wanted to finish. At first I thought it wasn’t going to work so before it was dry I added a bit more glitter in both blue and gold. When it dried however I realized that the original mix was actually quite nice. I cut the panel down just a bit and chose a navy CS for the card base. Then I took an old wooden block music stamp and some vellum and stamped it in versamark ink which I heat set with fine black detail EB. I attached this to the stencilled panel and then adhered everything to the card base. The little bird came from the Happy Spring set by GKD and I used copic markers to add colour after which I fussy cut him out. I added him to the vellum using dimensionals to lift him up.

Musical Notes
Inside card

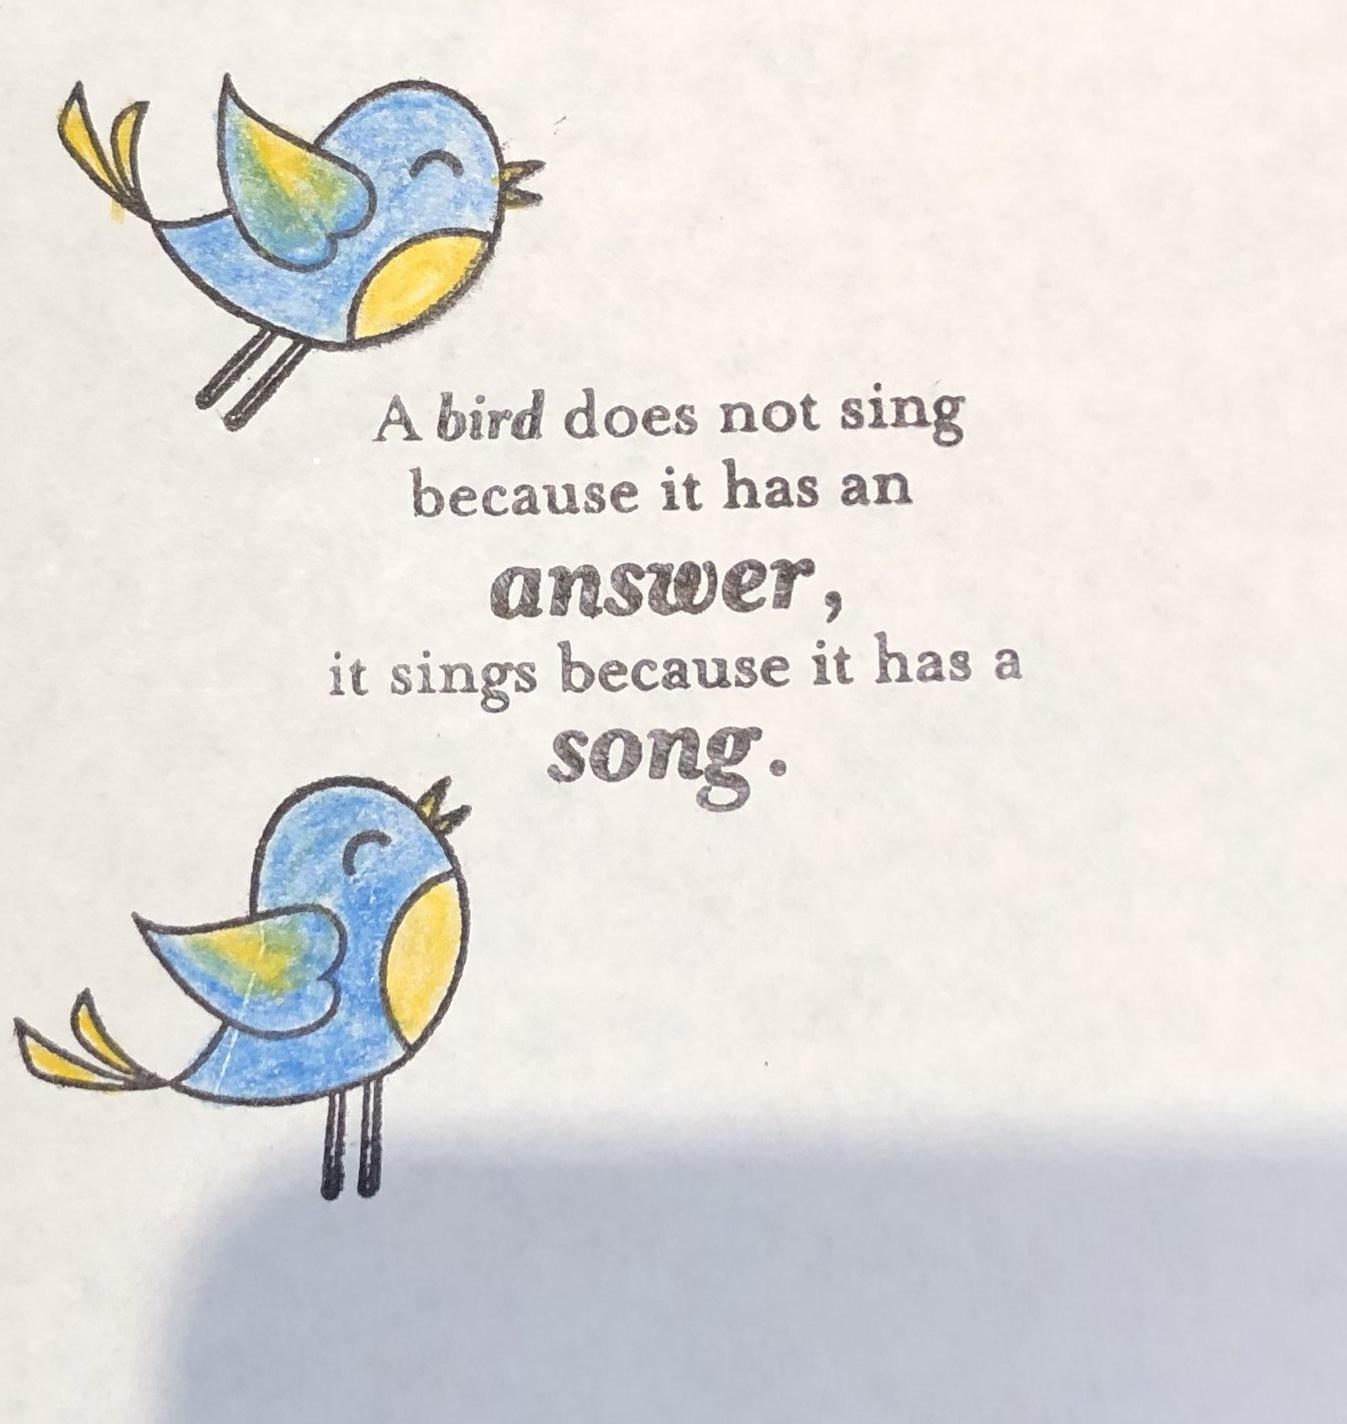
I also stamped the bird on the inside of the card using pencils to add colour and used the sentiment from the GKD Snowbirds Stamp and die bundle set.

Flower Layer Love

This began as an entry for this months Flower Power GKD challenge and evolved into an entry for the Modsquad http://modsquadchallenge.com/layered-looks/ this week as well. I began with a piece of sandy yellow cs and stamped the rays in Aged Mahogany Distress Oxide ink. While they were still wet I partially sprinkled some vintage pearl EB on top and heat set it. I added the white heart strip to the lower portion and then layered the rest on top. I used Lisa Hetricks (GKD) Today and Always stamp set for the other images which I stamped, coloured and fussy cut. I also used a Love word die that I cut out of some almost black thick paper. It was a bit harsh so I went over the word with one of my Sakura pens and while the ink was wet I added a tiny amount of a pink EB and heat set it.

Flower Layer Love

I used the ink pad to do the edges of the panel and also added some black for a border and added it all to the Plum Punch card base. It still needed something so I added some tiny purple gems to the background and also to the word. It is sparkly in reality but the photo doesn’t show it well.

Sparkly Feathers

Left over from another project I had the oval foam sparkly piece and wondered what to do with it. I also had die cut an intricate frame when trying out a die I hadn’t used found during my organization project. At the same time I rediscovered my feather dies so I cut a few out and brushed ink on them. They needed something extra so I dotted glue here and there and shook a bit of glitter on top. I added all of the above together, but still had no idea where I was going in my head. In the end I stamped feathers in different colours onto white CS stamping off each time to get a more faded look. I added this piece to some black paper and then added it to the Teal card.

Sparkly Feathers

Not sure how this card will be used but most likely for a masculine birthday as I never have enough masculine style cards. It isn’t one of my best creations but it isn’t a truly bad one so it will be given to someone for sure.

Sympathy

I like to have a few sympathy cards on hand as one never knows when one may be needed. The new die from Cheapodies and an Inspired by Stamping stamp set called Seaside that I’ve had for a while, but only used one or two stamps from, were calling me. After cutting the bulrush from a scrap piece of CS I took another piece of CS and brushed various distress oxides over it. Then I stamped the images on top and coloured them in. The beauty of distress oxides is that one can colour over the top or stamp in other colours and it works.

Sympathy

I used my Sakura gelly roll pens to colour in the dragonfly who comes from a GKD set. I did the edges of the panel with my liquid chrome pen. Wish they had this in gold but so far only seems available in silver. Assembled this onto the Wild Lilac card base.

Reach for the Dream

This was created for the Pink and White challenge at http://daranddiane.blogspot.com/. Decided to try a similar design to something seen on Pinterest and this is my take on that card; found here, http://www.stampingscene@blogspot.com.

I started by creating the polka dot strip using the stamp from Lisa Hetrick’s new set called Today and Always. I used 2 different pink distress oxide inks and stamped the image twice but only used half the stamp each time. I then used a glue pen and made a few squiggles here and there after which I placed some scrap gold foil and burnished it into the sticky areas. This added a bit of gold. With another scrap piece of paper I divided my card almost in half so I could stamp the sun (StampinUp) at the bottom and I heat embossed in gold. Adhered the polka dot piece after cutting it out with deckle edged scissors. On white CS I stamped the flowers and leaves from the set called Fancy Flowers by GKD using another of the pink inks. I fussy cut them all out and then added the leaves to the back of three of the flowers before gluing them to the card front. I did use dimensionals on a couple of the flowers. The sentiment is a combination of a stamp from Beth Silaika – All Star set and a word die I’ve had for ages but hardly used. I had cut the word in black but didn’t like it so I went over it in silver with a liquid chrome pen. Didn’t like that either so I cut another word and heat embossed in gold. I offset the gold piece slightly over the original one and now like it much better.

Floral Bouquet

Started with the last piece of left over foiled CS to which I then began stamping the flowers and leaves. This one is intended for this weeks Modsquad challenge – http://modsquadchallenge.com/brand-name-clear-or-rubber-stamps-no-digitals/.

Lisa Hetrick – Today and Always GKD

I stamped largest flower first and also created a mask. Then I stamped the rest of the images using all Distress Inks. After removing the mask I stamped the sentiment using 3 small stamps from the set. I then added a bit of bling and mounted the piece to some black paper after which it was adhered to the Tomato Soup GKD cardstock. Hubby really liked this one.

Stars & Stripes

When creating some foiled cardstock for another challenge I actually made a few extra with left over bits of foil. The next two cards are using those pieces and really just playing around.

Beth Silaika – All Star from GKD

Having the foiled piece ready I decided to add the tiny stars down each white space in various Distress Ink colours. Then I took a border die cut made with a set called Alisons Ribbon dies and inked it with VersaMark to which I then added some copper EB powder. After heat setting I got something that almost matched the foil. I took another die from a newly purchased Concord & 9th kit and using a VersaMark pen I did the edges and embossed those. Sentiment is built from the All Star set and I went over the large word with a gold pen.

Flowers and Foil

Lisa Hetrick – Today & Always GKD

This one had been foiled diagonally using Jelly Bean green foil and sweet mango colours which I then added to a piece of copper Metallic card stock and adhered to Grass Green Card stock. Using my newly arrived stamp set I created two flowers and fussy cut them out along with a couple of leaves. I adhered the leaves and then added the flowers on top with dimensionals. Stamped the word Today and didn’t like how big it was so cut it out by hand. I also stamped the tiny word banner and added it underneath.

Sympathy

A club member of my husbands photography group has just lost his mother so a card was needed to show support. I had been wanting to try the technique found at https://lostinpaper.com/2016/02/28/video-altenew-monochromatic-almost-bird-by-request/ so I followed along and created this …

Deep Sympathy Dragonfly

It was relatively easy to make although I almost ruined it when I tore a corner of the popped up frame. The addition of the bling was my fix for the tear, but initially I didn’t want bling on this card.

Anyway I used the stamp set called The Wetlands by Theresa Momber – GKD as well as a small stamp from Inspired Stamping called Seaside and the Vertical Greetings set by Melanie Muenchinger – GKD. Stamped everything with iced Spruce Distress Oxide ink and used Sakura gelly roll pens to add colour to the dragonfly. I am really pleased with the result and shall use this technique again.

Hello Friend

The other day when playing with the Kitchen Sink stamp set I had won from last year – I stamped out a couple of extra flowers. Initially I didn’t like them at all but they kind of grew on me a bit so I fussy cut them out and thought about how to use them. I had a panel with some foil taped strips from a few days ago and placed the flowers on it. Then I went to bed. The next day I took a look and decided that they would work with the foiled piece.

Dogwood Flowers and Foil

As I had used some of the purple shades of Distress Oxides to do the flowers I decided on Lovely Lavender CS by GKD for the base card. Using more of the stamps in the set I stamped some leaves and then popped up the 2 flowers on top. Added the sentiment in the corner using an incentive set from GKD called Inspiring Poppies. I’m still not sure about this 2 or 3 step stamping but will keep practicing the technique.

Spring Florals

Using the left over piece of CS from previous post, I stamped the flowers all over using same stamp set as before but this time using the sketchy flowers and leaves. I gave it all a gold edge with a Sakura gelly roll pen, mounted it onto some black paper and then adhered to card front.

Sketchy Spring Florals

With some perfect pearl powders and a water brush I added some additional colour and shine. Didn’t try to colour it all just flicked onto the petals with the brush. I also used a Sakura gelly roll pen on the leaves. Using some Sissix thinlet word dies I cut out the sentiment but before I added it to the card I first used VersaMark ink and thick embossing powder to get dimension and shine.