Several Shades of Yellow on Black

Color Hues #42 Black and Yellow

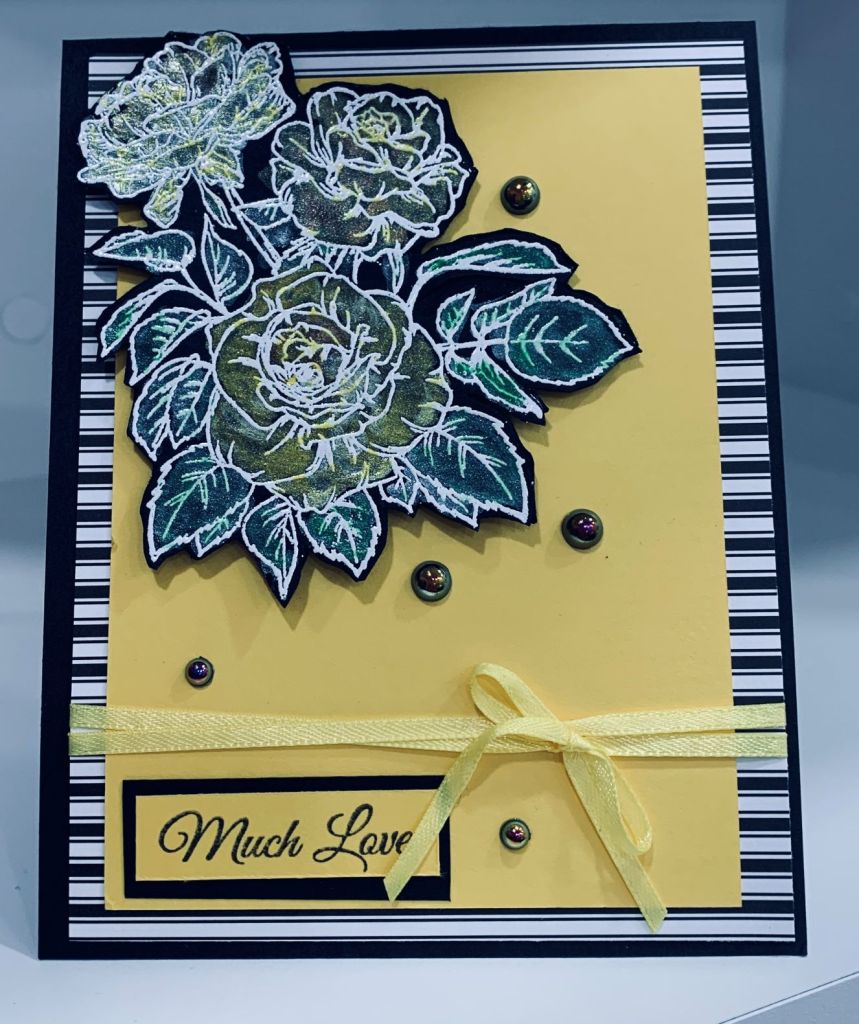
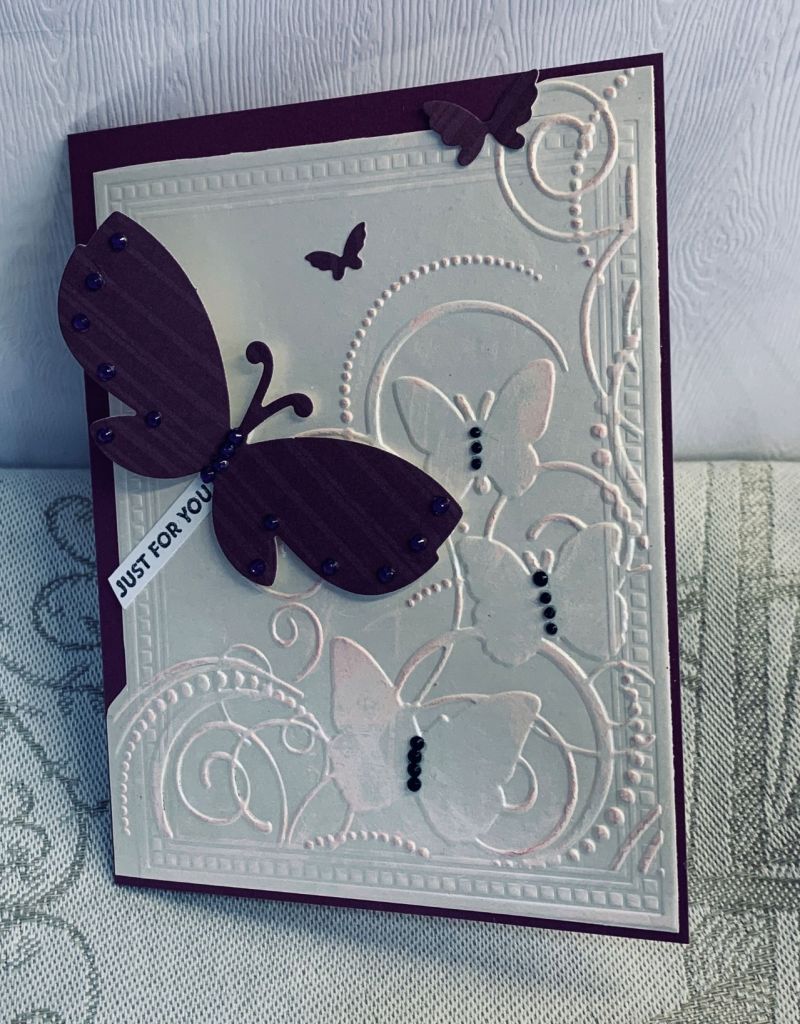
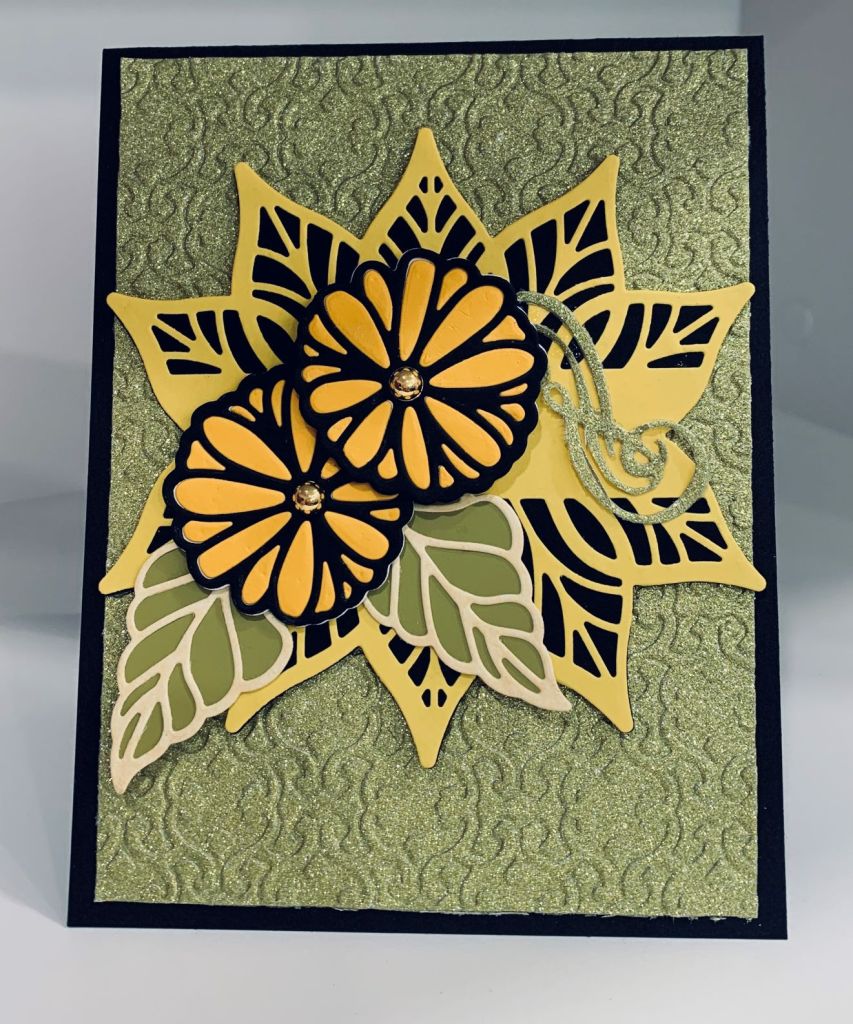
After going through my paper scraps I picked out several different shades of yellow and using a new Spellbinders die set called Be Leave Me, I proceeded to die cut the elements. I paper pieced the flowers to fit the challenge as well as adding the largest element to a black piece. I wanted some contrast between the flowers, leaves and background so I chose a cream yellow for the leaf outline and added it to a yellow green paint swatch. Using a glitter paper pad from Scrapbook.com I found a yellow green that works for the background and I dry embossed it using a brocade folder. I also cut a flourish from the same glitter pad and then added some gold gems for the center of the flowers. As I’m not sure yet of how I will use the card I’ve left off a sentiment and, in fact, may just add something inside rather than on the front.

Thanks for sharing some time with me today.

Black & Yellow

https://colorhuesthecolorchallenge.blogspot.com/

This card started out as a different idea, but as I messed up the stamping twice I got frustrated and decided to cut out the part that was okay and discard the mess. I had originally intended to stamp all over the black cardstock and then add colour. In the end I only used part of the image and then added metallic watercolours to it, and in reality it looks pretty, but the photograph doesn’t do it justice. Once the paint was dry I fussy cut the piece and popped it up on the yellow layer. That in turn was added to the striped layer and before I added it to the card front I added the yellow ribbon. In retrospect I probably should have dry embossed the yellow layer but so many interruptions today, left me scrambling to finish it and I forgot. The sentiment is from Joy Clair and gems from Trinity stamps. I love these little gems as they change colour in the light but they also pick up colour from the project.

Thanks for looking.

Someone Special

June Anything Goes Summer

The Four Seasons mood board has a lot of pink but I chose to use mostly green on my creation. I did choose some blossoms but left them almost white with a hint of shimmery rose gold here and there and I also used some rose gold along the edge of the border die piece. The dies used are from Memory Box, Spellbinders and Gemini. The embossed piece uses a new to me mini folder from Gemini called Lattice panel. Sentiments are from 2 different sets, one is Altenew and the other SSS and both are probably from discontinued sets as they are really old. Gems and bow are from my stash. I had fun putting this together and am pleased with the result. Have a great day everyone.

Java Great Day

Challenge #276 – Here’s to Beverages! & PP594 – A Theme Challenge from Anne Marie
showing Gate fold

This card came about because I had made a mistake on a previous one (for a graduation) and I didn’t want to waste the CS. It was already cut, scored and had the white triangle shapes adhered, which is where the mistake occurred, as I had them in the wrong place for the original design. As I had the DSP sitting on my desk I decided to add it to the white triangles and then it sat there for a day or two. Yesterday I saw that the challenge at As You See It was a beverage one and this morning the reminder for Paper Players showed that it too is for beverages or food. The little mug die cut is from Trinity Stamps and was a gift in my last order. I paper pieced the white cup frame with more DSP and added it to the card front as you see. Using a gold pen I added the indication of steam and from an older GKD set I stamped the sentiment and heat embossed it. Even using the magic bag I still get the powder where I don’t want it and the camera always picks up the specks. I added the gold embellishments, from Trinity Stamps, to finish the card. It is a small card only three and half inches high but it works and was a good way to use up the CS.

Thanks for spending time with me today.

A Record Player

Make the Cards Challenge #56

Above photo is the outside of the box and the one below is when you lift the flap.

The inside

This card has been made for an ex boyfriend, who has remained in my life as a good friend. He is a classical guitarist as well as being a doctor and I thought making a card that looks like a record player decorated with a classical guitar was perfect for his birthday. We go back many years so the nostalgia of a real record player works well for both of us.

The idea for the card came from MFT and is basically a box shape that flattens for mailing. The PP is from a paper pad in my stash, the musical notes are stickers I’ve had for ages, the guitar is an unbranded die that came in two sizes and I used the larger one on this card, the sentiment is from GKD and the turntable is all from MFT. Once I had the box shape done, I added all the other elements until I was happy with it. Hope you like it and thanks for taking time to look.

Art Colours Life

Just Us Girls Challenge #635 ~ Word Week

Well I may be able to create cards with, in some cases, a few being pretty good, there is no way I can call myself an artist based on my painting skills. On this card I hand created the rainbow effect in the background but the result isn’t what I expected. That said, it works for behind the focal part so I have used it here. I did add some sparkle to it before adding the circle. The sentiment used is from an older GKD set and the focal image is from a free digi stamp that I had saved on my computer and never used until now. I chose not to colour the entire image but instead just colour the paint brushes and the palette, kind of like a spotlight technique. The bling is from my stash. I forgot to cut the panel down so I could add a border behind it so I went around the edges with a sponge the same as I did on the die cut circle.

Thanks for looking and hope you all have an excellent weekend.

White with just One Colour

WHITE with ONE other color ONLY

I was fooling around with some dry embossing and having seen a card that used this idea, I decided to create something similar. My dies are an old Spellbinders set called Moroccan Motifs. I die cut one of each size and ran them through with an embossing folder that had snowflakes. Then I put them together using foam squares under each layer. I dry embossed the layering panel with a brocade folder cut it down a bit then added it to the white card front. After which I added the other elements. The little red bird is something I saved from a received Christmas card and he seemed perfect for the corner. The greeting is from a Spellbinders mix and match set and I added ink and then versamark before heat embossing clear. This works as a Christmas card even though the die is not a snowflake design. Thanks for looking and have a great day.

Swirls and Butterflies

Anything Goes Embossing With A Twist of BUTTERFLIES

2nd image at slightly different angle

This is my second entry into the CYHTP challenge. I used a pre-embossed piece of card stock with a shimmery finish and a Darice Folder which I embossed over the top of the other. I swiped an ink pad, ‘Tattered Rose’ to add a small amount of colour. Then I cut around the outside of the frame so it could be mounted onto the usual A2 size CS. The large butterfly is one from MFT but I chose not to do any stamping and instead used a PP with a slight pattern to it. Using the same PP I cut some small butterflies to use as well. The folder butterflies have some tiny gems added to give them a defined body and I added a few gems to the large butterfly too. The sentiment is the same as on my previous card and in this case I added it so it would look as if the butterfly was trailing the sentiment. It sparkles more in reality than it does in the photo.

Thanks for sharing some time with me today.

Embossed Butterfly …

Anything Goes Embossing With A Twist of BUTTERFLIES

The dark purple background paper featured here is a piece that I had completely forgotten I had so when I unearthed it the other day I just had to use it. I believe I got this paper from Hot off the Press a long time ago and in my inexperience of those days didn’t really have any ideas on how to use it. The paper is actually more like fabric as it has a soft velvety finish. I wondered what it would look like if I embossed it and this is the result. I used a 3D folder by Spellbinders which is also one of the first 3D type that came out. I did cut my piece down and still have a leftover second piece to play with. I also used the same folder on a piece of shimmery pale violet paper which also looks pretty. The butterfly and sentiment (IttyBitty Basics by MFT) strip use a small piece of this paper. The die used for the butterfly is from MFT, but I don’t have the matching stamps for these dies. Instead I used another die that cuts tiny holes and used it to emboss the shape. Taking the photo was another issue. The velvet finish picks up tiny bits that are invisible to the naked eye but glaringly obvious in a photo. In the end I used a small brush to clean off the card front and managed a half decent picture. The challenge twist of adding a butterfly has been met and I also created another card for the CYHTP challenge which I’ll upload in a minute or two.

Have a great day and thanks for looking.

And Many More

Challenge #465 – Rainbow

Having seen a card that used a stamp in this way only with an Ombre look, I decided that doing one in rainbow colours would work for the challenge at Less is More. I stamped the birthday wishes first using Chipped Sapphire, and then with the second stamp I stamped up the side of the card at an angle using the rainbow idea. To get this angle I used a sheet of paper at an angle and stamped from the bottom to the top. Stamps used are from a collaboration set by the Stamping Village and in particular Altenew and Picket Fence Studios. I added a bit of sparkle using a glitter pen on the candle flames and over the larger word and flourish in the Birthday greeting. I did a second card using the same idea but in this case it is on a separate layer and has balloon images as well. These I coloured with glitter pens and Sakura glaze pens.

Second version

Personally I like the second card best but it has too much in it for the actual challenge. Thanks for spending time with me today. Have a great weekend.