Reverse Easel Fold

Challenge 213 – Be Brave, Be Strong, Be Bold 

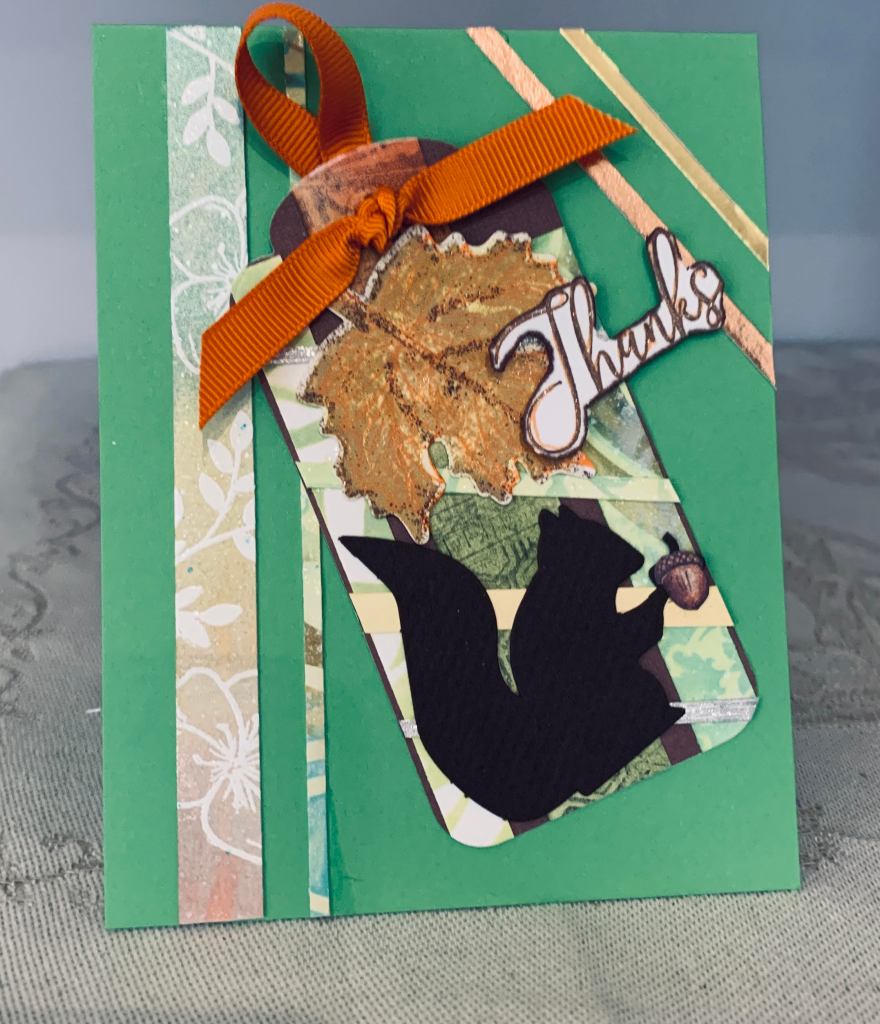
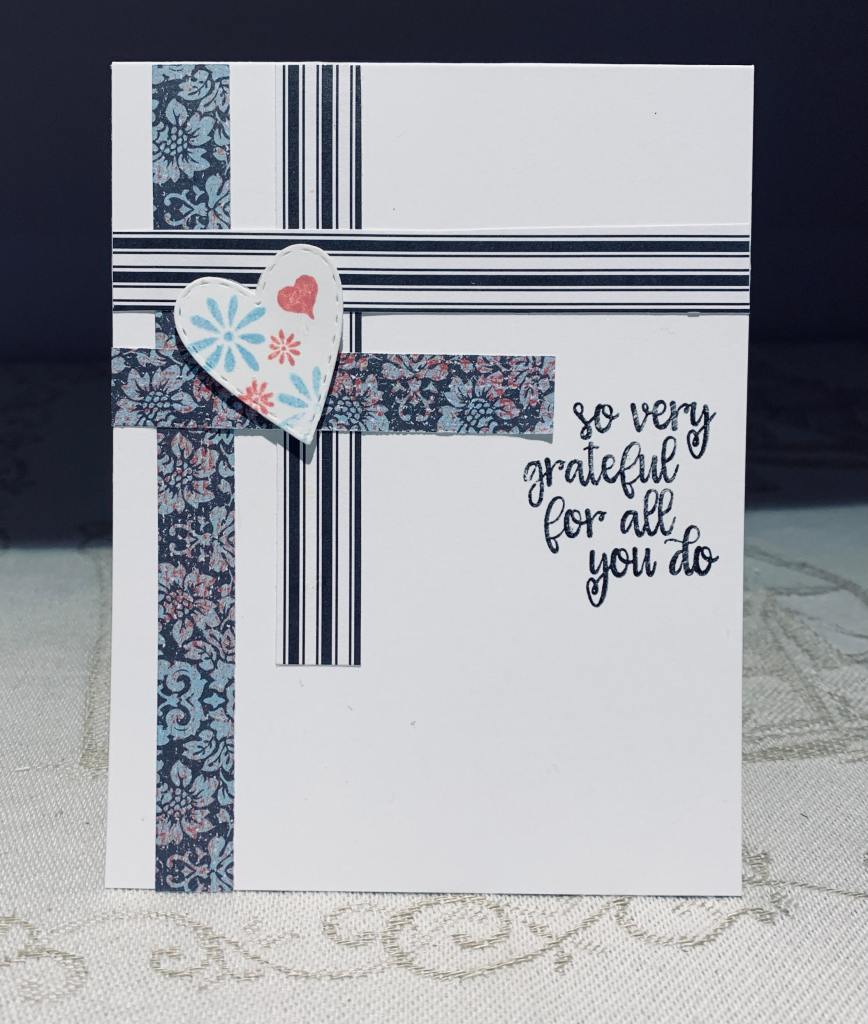
This card came about because I scored and folded a card base incorrectly and had to decide how to use it so it wouldn’t go to waste. Purely by luck my Pinterest feed had an example of a reverse easel and I figured it was the best solution to using my base. I’ve had the PP for a long time and it came from PaperWishes. It was just right for the card base with the different purples in the design. I also had the ribbon from a chocolate box so I adjusted the size to make it work for this card. The sparkly tag is a store bought die cut and I added a scrap piece of purple after stamping the sentiment and some random sprigs of leaves/flowers. Stamps are from a Wreath Builder set by GKD. Once I glued all the PP and then the tag and bow I created the circle piece for helping everything to stand up using a die set from GKD which also had the flower dies as part of the set. Die cut the flowers and leaves, inked them as you see and then glued them on both the circle and on the tag. Added the circle to the bottom panel and the point of the tag tucks into these flowers to keep it standing. There is space for a greeting either on the under part of the flap or on the back and it folds flat for mailing. It is a pretty girly card and will go to one of my friends eventually.

Framed Fun

Challenge #226 – Frame It

Last week I was playing around with a sparkly tag and a scrap piece of inked background and wondering what I should create. On Pinterest I saw a card that had a hanging interior panel and I thought the tag would work as the interior panel. I cut a frame from the green card front and made a small hole at the fold line so I could thread the cord through easily. I already had the tiny skating mice coloured and cut on my desk so I added them at the bottom of the tag as if they were on ice and then created the village scene (MFT stamp set) behind them by stamping onto the inked piece. Once it was coloured and dry I glued it to the tag. I also added a white piece of shaped paper onto the back of the card so there is space to write a greeting. Once I had attached the tag and tied the bow, I realized the card wasn’t going to stand easily so I created a piece for the bottom that works similar to those calendar cards I’ve made in the past. I added some sparkly pieces to each corner for decoration and stamped and heat embossed the sentiment also from MFT. The tag swings freely and is easy to move aside for writing on the back panel. I set it aside thinking it may possibly work for an upcoming challenge and today I decided the Inkspirational challenge was perfect for this card.

Coffee Anyone?

Global Design Project #267 | Theme Challenge

Someone gave me a sheet of wooden coffee cups some time ago, and I forgot I had them. Seeing this challenge brought them to mind and I dug them out. Using a GKD set of stamps called Coffee, I pulled off most of the sentiment stamps and stamped them as shown using my Misti and some Distress Ink. I added a few coffee beans here and there too. Gave the panel a gold border and glued it to card front. Added the coffee cups and a few gold dots and hey presto a completed card.

Merry …

PP517 – A Clean-and-Simple Challenge from Ann

As of yesterday, I met my goal of finishing all my international Christmas card leaving me with just the local ones to make now. To make life a little easier I decided to make multiples of several designs, with this card being one of 6. It fits this challenge too. Stamp set used is quite old and unfortunately doesn’t have a brand printed anywhere on the packaging. The sentiment came from a Hero Arts set. I stamped the image and coloured it with a combination of distress ink and pencils then I sprayed a bit of Perfect Pearl mist to get the spatter. Once it was glued to card front I hand drew some gold lines to make a frame for the layer. I also added a bit of glitter to the flower center.

Joyful Village

Sweet Stampin’ – Use Red & Just Us Girls Challenge #561- Word Week

I don’t know what I was thinking when I began this card but it sure didn’t work the way I thought it might. The challenge at JUGs is about triangles and I used some strips to create corner triangles and the house roofs plus the tree for the rest. Using red was the easy part and that fits the Sweet Stampin challenge nicely. There is a mix of dies and stamp sets used here. The sentiment is from SSS using the matching die, the houses and tree are from MFT and I used paper scraps to die cut them.

Emboss Relief

Embossing

The Sisterhood of Crafters has an embossing challenge just started and I had seen a technique at SplitCoast Stampers HERE that I wanted to try. My issue with this was I didn’t have many of the suggested supplies so I improvised. I’m not sure if I like the result but it was fun to give this a try nonetheless. Apart from the supplies I followed the tutorial and video pretty closely. Instead of using a lot of die cuts I used a 3D embossing folder by Crafters Companion and then I cut 2 layers of the word die that you can see on the card front. Not having Liquitex I used distress collage medium initially and then my paints were mainly from Pebeo as I don’t have any acrylic paints. My end result has a glossy finish because these paints dry glossy. I couldn’t get the white highlights either and wasn’t happy until I had the bright idea of swiping some golden ink over the top using an ink pad by Delicata. This gave me better results and softened the paint colours underneath. I’m still uncertain as to whether or not I like the card, but it was fun to play. Using a gold pen and ruler I added the frame at the edges and I also added a few tiny gems to finish the look. If I try this again I will ensure I have the right supplies on hand.

Gathering

The Card Concept #143 {Give Thanks}

It was the tags that inspired, actually if I’m truthful, reminded me, I had made one weeks ago that I hadn’t yet used. When I saw the challenge I thought perhaps I could make it work on a card. The style to my mind is Freestyle Collage because I used a lot of scraps both on the tag and then on the card front. The tag shape was cut from a die set (one of 2 sets) given to me by my hubby a couple of Christmas’s ago. I’m not a big tag maker and admire the crafters I see who can create truly beautiful ones. It definitely isn’t my forte or go to style. That said, doing one or two once in a while is good for me. The little squirrel and nut is from a kit that a neighbor gave to me when she downsized. The leaf is something I played with and didn’t like, and is from a GKD set, but I eventually jazzed it up a bit so it could be used. Ribbon is from my stash and the word is stamped using a stamp from a SSS set I really like. I fussy cut around the word so it would fit and also went over the image with a copper Sakura gelly roll Stardust pen. Most of the strips are leftover scraps from backgrounds I had created and couldn’t throw away.

Simple Thanks

Challenge #396 – sketch & MSC https://modsquadchallenge.com/so-grateful/

We all end up with lots of little scraps that personally I find hard to throw away. When a sketch challenge shows up such as this one, it is a great opportunity to use one or two pieces on a card. Everything on this card is left over strips from other projects and a small die cut heart that I didn’t use. Stamps are from a GKD set called wreath builder and I randomly stamped one or two onto the heart in different colours. The sentiment is from the same set. A simple and quick card for a change.

Warm Thoughts

CAS Game #178 – Sketch + optional twist Use Primary Colours

I found a scrap piece of yellow CS and dry embossed it after which I swiped a lighter yellow over the raised areas. Added this piece to another scrap that was a test of a new border die from Crafters Companion. The stamp and sentiments are a tiny set I got in a local craft store last year. Unfortunately their pricing label covers the brand name so I can’t see it, but could be Stampendous. Anyway I used red and blue to colour the stripes then stamped out the sentiments, fussy cut them and stacked as shown.

Merry …

PP516 – A Colour Challenge from Joanne

Its funny how a photo can make paper look a different colour sometimes. I used the exact same piece of paper to die cut the letters but the letter Y looks a different red here. I did use 2 different greens for this card as the background panel is a shimmery CS in pine green. Added some gold foiled strips down each side and used the same gold to die cut the Scripty word, plus the moon and stars. A simple yet effective Christmas card and so quick to make once I had the layout of the letters right. Have enough letters left to make a 2nd card only this time I shall use some silver.